Using Storybook with RedwoodJS - Lunchdev
Anthony Campolo demos using Storybook in RedwoodJS to build and visually test a comment component without connecting a database first
Episode Description
Anthony Campolo demonstrates how RedwoodJS integrates Storybook to enable component-driven development with automatic story generation and mock data.
Episode Summary
In this live coding session, Anthony Campolo from the RedwoodJS core team walks through the Storybook-integrated workflow that Redwood calls "building a component the Redwood way." Starting from a completed blog project based on the first Redwood tutorial, he shows how Redwood automatically generates Storybook files alongside every new component and cell, giving developers immediate visual feedback without needing a database or backend wired up. The session highlights Redwood's "cell" convention — a higher-order component pattern that separates data-fetching states (loading, empty, failure, success) into named exports, making each state independently viewable in Storybook. Anthony builds out a comment component and comment cell step by step, demonstrating how Mock Service Worker intercepts GraphQL calls behind the scenes so mocked data flows through even nested component hierarchies. The group discusses the philosophical boundary between visual component testing in Storybook and end-to-end integration testing, the role of developer experience in framework design, and how authentication states can be mocked for role-based UI testing. Rob Cameron, the tutorial's author, joins to clarify technical details throughout, reinforcing how Redwood's conventions reduce the configuration burden that typically keeps beginners from benefiting from tools like Storybook.
Speakers
- Michael
- Anthony Campolo
- Rob Cameron
- Keith
- Rob
Chapters
00:00:00 - Introduction and Project Setup
Anthony Campolo is introduced as a member of the RedwoodJS core team, and the session is framed around demonstrating how Storybook integrates into the Redwood development workflow. The goal is to show how Redwood automates visual component testing and makes it easy to inspect components in their various states.
Anthony begins by setting up a project based on the completed first Redwood tutorial — a simple blog application. He runs database migrations, seeds data, and launches the development server, then walks through the project structure, explaining the separation of front-end and back-end folders and introducing the concept of a Redwood "cell" as a convention for declarative data fetching with GraphQL.
00:05:27 - Exploring Storybook and the Cell Convention
Anthony launches Storybook and demonstrates how Redwood automatically generates corresponding Storybook files for every component and cell. He clicks through the different states of the blog post cell — success, error, empty, and loading — showing how developers can visually inspect each state without triggering real errors or loading conditions.
The group pauses for a discussion about what makes cells valuable. Anthony and Michael explore how cells replace the typical pattern of writing conditional rendering logic inside a single component, instead splitting each data state into its own named export. This declarative pattern not only cleans up component code but also makes Storybook testing far more powerful, since each state gets its own isolated, clickable story right out of the box.
00:11:41 - Building the Blog Post Summary Feature
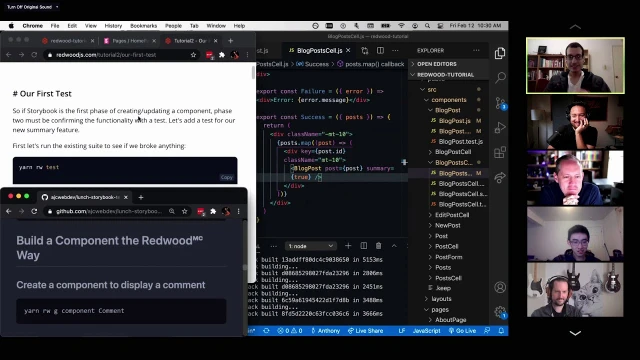
Anthony begins modifying the blog post component to show truncated summaries on the homepage instead of full post bodies. He creates a truncate function, adds a summary prop to the component, and then updates the Storybook stories to include both a "full" and a "summary" version of the blog post so each variant can be previewed independently.
After working through a small bug with the missing prop destructuring — with live help from Rob Cameron in the chat — Anthony updates the blog post cell and homepage to pass the summary prop through. This sequence illustrates the iterative, visual-first workflow that Redwood encourages: make a change, see it in Storybook, verify it works, then integrate it into the larger application one layer at a time.
00:19:11 - Generating and Styling the Comment Component
Anthony uses Redwood's generator command to scaffold a new comment component, then builds it out with name, date, and body fields styled with Tailwind CSS. He adds a date formatting helper function and populates the Storybook story with mock comment data. The discussion touches on using Storybook decorators to apply layout margins to stories without polluting the component itself.
A key theme emerges here around the value of building in Storybook without a database connection. Rob Cameron explains that this approach lets developers design data-dependent components in complete isolation, iterating on appearance and behavior before any backend wiring is needed. This dramatically speeds up the development loop and reduces the number of moving parts a developer has to manage at any given time.
00:27:09 - Creating the Comments Cell and Mock Service Worker
Anthony generates a comments cell to handle fetching multiple comments, then updates its GraphQL query and imports the comment component into it. The session reveals that Redwood also generates a mock file alongside each cell, powered by Mock Service Worker, which intercepts GraphQL requests during Storybook rendering and returns fake data transparently.
The group discusses how this mocking layer works and why it matters. Even when a cell is nested inside another component being viewed in Storybook, MSW still intercepts the data call and returns mocked results through the entire component chain. This "tasteful magic," as one participant calls it, means developers never have to manually wire up fake data pipelines just to preview how nested, data-driven components will look together.
00:38:45 - Integrating Components and Developer Experience Philosophy
Anthony integrates the comments cell into the blog post component, showing how the mocked comments appear within the blog post story even though no real database is involved. He demonstrates Storybook decorators for applying universal margins and discusses the step-by-step tutorial philosophy — explaining every incremental change rather than dumping large code blocks.
The conversation broadens into the developer experience philosophy behind Redwood. Anthony and Rob describe how the framework was designed from first principles around an ideal development workflow, with Storybook integration as a core piece of that vision. They discuss how authentication states can be mocked using Redwood's hooks so role-based UI differences are testable in Storybook, and how the conventions remain optional since developers can always drop down to the underlying libraries like Apollo or Prisma directly.
00:43:12 - Storybook Value Proposition and Closing Discussion
Michael asks Anthony to explain Storybook's value for anyone unfamiliar with the tool. Anthony compares the experience to the moment in Wizard of Oz when the screen shifts from black and white to color — suddenly all your abstract React code becomes visually browsable. He emphasizes that Storybook is especially powerful for beginners but historically difficult to configure, which is precisely why Redwood bundles it as a first-class feature.
The session wraps with a question about testing role-based access and permissions in Storybook. Rob Cameron explains that Redwood's authentication hooks can be mocked per-story, letting developers click through logged-in, logged-out, and moderator views without maintaining test accounts. The group thanks Rob for his contributions and encourages attendees to explore the Redwood tutorial and join the community Discord for further discussion.
Transcript
00:00:00 - Michael / host
So welcome to today's event. We got a super exciting one today. Anthony AJC Web Dev. Actually don't know your last name. Anthony Campolo.
00:00:10 - Anthony Campolo
That's right. It's all good.
00:00:14 - Michael / host
Your Twitter handle, your last name doesn't start with "at." So yeah, we're doing a really fun thing today. Anthony is part of the core team over at RedwoodJS and is demonstrating for us how RedwoodJS kind of automates a lot of your visual testing of components, and how it hooks into Redwood and all the cool stuff you can do. Because it's not just Storybook, it's like Storybook on crack. Anthony, why don't you take it away and tell us what we're doing today?
00:00:49 - Anthony Campolo
All righty. Thanks a lot, Michael. Great to be here again. We've been building this up over many months, and so this is one of my favorite places to come give presentations and hang out with y'all. And we're going to be, as Michael said, talking about Storybook. And we're going to be talking about the workflow of building a component with Storybook. So we kind of call it building a component the Redwood way. And the idea being that with Storybook you can have a lot of visibility into what your component looks like in its different states and all that sort of stuff. So we can kind of just dive right into it, because talking about it is a little theoretical. But what's cool is it's a very visual thing.
00:01:35 - Anthony Campolo
So let's go ahead and let me close all this stuff up.
00:01:40 - Anthony Campolo
So all I've got going on right now is I got us started off with the Redwood tutorial. So this is kind of the end state of the first Redwood tutorial, where you build out a blog. We're just copying that, and then we're going to get our database set up with just some basic little seed data. This first command is going to generate the client and set up migrations, and then we're going to do... These commands actually have been deprecated as of yesterday. But don't worry too much about that. All the other Storybook stuff is going to be the same. Just make sure to actually follow the actual Redwood tutorial when you're using these commands. And that's how you'll get the most
00:02:28 - Anthony Campolo
current, most up-to-date stuff.
00:02:31 - Anthony Campolo
And this is going to open up our project on localhost:8910, and we'll see kind of our basic Redwood homepage. And since we're streaming, everything is a little bit sluggish. But for the most part, this usually goes pretty quickly. I also have like a seven-year-old computer, which is super duper fun. All right, so here we go. This is the Redwood blog. So that looks pretty nice. Let's go ahead and get our project open over here.
00:03:08 - Anthony Campolo
Let's do this. Let me get this over here on one side and then we'll get this over here.
00:03:17 - Anthony Campolo
And if anyone wants to see the kind of repo that I'm going off of, this is my GitHub, AJC WebDev, and lunch-storybook-test. This is kind of what I usually do for all my talks. I'll write out just a little script of what I'm going to be going over. Right now we have our project. If you're not familiar at all with a Redwood project, we have a front end and a back end. So we're going to be working, I think, mostly in the web front-end folder. This is our homepage that we're looking at over here. Right now we're getting our blog posts. Cell is what we're looking at. A cell is just a way for Redwood to do data fetching in React. So if you've never seen a GraphQL query before, this is a GraphQL query. We are asking for the posts, and we're asking for the ID, title, body, and created-at date of those posts. And then we also have the four states that our data can be in: it can be loading, it can be empty, we can get a failure, in which case it gives us this error message, or success. And so the success state
00:04:38 - Anthony Campolo
is what we're looking at over here, and it's mapping over our posts and then giving us this blog post component and feeding in the post. But yeah, I've never gotten Zoom bombed before. Now I understand what's happening.
00:04:52 - Michael / host
Yeah, I get it now. I see what's happening. When people are just trying to teach a class in school,
00:04:58 - Anthony Campolo
It's just people trying to take us down. Redwood's too cool. People are like, we gotta stop them. We need to stop them from teaching everyone how to code in a more simple and comprehensible way.
00:05:09 - Michael / host
Tom, you have a much more spammy audience than I do. I guess.
00:05:13 - Tom / producer or moderator
I guess I had no idea. I'm so sorry.
00:05:16 - Anthony Campolo
No, it's all good. It seems like we're good. Let's see if we can move forward.
00:05:20 - Michael / host
All right, I'll try to keep catching them if I see anything come up. Sorry about that.
00:05:27 - Anthony Campolo
Never know what's going to happen. This should be pretty easy to understand if you've ever seen a React component before. We've got our blog post component, which is taking in the posts, and then for each post, it's going to create an article. That article will have a header. Inside that header is going to be the post title, which is what you're looking at right there. And then the post body is what we're looking at right there. Now, this is pretty cool, but what we can also do is take a look at this in Storybook. So let's get our Storybook going. Our Storybook command is going to be yarn redwood storybook. All of our commands start with yarn redwood. And what this is going to do is open up Storybook on localhost. I think it's 7910. I believe it's gonna pop up on the screen at the bottom in a second. And for anyone who's ever used Storybook before, it's going to take all of our components and just kind of show us an example of what they look like with data in them. So for each of our components, we have a corresponding Storybook file.
00:06:52 - Anthony Campolo
And if you look at.
00:06:54 - Anthony Campolo
Oops.
00:06:55 - Anthony Campolo
So this is the Storybook file right here. And we're exporting this variable called generated, which is returning our blog post component, which is what we were just looking at. And then it's got some dummy data in here, and then you export it with a title. And what's really cool is Redwood is set up so that when you use your generate commands to generate a page or a component or anything like that, it's also going to generate a Storybook file.
00:07:30 - Anthony Campolo
Let's get this up over here, actually.
00:07:34 - Anthony Campolo
So this is now our Storybook, and we're going to have a panel on the side that's going to actually.
00:07:45 - Anthony Campolo
Let me switch these over.
00:07:53 - Anthony Campolo
There we go.
00:07:53 - Anthony Campolo
That's what I wanted. Cool.
00:07:56 - Anthony Campolo
So this is Storybook right here. Now you have on the left here components, cells, layouts, and pages. This is pretty similar to our general folder structure. We have pages, layouts, and components, except now we also have cells. And so what's cool about cells, as I was saying, is that we have these different states they can be in. So right now this is the success state, and we're seeing both of our posts. So it's mapping over the posts. And if we say, okay, what if we got an error? We can just click that and see what our error is. So we didn't have to actually feed in an actual error to see what you're going to get from that. And then same with the empty and the loading states. If you want to design your little loading spinner or have a funny little error message or empty message or anything like that, you can do that all in Storybook, and it's very easy to see what's what.
00:08:54 - Michael / host
This is fascinating. Could I pause you for a second?
00:08:57 - Anthony Campolo
Everyone feel free to jump in at any time like always.
00:08:59 - Michael / host
Okay, so for very little effort so far, we have something that would have taken a considerable amount of effort if I was just doing it on my own. And to be honest, I'm not even sure I would have the tools to provide these stories very easily, like for the loading, empty, and failure state. So I'm curious, could you tell us a little bit more about the whole cell notion? Because it seems super fascinating that you have all these states in a very isolated way right out of the box.
00:09:36 - Anthony Campolo
Totally. And this is what comes with having nice conventions that we can all agree on. And a cell is nothing crazy. It's just a convention for data fetching. As a React developer, you've probably written many data-fetching components a lot like this, except you're doing a whole bunch of conditionals to say if you get success, you should do this. If you get an error, here's how you handle your error message. If it's still loading, here's what you do with your loading state. The Redwood team just said we don't want to have to keep doing this over and over again, so let's create a shared declarative way to do data fetching. So it's just, I believe, a higher-order component that's exporting each of these different states, and that's pretty much all it is. So it's not really doing anything crazy. And if you want to dive through the source code, it should make a lot of sense. This is what you get out of the box with every cell. Every cell is going to have all of these, and all you do is write the query for the exact data you want that cell to return and then write what you want the success state to do.
00:10:47 - Anthony Campolo
And then you can customize these three if you want, or you can just leave them as defaults and they'll at least function as your minimum viable data fetching. That's the cell idea. It's one of the things that Redwood developers are really big on. And I know that for me personally, anytime I'm working not in Redwood, I'm always like, I wish I had cells. And it's just a nice convention to have. Does that kind of answer the question?
00:11:14 - Michael / host
Yeah. Yeah, I guess I'm so used to seeing this happen inside of, like one block of code. Right. You know, so you have your component and you'll have some kind of conditional or, like, you know, ternary statements in there that'll be like, if it's loading, if it's success, if it's all this stuff. But having it split out in these named exports is. Is really beautiful. And you can see almost immediately the value of this when you can split those stories out. That's very cool.
00:11:41 - Anthony Campolo
Yeah, totally. This is what's cool about now having all this Storybook stuff completed, is that this is all kind of part of the larger vision of Redwood from the beginning. But all the pieces haven't really been in place. They had to be built up. This is what the second tutorial is really good about, because what I'm walking you through right now is going to be the Storybook portion of the newer Redwood tutorial. And so we can start getting into this. So this is our blog post.
00:12:12 - Anthony Campolo
I'm not sure if I actually changed anything here. I think this is just the same thing.
00:12:18 - Anthony Campolo
And
00:12:22 - Anthony Campolo
see, did that change anything?
00:12:28 - Anthony Campolo
Okay.
00:12:28 - Anthony Campolo
Yeah, that's good. Okay, cool.
00:12:29 - Anthony Campolo
So that's just our beginning, starting point. Okay. So let me also pull up the actual Redwood tutorial so you guys can see what I'm talking about. redwoodjs.com has got everything you'll ever need for Redwood. You got Tutorial One over here, and then you got Tutorial Two down here, Redwood's Revenge. I also like calling it the Redwoodening. This is the beginning of the tutorial, and this is the prerequisite. Some of the stuff we already talked about, where we talked about what cells are, and then this is all the other stuff you go over in the first tutorial, which you don't really need to worry about too much. These were the instructions we did to start. You also notice how these are slightly different commands right now because we have moved to Prisma Migrate. None of that is particularly relevant to this talk, though. Cool. There we go. This is going to be our first story. What we're going to do is take our components and render a small little summary on the front page.
00:13:52 - Anthony Campolo
If we look at our blog post cell, we're getting two things right now. If we look at our homepage, we see this is what the cell is. The cell is imported onto the homepage. But we don't want to get all of this. We want this to just be a short little explanation of what's going on.
00:14:15 - Anthony Campolo
I need to close that.
00:14:18 - Michael / host
Is this like a hipster ipsum or something? I see LaCroix.
00:14:21 - Anthony Campolo
That's exactly what it is. Yeah, that was Rob. So this is what we're going to do. First we're going to create this truncate function. And the truncate function is just going to take the text of the blog post and shorten it to whatever length we want to provide. And then it's going to stick this little dot dot dot on the end, and that's going to go right at the top of our blog post.
00:14:51 - Anthony Campolo
JS right here. So we're going to go there and there and that's going to go there
00:14:58 - Anthony Campolo
and then we're going to bring it in down here in the div. So now instead of showing the post body, we want to show this little summary.
00:15:12 - Anthony Campolo
And so we're going to grab that.
00:15:18 - Anthony Campolo
Now if
00:15:20 - Anthony Campolo
we look over here, let's see if that does the thing.
00:15:31 - Anthony Campolo
Summary is not defined. That is because we have to actually define the summary now in our story. So if we go over to our blog post story, we're going to have the blog post normal, and that's why we're going to set it to full right here. And then we're also going to have the blog post where summary is set to true, and that will then be a summary.
00:15:59 - Anthony Campolo
So let's grab that and put that all in there. And
00:16:12 - Rob Cameron
You need the summary prop passed to the component.
00:16:18 - Anthony Campolo
Yeah, just so we got that. Yep.
00:16:25 - Anthony Campolo
So now we're going to go back to the blog post component and import the... Actually, sorry, I kind of created
00:16:34 - Anthony Campolo
some shorthand notes for this,
00:16:37 - Anthony Campolo
but now I realize that I haven't
00:16:40 - Anthony Campolo
gone through this as many times as I probably should have. Okay, cool.
00:16:43 - Anthony Campolo
So.
00:16:49 - Michael / host
We're all friendly here. You've seen me on the struggle bus, like.
00:16:53 - Anthony Campolo
Yeah. Okay, so what do you say, what am I missing right now, Rob?
00:16:56 - Rob Cameron
Line seven there. You gotta decompose the summary prop coming in, in the list of props there. I can't draw on the screen, but line seven.
00:17:05 - Anthony Campolo
Yeah, yeah, line seven, right? Yeah. Oh, that's right. So this is what I'm missing right here. Okay. Yeah. So I only grabbed this bottom part here. Yeah. So we have to actually start it off, letting it know that summary is set to false and that it also has the prop at all.
00:17:24 - Anthony Campolo
So that should do it.
00:17:25 - Anthony Campolo
Yeah. This is one of the really nice things about the tutorial docs, and why I always try to recommend people actually stick with the tutorial docs, because they actually highlight what's being changed within the thing. That's why I immediately bailed on the notes that I wrote down there. All right, so now if we look over here, we now have full, which is the full blog post, and we also have summary, which is the dot dot dot with that right there. So that's good. But it's not being brought in yet to our blog cell. So that is going to be the
00:18:03 - Anthony Campolo
next thing we want to do. Cool.
00:18:07 - Anthony Campolo
So now we want to actually display the summary within the cell. So if you look in our cell now, we need to pass in that summary there. So we're going to go on over
00:18:17 - Anthony Campolo
to our blog posts cell, we're going to grab that and do that. If we look over here at success, that should do it.
00:18:36 - Anthony Campolo
Now we see we've got that for our cell. And then since our cell is being brought into our homepage, you now see that our homepage is also displaying those little summaries. So that is cool. Now what we're going to do is actually build a component in what's called the Redwood way. So, build a component the Redwood way. This is a crazy obscure joke that only French Canadians will get.
00:19:11 - Anthony Campolo
And let's.
00:19:13 - Anthony Campolo
So this is... And also in the actual docs it kind of bumps you between testing and Storybook. It just kind of focuses on the Storybook part. I'm going to skip over the testing, but the two are kind of integrated together if you're actually going through this tutorial. Okay, so now what we're going to do is use this yarn redwood generate command. You have yarn redwood generate commands for almost everything you'd want to generate in a Redwood project. And we're going to generate a component called comment.
00:19:47 - Anthony Campolo
And let's get another terminal going over.
00:19:52 - Rob Cameron
Yeah, we should say the first part of the tutorial, you basically build a blog, but it's sort of kind of read-only.
00:20:01 - Rob Cameron
And in the second part, now you got a comment engine so people can actually comment on the blog posts. That's what he's doing here.
00:20:02 - Anthony Campolo
That's right.
00:20:03 - Anthony Campolo
So now we have comment and then
00:20:07 - Anthony Campolo
we should have the comment over. So first, let's see. Okay.
00:20:14 - Anthony Campolo
Yeah. And I believe last time I ended up having issues until I restarted my server. So that is just one thing. I think it's usually when you create new files or new folders that my dev servers tend to get confused. So that's all that's going on here. So let's kick yarn redwood dev back
00:20:37 - Anthony Campolo
on over here, and then we'll get the Storybook running over here. Restart that sucker. How's this guy doing?
00:20:59 - Rob Cameron
And you'll see here as it goes, the benefit of doing this in Storybook is that normally, if you didn't have Storybook, you'd have to build the comment component, put it in the blog post component, hook up the data, hook up the database, and get all this working just to refresh the page and see if your new comment component works. But here he's going to do it in Storybook, and you can do each piece in isolation in Storybook and see what it looks like right away without hooking up the data or anything. Then you can hook up the data, see what it looks like, hook it up into the main blog post, see what it looks like, and do it iteratively instead of having to do everything all at once before you can see anything happen.
00:21:31 - Michael / host
Yeah, yeah,
00:21:34 - Anthony Campolo
yeah, you got it. Yeah. It's definitely all about this really nice developer workflow. Redwood thinks a lot about DX, developer experience. I've talked about this with other people: I think every developer has different pain thresholds for how obnoxious their tooling can be. Some people have a very high pain threshold, some people have a very low pain threshold. And some people's pain threshold is so low, like Tom, that he will spend years building a framework entirely based around developer experience. And that's kind of what we all get to benefit from, this really, really nice, well-done developer experience, because it was really thought of from first principles as the thing you want to aim for. And then the framework was kind of built around these ideas of how do we actually get the development workflow that we want to get. I think it's a pretty cool way to think about how to do all this. Now you see over here we've actually got this comment going on, and this is just your blank component that gets generated with a little H2 and a little
00:22:43 - Anthony Campolo
Hello, paragraph.
00:22:46 - Keith / attendee
All right, may I hop in here with a quick question? So you're using properties to pass data around, which is a good, fundamental habit. And I may be getting ahead of myself, but I'm pondering, say, effects. So if you're grabbing data from a useEffect hook, it feels easy to test components where you only get data via props, and hence you should do your best to only pass data as props. Because in this group, we hear a lot that we should write code that's easy to test. And if we're writing code that's easy to test or use and see in Storybook, then it's got to be pretty good code, good habits. But what about...
00:23:32 - Anthony Campolo
That's a good question. I think the idea is that because it's Storybook, they are just components at the end of the day. So I'm guessing the effects are going to happen within Storybook. Someone like Rob, or if Tom's still around, someone who's done more Storybook, may be able to answer that question better.
00:23:51 - Rob Cameron
I don't think I've done any useEffect stuff within Storybook, but it should work. I mean, they're isolated in kind of their own little world there. So I believe useEffect and stuff will still work unless it depends on some kind of global state that isn't available. Then you get into more complex situations. I don't know how far Anthony's gonna get in this one, but we do do some stuff where you're getting some data from external files and stuff.
00:24:12 - Anthony Campolo
But...
00:24:13 - Keith / attendee
Well, in the Storybook... Pardon me, I haven't dipped my toe in this yet, so it's new. The Storybook story file is populating, say, default data for you, or you're doing that.
00:24:26 - Anthony Campolo
This is the Storybook file we're looking at right now. And all it is doing is importing the comment component, which is this right now. It doesn't have any dummy data in it, but the other one we were doing had this right here. So it's feeding in this kind of mock post right now.
00:24:43 - Keith / attendee
Sure, right on. So that prop data that you're passing in, you're feeding in right there. Got it. I guess I was a little wrapped around the axle. The cell has this concept of grabbing data from wherever and then presenting it in different states. But that grabbing data from wherever is really not part of the story, it seems. It's once you have it, present it in this way or that.
00:25:04 - Michael / host
That is an interesting distinction, Keith. And I think, if I may, it seems like these are very much the kind of the visual tests and that maybe those other tests that are going to test the whole workflow of actually fetching data and whatnot would be in maybe some other type of test harness, like an end to end type of test environment.
00:25:30 - Anthony Campolo
Yeah. The problem is just testing anything that's not your project in general. There's always philosophical discussion about it. Should you try to mock it to the greatest extent you can, or should you actually just test the outside system? Especially as we're getting into this whole serverless Jamstack world where we're relying on all these third-party APIs and services, the question of how you test this stuff is really complicated. We've come up with a lot of good conventions around testing Storybook and mocking, and we've integrated all of them into a unified workflow that should hopefully get your whole Redwood project working and functioning and having good tests that you can continue to run and build on. And then for me personally, my own philosophy is that I'm always going to test with the actual third-party APIs running. I will try not to mock as much as possible because I think it just makes more sense to actually test the real system as much as you can. So I'm not really concerned so much with testing effects as testing my whole project in isolation and then, as Michael said, doing some sort of end-to-end test where you actually integrate the third-party stuff.
00:26:38 - Michael / host
Gotcha. But Keith, to your question, it seems like this is primarily for and almost provides a boundary, like you were saying, to have these just be prop driven components. And then with the exception of there's some interesting stuff happening with the cells and the way that those are being exported, but these are mostly just kind of like testing the varied states of a prop driven component.
00:27:09 - Keith / attendee
Cool. Okay, cool. Thanks for that detour. Appreciate it.
00:27:12 - Anthony Campolo
Yeah. And the cells are completely separate from Storybook. That's totally a Redwood concept. But what we're going to do now is actually build out this little comment component.
00:27:25 - Anthony Campolo
So we're going to take that and that.
00:27:29 - Anthony Campolo
So now we're going to be bringing in comment name, createdAt, and comment body, and that's what we're expecting. So right now we don't have the name property. Let me see that right there. So now we're going to go back into our comment stories and populate it with just a little comment here.
00:27:52 - Anthony Campolo
Our own Rob Cameron hanging out with you all right now.
00:27:57 - Michael / host
In the flesh.
00:28:00 - Rob Cameron
Gotta plug myself in my tutorials.
00:28:03 - Michael / host
Totally.
00:28:04 - Michael / host
I mean, people gotta know who wrote them.
00:28:07 - Anthony Campolo
They do.
00:28:08 - Anthony Campolo
It's important.
00:28:09 - Anthony Campolo
This stuff don't write itself, people.
00:28:10 - Rob Cameron
It's a team effort, team effort.
00:28:10 - Rob Cameron
But I'll sneak in little Easter eggs there with my name in them.
00:28:15 - Keith / attendee
It is, but it's so cool to make it personal. I think things are better when they're personal. It's a way to make it personal.
00:28:21 - Michael / host
Agreed.
00:28:22 - Anthony Campolo
I agree.
00:28:25 - Anthony Campolo
This is what I would do when I would write my own tutorials. Whatever product I'm building, the first thing I do is change the H1 to just say AJC Web Dev. In case you're wondering...
00:28:34 - Anthony Campolo
This is AJC Web Dev.
00:28:37 - Anthony Campolo
Now we're looking at this data. We're feeding this comment into the comment component in our Storybook-generated thing, which is over here. So that is all good. Now what we want to do is format this date. So we got this little helper function right here that's taking our date time that's getting passed in, using the Date object or constructor, whatever the new keyword thing does, I don't use it very often, and setting that to parsedDate. And then we're going to take that and do the toLocaleString, and basically parse out the date with the month and the year and all that goodness. Did you copy-paste this from somewhere, Rob, or did you just write that?
00:29:35 - Rob Cameron
I'm sure I had half a dozen windows open to Stack Overflow for various JavaScript date formatting. I have to look it up from scratch every time. It's so complicated. There are libraries that make it easier, like date-fns. That's the new one that everyone uses. But I wanted to keep it just kind of plain JavaScript for this.
00:29:55 - Michael / host
Yeah, that is always nice in these tutorials to not have to install something just to see the example.
00:30:04 - Anthony Campolo
Okay, that should be all you need to do there.
00:30:08 - Anthony Campolo
So we're making the date look a little nicer. And then we also added some styling as well. So you see all these class names and whatnot. You're probably thinking, hey, it looks like Tailwind. Or you're thinking, hey, what's all that junk in your HTML? It's probably one or the other. And Tailwind is a nice way to write a bunch of little shorthand classes that give you these nice little styles right here. And what we want to do, though, is actually...
00:30:40 - Anthony Campolo
First we're going to.
00:30:42 - Anthony Campolo
Yes, we want to add a little margin around it, but we don't want to add the margin into the actual component because we want to have our storybook just look a little nicer. And what we're going to do is we're just going to pop in that little margin for here into our storybook story over here. And then when we do that, it's just gonna space this out a little bit for us so that we can see it and kind of what it will look like when it's actually being displayed within our project.
00:31:26 - Anthony Campolo
All righty. And then that's the test. Skip that. That's all good. Format date, add styling, and then add margin to the story.
00:31:41 - Tom / producer or moderator
Great.
00:31:42 - Anthony Campolo
All right, now we want to have multiple comments. So we're going to generate a comments cell. We first generated a comments component, and now we're gonna do Comments Cell, the cell being what we were looking at before, which does our data fetching for us, and that's going to be created in our components folder over here.
00:32:10 - Anthony Campolo
So Comments Cell looks much like our other
00:32:15 - Anthony Campolo
cell that we were just looking at. What we need to do is import our comment into our comments cell. This is our comment component that we were just looking at right here. We're going to import that into our cell, and then we're going to update our query to include basically all the comment information: the ID, the name, the body of the comment, and then the created-at date. Then in success we are going to return the comment with the ID set to key and then pass the comment through.
00:32:58 - Anthony Campolo
I think that's going to be.
00:33:01 - Rob Cameron
If anyone's ever confused when to use a component and when to use a cell, usually it's if you ever think, I need to get data from the database and display it, then you go cell. Because cell handles these different loading states and empty states and failure states. Otherwise it's just a regular React component.
00:33:19 - Anthony Campolo
I might need to restart my server again. Cannot wait to get a new computer, guys. You have no idea.
00:33:33 - Michael / host
So something like, something like a layout that's maybe just going to compose the various pieces of data wouldn't necessarily need to be a cell if it's just kind of wrapping, wrapping things that are fetching data with like a nice layout that could just be like a component and then you can keep your cells for like the actual post content.
00:33:55 - Anthony Campolo
We have a layout. We have layouts specifically for page layouts. So that's kind of separated out as a separate thing in Redwood. Or if you just mean the kind of layout of the component itself, that's kind of different, though.
00:34:09 - Michael / host
Gotcha. Yeah, I was just thinking about examples of things that would just be components versus like an actual. Like a. Like a cell. Yeah, that was the first one that came to mind.
00:34:21 - Anthony Campolo
Yeah, like if your layout had some custom data in it, like something in your header was coming out of the database, you could manually... there's a hook, useQuery, so you could go to GraphQL and get that data even in the layout without using a cell. It'd be a little more work, but you could do it that way.
00:34:37 - Short interjection / moderator
Yeah.
00:34:40 - Anthony Campolo
Yeah, that's kind of the cool thing about having all these conventions in Redwood, is that they're all just abstractions, but the libraries are still in there. So if you ever want to just drop down and use Apollo, you can always do that. You don't really have to go through the Redwood conventions necessarily. It's similar with Prisma. If you say, hey, I don't really like ORMs, then you can just get rid of your ORM, and that's fine. Redwood won't really care or complain at all. One of the things that I really like about it, and what's cool about cells also, is that you're going to get one other thing created with it, which is going to be this mock file. So look, we have our stories file like before, but we also have this mock as well. And Rob, are we using MSW for this, Mock Service Worker?
00:35:33 - Rob Cameron
Yeah, that's kind of what's intercepting. When the cell tries to go out to GraphQL, MSW sneaks in there and says, "Nope, return what's in this file instead."
00:35:40 - Anthony Campolo
Very cool.
00:35:44 - Tom / producer or moderator
Okay, that's cool. So that's like the little bit of magic I was so curious about. So. Yeah. Neat.
00:35:53 - Rob Cameron
Yeah. So in that case, in the data, right, we handle that. We have little hooks, not in Storybook itself, but I guess in that GraphQL layer displayed through Storybook. We're sneaking in there and intercepting that data to give you a little nicer experience.
00:36:07 - Anthony Campolo
Yeah.
00:36:07 - Tom / producer or moderator
Tasteful magic.
00:36:09 - Michael / host
Tasteful magic. Is that mswjs.io?
00:36:15 - Rob Cameron
Say it again. You cut out there.
00:36:16 - Michael / host
Oh, sorry. Is that mswjs.io? Is that where the...
00:36:21 - Rob Cameron
I believe so.
00:36:23 - Anthony Campolo
Okay. So, yeah, I think there's not really any other libraries.
00:36:26 - Anthony Campolo
Mock Service Worker should be it.
00:36:30 - Anthony Campolo
Yeah, I know Matt Sosnowski works on Mock Service Worker a little bit.
00:36:34 - Rob Cameron
So you won't see any of that MSW sort of interface in the Storybook stuff. It's just all handled transparently for you. But it is there if you wanted to write something manually that uses MSW. It is available.
00:36:47 - Anthony Campolo
Okay, so back on track here. So all I did here was, after I got this comment cell created, we have this mock folder here and we are exporting the comments. And then we have these two fake comments right here. So the other comment we were looking at before, Rob Cameron, first comment, and then David Price, second comment. We have a similar issue, though, which is the margin. We want to add a little bit of margin there, but this time we actually want to do this in the cell, not in the Storybook. Because what we're looking at here is what we're actually going to see displayed wherever we display our cell. So we want to make sure that we have this looking nice and good.
00:37:34 - Anthony Campolo
So let's go down.
00:37:39 - Anthony Campolo
So we're adding in a little margin here and then sticking the comment now inside this div with that margin.
00:37:49 - Anthony Campolo
So this is going to be our
00:37:51 - Anthony Campolo
success state inside of our comment cell. And then when we update that, we now see we had a little margin added in between and it was just margin top. So there's kind of add some space in between, but we still want the kind of margin on the sides like we had before so that we are going to add the margin to our story so that doesn't mess with the component itself.
00:38:23 - Anthony Campolo
Comments Cell down in success, which is this thing right here.
00:38:31 - Rob Cameron
Yeah. Again, the magic here is that he's building these components that require data from the database, but he's doing it in Storybook and doesn't need the database yet. He can design this whole thing without the database yet. It's amazing.
00:38:45 - Michael / host
It is really amazing because I think this is something that I'm so attracted to with Redwood. There's a very real constraint sometimes that makes it so that the development team has to go off and do its thing, and the design team has to go off and do its thing. And a lot of times React lives in that space where they come together. And there haven't been a lot of good tools that allow you to work on this part that requires both pieces in a cogent, sensible way. And I feel like one of the really great developer experiences that's achieved in Redwood is that it kind of defines that third space of, you've got backend, you've got pure frontend, but then there's this space in the middle where people need to collaborate in the meantime. And seeing it come together like this is really, really, really nice.
00:39:40 - Anthony Campolo
Now what we're going to do is go back into our blog post component and import this comments cell that we just created. So now within our blog posts, we will actually see the cell.
00:39:55 - Anthony Campolo
We are going to go there, over there, over there. That's all good. Then see our blog post.
00:40:06 - Anthony Campolo
Now we see we have these comments in our blog post component.
00:40:13 - Rob Cameron
The magic there is that even though Storybook is showing you the component, the component uses the cell and our stuff still kicks in. Even though it's like a subcomponent of the component you're displaying, the MSW stuff kicks in and still intercepts that GraphQL call and shows you the mocked comments. Even though that's not the cell you're viewing here, you're viewing its parent, it still goes down through a chain of cells and still gets mocked.
00:40:38 - Anthony Campolo
Super duper cool. Now we're going to use this decorators thing so that just all of our stories have that margin that we want and this is where we're exporting it. So we're exporting the title, but we're also going to export this little decorator as well. So this is just kind of showing you a little trick you can do with Storybook to get that kind of margin that you want to get.
00:41:07 - Michael / host
Oh, nice. Because you had applied that initially just to the example, but now you can apply it to all of them universally.
00:41:14 - Anthony Campolo
Yeah. So now any story that is going to come through this is going to get that margin. So this is kind of like how you can nest components within components. Because Storybook is just a component, you can do the same thing. So you can kind of nest that
00:41:29 - Anthony Campolo
in there as well.
00:41:30 - Michael / host
That's really nice because I see a lot of documentation for UI libraries that will. They'll use just the. You go to copy an example and then it has all of this layout attached to it as well. So having that separate, being able to apply that but then not have to see it in the story is nice.
00:41:51 - Anthony Campolo
Yeah. And we want to now add a little bit of gap between. So you see, right now our comment is like right up against our blog post there. So we're going to go back into our blog post component and add some margin around the comments cell, which is so.
00:42:14 - Anthony Campolo
That's good. That's good.
00:42:18 - Michael / host
Cool.
00:42:21 - Rob Cameron
You see, he's doing a lot of formatting stuff, and this is just my style of writing the tutorial. I could just give you a whole bunch of HTML and say copy and paste this and don't worry about what it does. But I want to explain every single step so something isn't just magically changing and you're supposed to accept that that's the way it works. You're seeing why I'm doing that and how to actually do it at each step.
00:42:37 - Anthony Campolo
Yeah. This is one of the biggest things about the tutorial, and why I think it's so important, is that it walks you through each step of what your workflow is actually going to be like. Like you said, we could just give you all this code and be like, here you go, go look at it. But it's about this sequence of showing you, all right, how would you actually build something in the Redwood way?
00:42:58 - Anthony Campolo
And sweet.
00:43:00 - Anthony Campolo
That's it. That is our component that we built with our comments. Any questions?
00:43:12 - Michael / host
I do have a question. I actually use Storybook quite a bit. I was actually in it right before this meeting. But I'm curious, for anyone who is unfamiliar with Storybook as a tool, kind of, what's the like. What's the notion there?
00:43:27 - Anthony Campolo
What are.
00:43:28 - Michael / host
What's the like value in using Storybook?
00:43:34 - Anthony Campolo
Velocity, I think, is the idea. Think about, like Rob was saying, how much time you spend fiddling with setting up your database and getting your components in the right state and all that kind of stuff. It kind of just spits it all out for you. I thought it was really cool. The way I liken it is that it was like that moment in The Wizard of Oz when Dorothy opens the door and it goes from black and white to color. You were dealing with all this React code that was all super confusing, and then it's just like, can I just see what all this stuff actually looks like? And then you just hit a button and it's all there, and you can just kind of go through it. So I think it's a really powerful tool for beginners. And it's unfortunate that these types of tools require so much work and configuration to get going, because then the people who would benefit most from them have a hard time actually getting access. So that's also why we wanted to really integrate it into the framework.
00:44:27 - Anthony Campolo
So for people learning, Redwood can also have this Storybook tool as well.
00:44:34 - Michael / host
Oh, sorry. Go ahead, Rob.
00:44:36 - Rob / attendee
I was just going to ask, kind of my unexplored idea of Storybook, I haven't used it professionally yet, is that it helps a lot with different permissions or roles or user levels or something like that. Does that integrate with Redwood as well? Or as far as...
00:44:54 - Anthony Campolo
Right.
00:44:55 - Rob / attendee
My previous job, we would have people from different branches or different levels of users. And then we would have to test it by having test users and logging out, logging back in, and going to the page, which was a massive pain. Does Redwood kind of, or Storybook kind of, take care of that?
00:45:15 - Anthony Campolo
Yeah. So I think Rob can speak more to this, but we have auth integrated into Redwood itself, so I think that's why you probably will be able to do that with Redwood and Storybook. I don't think that's really because of Storybook. I think that's more because of how we have hooks that manage the user state. Is that correct, Rob?
00:45:35 - Rob Cameron
Yeah, Storybook doesn't really care about authentication or whatever, but we have a bunch of little helpers in there that do it for you. You'll see, if Anthony was to keep going in the tutorial, the next step is we add a moderation feature. So if you have a certain role when you're logged in, you can delete comments. So then in Storybook you can see, okay, if the person's logged in, what does the comment look like? If they're logged in as a moderator, does the button show? And you have all these states right in Storybook. You just click through them all and see, yep, everything is behaving as expected.
00:46:01 - Rob / attendee
That's beautiful.
00:46:02 - Michael / host
Wow. Yeah. Now, if you didn't have Redwood, to answer your question, Rob, I think as long as the components were architected in such a way that those are props to the component, you should easily be able to compose stories from those. And that is the killer place for that.
00:46:23 - Anthony Campolo
Right.
00:46:23 - Michael / host
Because like, ghosting into someone else's account with different privileges is a pain in the ass in, like every system that I've ever used. So, yeah, that is like a really choice case for that.
00:46:35 - Rob Cameron
Yeah, totally. So our auth stuff, we don't usually pass through as props. We have a hook, useAuth. And then behind the scenes, it's going to figure out if you're authenticated or not and give you a bunch of functions like isAuthenticated, isLoggedIn, and isLoggedOut. So we can mock all of that for Storybook. Rather than having to pass through who the user is down to your component chain as props, you'll use a hook in the component that you care about, and we let you mock the result of that hook in that particular story.
00:47:04 - Michael / host
Very cool.
00:47:08 - Anthony Campolo
Sweet. Thanks so much for being here, Rob. Super huge help as always.
00:47:12 - Rob Cameron
Yeah, no, this is great. Thanks.
00:47:15 - Michael / host
Yeah, it's nice to meet the man behind the name in the tutorial, the
00:47:22 - Rob Cameron
man behind the typos. We get typo fixes for the tutorial like every day.
00:47:26 - Anthony Campolo
Then people get their first PRs in that way.
00:47:29 - Michael / host
I know, it's great. That's true. Got to start hiding them in there just so people have those opportunities. Anthony, awesome as always. I really appreciate you sharing these cool things with us and just kind of what's happening in Redwood. But particularly this overlap is really neat because it really does focus on the developer experience that we all have a lot of pain around right now, which is that collaborative handoff from design to component to data. And so it's really cool to see what you're doing. Did you have any parting words?
00:48:08 - Anthony Campolo
No, just thanks. Thanks as always, Michael. I'm such a huge fan of everything you do and all the stuff you put together here. So I always enjoy the opportunity to get out and share some knowledge and hang out with all you guys. We got a couple new faces as well, which is always really cool. So hope to see you hang out in the Discord as well.
00:48:26 - Anthony Campolo
Yeah.
00:48:26 - Michael / host
Yeah. Well, hey, thanks everybody for being here.
00:48:28 - Anthony Campolo
If you.
00:48:29 - Michael / host
If you do have a question that comes up later, you can always ping anyone in the Discord and we'd be happy to follow up and make sure that you get pointed to the right place. As always, the Redwood docs are fantastic, and I think probably going through this tutorial would provide a lot of insight into both Redwood and Storybook. So yeah, thanks for your time, everybody. Good to see all your faces.
Discover Related Content
- Putting RedwoodJS Docs to the Test - Some Antics - Another hands-on RedwoodJS tutorial walkthrough examining accessibility patterns in the same blog scaffold
- Fullstack GraphQL with RedwoodJS and AppSync - GraphQL Denver - Companion session focused on the cell pattern and AppSync integration, with a deeper GraphQL Q&A
- Fullstack Jamstack Development with RedwoodJS - Async - Intro-level RedwoodJS demo covering Prisma, cells, and Netlify deployment for a general Jamstack audience
- Storybook with Michael Chan - Michael Chan, who hosts this session, returns to discuss Storybook's broader value, Chromatic, and design systems
- RedwoodJS with Peter Pistorius - RedwoodJS co-creator discusses the cell abstraction, Storybook integration philosophy, and the framework's GraphQL design decisions