
A First Look at SolidStart
Published:
SolidStart is a project starter and metaframework for SolidJS that provides a first-class way to build and deploy SolidJS applications.
Outline
- Introduction
- Create Client Rendered Solid Project
- Migrate Project to SolidStart
- Components and Reactive Primitives
- API Routes
- Deployment Adapters
All of this project’s code can be found in the First Look monorepo on my GitHub.
Introduction
On November 9, 2022, Ryan Carniato published Introducing SolidStart: The SolidJS Framework to announce the beta launch of SolidStart, the eagerly awaited metaframework for SolidJS. SolidStart provides a first-party project starter and metaframework for SolidJS. It prescribes a recommended way to organize, architect, and deploy SolidJS applications.
Vite is included for the build tool along with extra Solid packages for common functionality and a CLI for generating templated projects. These packages enable features such as routing, MetaTags, different rendering modes, TypeScript support, and deployment adapters.
A History of SolidJS and How it Compares to React
Before diving into SolidStart, it’s worth taking a moment to outline the history and motivation behind the creation of Solid. Branded as “a reactive JavaScript library for building user interfaces,” Ryan open sourced the framework on April 24, 2018. It was designed as a spiritual successor to the reactive programming model exemplified by KnockoutJS.
React wasn’t the first JavaScript “Just a Render Library”. I attribute that honor to a much older library, KnockoutJS. Knockout didn’t have components but identified an application was built from 3 parts,
Model,ViewModel, andView, and only cared about how you organized the latter. TheViewModelwas a revolutionary concept.
ViewModelsare instances much like components. But what set Knockout apart wasViewModelscould be anything you wanted; an object, a function, a class. There were no lifecycle functions. You could bring your own models and organize your application as you saw fit. Without best practices it could be a complete mess.But it was truly “Just a Render Library.” Those boundaries haven’t changed in over a decade… As
Controllerstransformed toRouters,ModelstoStores, andViewModels/Viewsgot wrapped together asComponents, the anatomy of a Component (even in a smaller library like React) is still 3 main parts:
- Container
- Change (Local State) Manager
- Renderer
Ryan Carniato - B.Y.O.F. Writing a JS Framework in 2018 (November 10, 2018)
As the 2010s progressed, Ryan believed the JavaScript world had moved on from using composable reactive primitives in favor of class components and lifecycle methods. Dissatisfied with this direction, Ryan aimed for Solid to be a more modern reactive framework inspired by Knockout but with features informed by newer component frameworks like Angular, React, and Vue.
Shortly after the framework’s release, React introduced hooks. Their debut in React Today and Tomorrow and 90% Cleaner React With Hooks, October 26, 2018 became a pivotal moment for Solid. React hooks are functions that can access React state and lifecycle methods from functional components. These functions can be composed into more complex UIs much like Solid.
Within a few years, the majority of React developers would be developing with composable, functional patterns. This ensured that React developers would find Solid easily comprehensible. But despite the surface level similarities between Solid and React’s syntax, Solid has a few key advantages over React due to its underlying implementation.
Solid removes the need for some of React’s more complex hooks that patch over the leaky abstraction underlying React. useCallback exists to give React developers a mechanism for preventing rerenders. But in Solid, components only mount once and don’t rerender so there is no need for an equivalent hook.
SolidJS Benchmark Performance
Solid is also one of the most performant JavaScript libraries. This is evidenced by the results of the JS Framework Benchmark. A large, randomized table of entries is created and modified. Rendering duration is measured along with how long various operations take to complete (lower scores are better).
While admittedly a contrived example, the benchmark allows factoring multiple measurements into a single geometric mean representing comparative performance between frameworks. For a combination of all types of read and write operations, Solid ranks just below vanilla JavaScript:
| Framework | Version | Mean |
|---|---|---|
| Vanilla JS | N/A | 1.00 |
| Solid | 1.5.4 | 1.10 |
| Lit-html | 1.1.0 | 1.19 |
| Vue | 3.2.37 | 1.25 |
| Svelte | 3.50.1 | 1.30 |
| Preact | 10.7.3 | 1.43 |
| Angular | 13.0.0 | 1.58 |
| Marko | 4.12.3 | 1.70 |
| React | 18.2.0 | 1.73 |
Solid ties vanilla JS and ranks just below Svelte on lighthouse startup metrics:
| Framework | Version | Mean |
|---|---|---|
| Svelte | 3.50.1 | 1.03 |
| Solid | 1.5.4 | 1.04 |
| Vanilla JS | N/A | 1.04 |
| Preact | 10.7.3 | 1.06 |
| Lit-html | 1.1.0 | 1.07 |
| Marko | 4.12.3 | 1.18 |
| Vue | 3.2.37 | 1.27 |
| React | 18.2.0 | 1.69 |
| Angular | 13.0.0 | 1.77 |
SolidStart Motivations
SolidStart takes influence from other JavaScript metaframeworks including Next.js, Nuxt.js, and SvelteKit by introducing multiple build modes, routing conventions, opinionated project structures, and pre-configured deployment adapters. The framework can produce sites or applications that employ either:
- Static site generation (SSG)
- Client-side rendering (CSR)
- Server-side rendering (SSR)
- Streaming SSR (SSSR)
In the future, you’ll also be able to choose:
- Some combination of all the above through route level controls
- Islands through newly created conventions like Hybrid Routing and Minimal Hydration
Create Client Rendered Solid Project
mkdir ajcwebdev-solidstartcd ajcwebdev-solidstartpnpm initpnpm add solid-js @solidjs/meta @solidjs/router solid-startpnpm add -D solid-start-node vite-plugin-solid vite undici typescriptAdd vite scripts to package.json and set type to module.
{ "name": "ajcwebdev-solidstart", "version": "1.0.0", "description": "An example SolidStart application deployed on Netlify, Vercel, and Cloudflare Pages", "type": "module", "scripts": { "dev": "vite", "build": "vite build", "serve": "vite preview" }, "keywords": [ "SolidJS", "SolidStart", "Netlify", "Vercel", "Cloudflare" ], "author": "Anthony Campolo", "license": "MIT"}Create a .gitignore file.
echo 'node_modules\n.env\n.DS_Store\ndist\n.solid\nnetlify\n.netlify\n.vercel' > .gitignoreThere’s only a handful of files needed for a working Solid project. These include a configuration file for Vite (vite.config.ts), an entry point for our JavaScript application (src/root.tsx), and an entry point for our HTML page (index.html).
Run the following commands:
mkdir srcecho > tsconfig.json # TypeScript Configurationecho > vite.config.ts # Vite Configurationecho > index.html # HTML entry point where JavaScript app loadsecho > src/root.css # CSS stylesheetecho > src/root.tsx # Defines the document the app rendersIn addition to the required files we also created optional files for CSS styling and TypeScript configuration. Later in the tutorial when we migrate this project to SolidStart, we’ll remove the HTML file and replace it with two files, entry-server.tsx and entry-client.tsx.
TypeScript and Vite Project Configuration
Copy/paste this impenetrable hunk of gibberish into your tsconfig.json and say a prayer to Microsoft.
{ "compilerOptions": { "allowSyntheticDefaultImports": true, "esModuleInterop": true, "strict": true, "target": "ESNext", "module": "ESNext", "moduleResolution": "node", "jsxImportSource": "solid-js", "jsx": "preserve", "types": ["vite/client"], "baseUrl": "./", "paths": { "~/*": ["./src/*"] } }}The vite.config.ts file is where we’ll add the Solid Plugin to define our Vite Configuration. Import solidPlugin from vite-plugin-solid and add it to the plugins array inside Vite’s defineConfig helper.
import solidPlugin from "vite-plugin-solid"import { defineConfig } from "vite"
export default defineConfig({  plugins: [solidPlugin()]})
HTML Entry, CSS Styling, and Render Function
The root Solid component will be imported as an ESM module from /src/root.tsx and set to the src attribute.
<!DOCTYPE html><html lang="en">  <head>    <meta charset="utf-8" />    <meta name="viewport" content="width=device-width, initial-scale=1" />    <meta name="description" content="An example SolidJS single-page application." />    <title>A First Look at SolidStart</title>  </head>
  <body>    <noscript>You need to enable JavaScript to run this app.</noscript>    <div id="root"></div>    <script src="/src/root.tsx" type="module"></script>  </body></html>
Include the following CSS styles in src/root.css.
body {  background-color: #282c34;  color: white;  font-family: 'Helvetica Neue', Helvetica, Arial, sans-serif;  margin: 0;  text-align: center;}
header {  font-size: calc(10px + 2vmin);  margin: 1rem;}
a {  color: #b318f0;}
To mount Solid and automatically create a reactive root, import render from solid-js/web and pass in two arguments, a top-level component function and an element to mount on:
- The first argument returns the root component and must be passed a function.
- The mounting container is passed for the second argument and wired up to the
rootdiv.
/* @refresh reload */import { render } from "solid-js/web"import "./root.css"
function App() {  return (    <>      <header>        <h1>A First Look at SolidStart</h1>        <a href="https://github.com/solidjs/solid">Learn Solid</a>      </header>      <footer>        <span>          Visit <a href="https://ajcwebdev.com">ajcwebdev.com</a> for more tutorials        </span>      </footer>    </>  )}
render(  () => <App />, document.getElementById('root') as HTMLElement)
Start Development Server
pnpm dev # or npm run dev | yarn devOpen localhost:5173 to view the running application in your browser. The page will reload if you make edits.
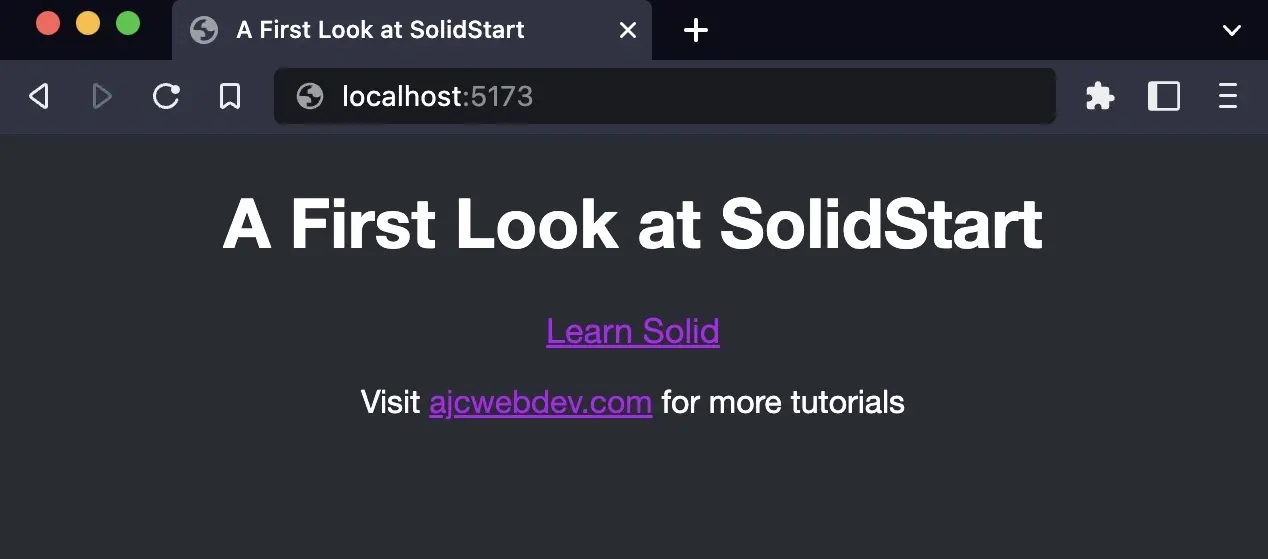
At this point, we could build and deploy a dist folder to any static host provider. Run pnpm build and pnpm serve to test serving your bundle on localhost:4173. Instead of deploying this project, we’ll continue to the next section and begin modifying our project to make it work with SolidStart.
Migrate Project to SolidStart
First, delete your existing HTML file and create a routes directory inside src.
rm -rf index.htmlmkdir src/routesecho > src/entry-server.tsx # Server entry pointecho > src/entry-client.tsx # Browser entry pointecho > src/routes/index.tsx # Home routeSolidStart Scripts and Vite Configuration
Replace the Vite scripts with the following SolidStart scripts.
{ "scripts": { "dev": "solid-start dev", "build": "solid-start build", "start": "solid-start start" },}Remove solidPlugin from vite-plugin-solid and replace it with solid from solid-start/vite.
import solid from "solid-start/vite"import { defineConfig } from "vite"
export default defineConfig({  plugins: [solid()]})
Index Route, Root, and Entry Points
Copy the App component from src/root.tsx and include it in src/routes/index.tsx with export default.
export default function App() { return ( <> <header> <h1>A First Look at SolidStart</h1> <a href="https://github.com/solidjs/solid">Learn Solid</a> </header> <footer> <span> Visit <a href="https://ajcwebdev.com">ajcwebdev.com</a> for more tutorials </span> </footer> </> )}root.tsx is the point where your code runs on both the server and client. It exports a Root component that is shared on the server and browser as an isomorphic entry point to your application. Since SolidStart is designed for file-system routing, routes are defined via a folder structure under the /routes folder. You can pass them into the <Routes> component with the <FileRoutes> component.
This collects routes from the file-system in the /routes folder to be inserted into a parent <Routes> component. Since <FileRoutes> returns a route configuration, it must be placed directly between <Routes>, typically in the root.tsx file. <Routes> is a special Switch component that renders the correct <Route> child based on the users’ location, and switches between them as the user navigates.
// @refresh reloadimport { Suspense } from "solid-js"import { Body, ErrorBoundary, FileRoutes, Head, Html, Meta, Routes, Scripts, Title } from "solid-start"import "./root.css"
export default function Root() {  return (    <Html lang="en">      <Head>        <Title>A First Look at SolidStart</Title>        <Meta charset="utf-8" />        <Meta name="viewport" content="width=device-width, initial-scale=1" />        <Meta name="description" content="An example SolidStart application deployed on Netlify, Vercel, and Cloudflare Pages." />      </Head>      <Body>        <ErrorBoundary>          <Suspense fallback={<div>Loading...</div>}>            <Routes>              <FileRoutes />            </Routes>          </Suspense>        </ErrorBoundary>        <Scripts />      </Body>    </Html>  )}
entry-client.tsx starts the application in the browser by passing <StartClient> to a mount function. mount is an alias over Solid’s hydrate and render methods. It ensures that the client always starts up properly whether you are using SolidStart for client-only rendering or server-side rendering.
import { mount, StartClient } from "solid-start/entry-client"
mount(() => <StartClient />, document)
entry-server.tsx starts the application on the server by passing <StartServer> to a render function called renderAsync. createHandler enables a mechanism for introducing middleware into server rendering. <StartServer> wraps the application root and includes Context providers for Routing and MetaData. It takes the Event object originating from the underlying runtime and includes information such as the request, responseHeaders and status codes.
import { StartServer, createHandler, renderAsync } from "solid-start/entry-server"
export default createHandler(  renderAsync((event) => <StartServer event={event} />))
While this example uses renderAsync, there are three different render functions provided by SolidStart. Each wraps Solid’s rendering method and returns a unique output:
renderSynccallsrenderToStringto synchronously respond immediately and render the application to a string.renderAsynccallsrenderToStringAsyncto asynchronously respond when the page has fully been loaded and render the application to a promise.renderStreamcallsrenderToStreamto asynchronously respond as soon as it can and render the application to aReadableStream.
Check that everything still displays as expected.
pnpm devOpen localhost:3000.
Components and Reactive Primitives
Since this is a tutorial about a frontend framework it will be considered illegitimate until we build a counter. Create a components directory and then a file called Counter.tsx inside of it.
mkdir src/componentsecho > src/components/Counter.tsxThere are two foundational building blocks at the core of Solid’s fine grained reactivity that will enable us to craft this magnificent counter into existence:
- Components contain stateless DOM elements within functions that accept
propsand return JSX elements. - Reactive Primitives including Signals, Effects, and Memos track and broadcast the changing values that represent the state of the components over time.
In this component we’ll create a signal to track the changing value of the counter and an effect to modify the value with button clicks.
Create Signal
Signals contain values that change over time. They are tracked by the framework and update automatically by broadcasting to the rest of the interface. Use createSignal to initialize a value of 0 and set it to count. Increment the counter once every second by passing a setCount(count() + 1) function to a setInterval() method that executes every 1000 milliseconds.
import { createSignal } from "solid-js"
export default function Counter() {  const [count, setCount] = createSignal(0)
  setInterval(() => setCount(count() + 1), 1000)
  return (    <>The count is now: {count()}</>  )}
Inside src/routes/index.tsx, import Counter from ../components/Counter. Return a <Counter /> component in the return function of the App component.
import Counter from "../components/Counter"
export default function App() {  return (    <>      <header>        <h1>A First Look at SolidStart</h1>        <a href="https://github.com/solidjs/solid">Learn Solid</a>      </header>      <main>        <Counter />      </main>      <footer>        <span>          Visit <a href="https://ajcwebdev.com">ajcwebdev.com</a> for more tutorials        </span>      </footer>    </>  )}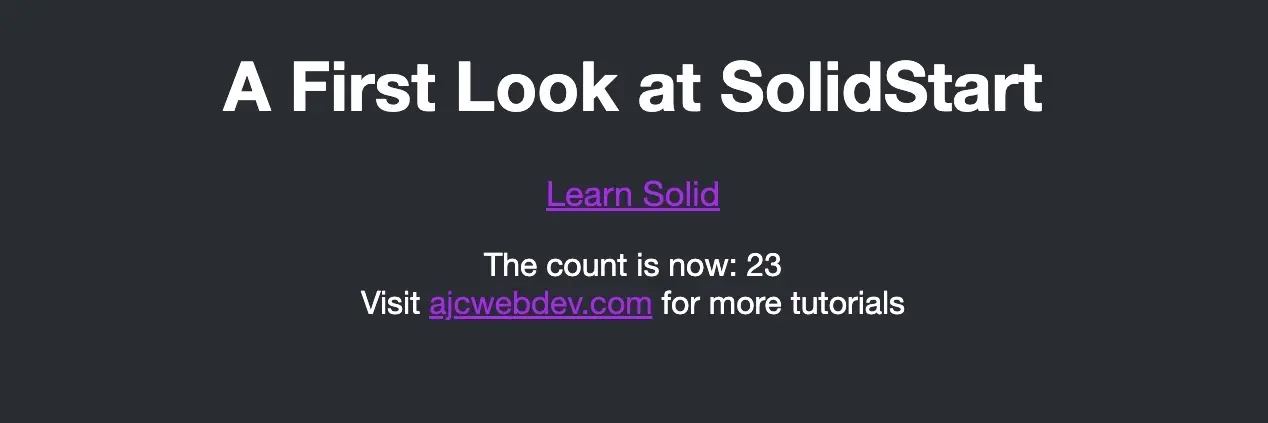
Create Effect
An Effect is an example of an observer that runs a side effect depending on a signal. createEffect creates a new computation (for example to modify the DOM manually) and runs the given function in a tracking scope.
import { createSignal, createEffect } from "solid-js"
export default function Counter() {  const [count, setCount] = createSignal(0)
  createEffect(() => count())
  return (    <>      <button onClick={() => setCount(count() + 1)}>        Click Me      </button>      <div>The count is now: {count()}</div>    </>  )}
This automatically tracks the dependencies and reruns the function whenever the dependencies update.

Create Route Data
Create a new file called students.tsx inside the src/routes directory. This will contain a third party API call to return a list of Harry Potter characters.
echo > src/routes/students.tsxcreateRouteData is a wrapper over createResource for handling async data fetching and refetching. With SolidStart’s file system routing, components defined under /routes can utilize a routeData function which executes when navigation to that component begins. This hook returns the JSON parsed data from the loader function. We’ll use the Fetch API to query Harry Potter information on Deno Deploy.
import { useRouteData, createRouteData } from "solid-start"
type Student = { name: string; }
export function routeData() {  return createRouteData(async () => {    const response = await fetch("https://hogwarts.deno.dev/students")    return (await response.json()) as Student[]  })}
export default function Page() { }
This routeData function can be thought of like a “loader” function (what a brilliant idea, amazing no one thought of it before) which includes a useRouteData hook to access the returned data.
import { useRouteData, createRouteData } from "solid-start"
type Student = { name: string; }
export function routeData() {  return createRouteData(async () => {    const response = await fetch("https://hogwarts.deno.dev/students")    return (await response.json()) as Student[]  })}
export default function Page() {  const students = useRouteData<typeof routeData>()
  return (    <>      <header>        <h1>Students</h1>      </header>      <main>        <code>{JSON.stringify(students(), null, 2)}</code>      </main>    </>  )}
useRouteData can use whatever data is returned from the routeData loader function.
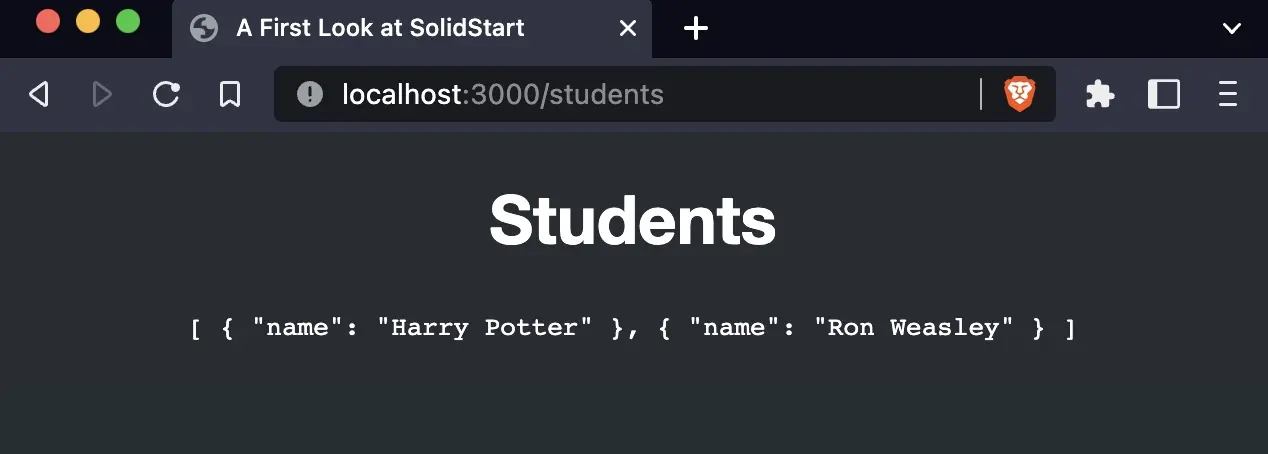
The <For> component loops over an array of objects. The <For> component has only one prop, each, which is passed an array to loop over with a callback similar to JavaScript’s map callback.
import { useRouteData, createRouteData } from "solid-start"import { For } from "solid-js"
type Student = { name: string; }
export function routeData() {  return createRouteData(async () => {    const response = await fetch("https://hogwarts.deno.dev/students")    return (await response.json()) as Student[]  })}
export default function Page() {  const students = useRouteData<typeof routeData>()
  return (    <>      <header>        <h1>Students</h1>      </header>      <main>        <For each={students()}>          {student => <li>{student.name}</li>}        </For>      </main>    </>  )}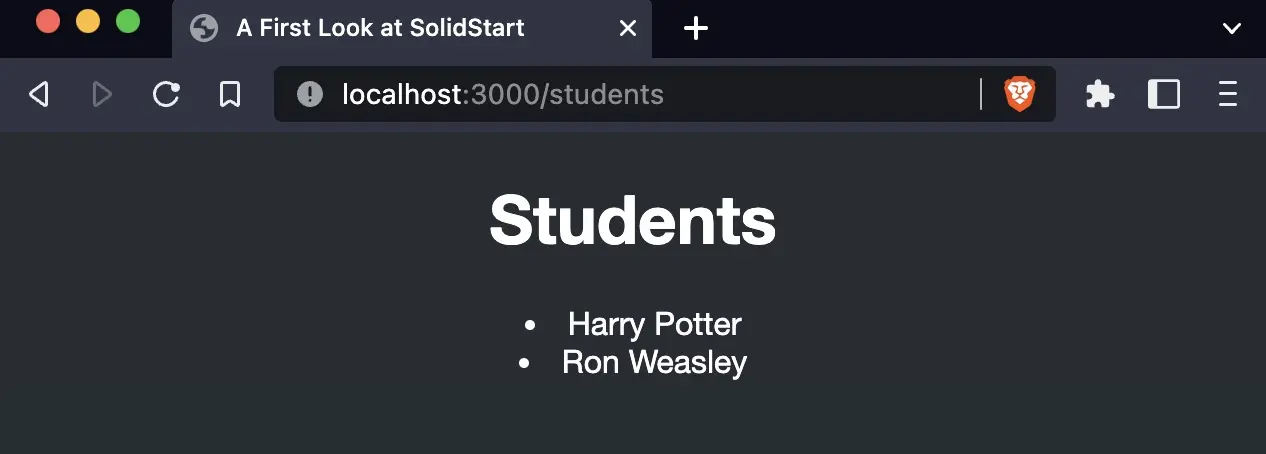
API Routes
API routes are similar to other routes except instead of exporting a default Solid component with a routeData function, they export functions that are named after the HTTP methods they handle such as GET or POST.
mkdir src/routes/apiecho > src/routes/api/index.tsjson is a helper function to send JSON HTTP responses. Return a JSON object with the key set to hello and the value set to world.
import { json } from "solid-start"
export function GET() {  return json(    { hello: "world" }  )}
Open 127.0.0.1:3000/api or make a request with cURL.
curl http://127.0.0.1:3000/api{"hello":"world"}Deployment Adapters
Here is the directory and file structure for the final project before including any files related to deployment:
.├── src│ ├── components│ │ └── Counter.tsx│ ├── routes│ │ ├── api│ │ │ └── index.ts│ │ ├── index.tsx│ │ └── students.tsx│ ├── entry-client.tsx│ ├── entry-server.tsx│ ├── root.css│ └── root.tsx├── package.json├── tsconfig.json└── vite.config.tsPush your project to a GitHub repository.
git initgit add .git commit -m "mr solid"gh repo create ajcwebdev-solidstart \ --description="An example SolidJS application deployed on Netlify, Vercel, and Cloudflare Pages." \ --remote=upstream \ --source=. \ --public \ --pushIf you only want to use a single deployment platform, select one of the next three options and push the changes to the main branch. I will deploy the project to all three by creating a different branch for each and specifying the correct branch on the deployment platform.
Deploy to Netlify
Import the netlify adapter from solid-start-netlify.
// @ts-ignoreimport netlify from "solid-start-netlify"import solid from "solid-start/vite"import { defineConfig } from "vite"
export default defineConfig({  plugins: [solid({    adapter: netlify({ edge: true })  })]})
Install solid-start-netlify and the Netlify CLI.
pnpm add -D solid-start-netlify netlify-cli @types/nodeCreate a netlify.toml file for the build instructions.
echo > netlify.tomlSet the command to pnpm build and the publish directory to netlify.
[build] command = "pnpm build" publish = "netlify"Connect the repository to your Netlify account through the Netlify dashboard or use the following commands with the Netlify CLI.
pnpm ntl loginpnpm ntl initThe build commands will be automatically entered from the netlify.toml file.
pnpm ntl deploy --prod --buildOpen ajcwebdev-solidstart.netlify.app to see a running example.
Deploy to Vercel
Install solid-start-vercel and the Vercel CLI.
pnpm add -D solid-start-vercel vercelImport the vercel adapter from solid-start-vercel.
// @ts-ignoreimport vercel from "solid-start-vercel"import solid from "solid-start/vite"import { defineConfig } from "vite"
export default defineConfig({  plugins: [solid({    adapter: vercel({ edge: true })  })]})
Deploy the project with the Vercel CLI.
pnpm vercel --yes --prodOpen ajcwebdev-solidstart.vercel.app.
Deploy to Cloudflare
SolidStart includes two adapters for Cloudflare, one for Cloudflare Workers and another for Cloudflare Pages. It’s important to note that the Cloudflare Pages adapter is also using Workers through Pages Functions. Install solid-start-cloudflare-pages and the wrangler CLI.
pnpm add -D solid-start-cloudflare-pages wranglerImport the cloudflare adapter from solid-start-cloudflare-pages.
// @ts-ignoreimport cloudflare from "solid-start-cloudflare-pages"import solid from "solid-start/vite"import { defineConfig } from "vite"
export default defineConfig({  plugins: [solid({    adapter: cloudflare({})  })],})
Build the project’s assets and run a local Worker emulation on localhost:8788 with wrangler pages dev.
pnpm wrangler loginpnpm buildpnpm wrangler pages dev ./dist/publicCreate a project with wrangler pages project create and deploy the project with wrangler pages publish.
pnpm wrangler pages project create ajcwebdev-solidstart \ --production-branch productionpnpm wrangler pages publish dist/public \ --project-name=ajcwebdev-solidstart \ --branch=production