A First Look at Ethers and Hardhat
This example uses Hardhat and Ethers to compile a smart contract written in Solidity and deploy that contract to an Ethereum test network with Alchemy.
All of this project's code can be found in the First Look monorepo on my GitHub.
Introduction
ethers.js is a library that aims to be a complete and compact tool for interacting with the Ethereum Blockchain and its ecosystem. This example uses Hardhat, an Ethereum development environment, to compile a smart contract and deploy it to Ropsten, an Ethereum test network that allows for blockchain development testing.
The contract is written in Solidity, an object-oriented, high-level language for implementing smart contracts. After deploying the contract, we will generate a boilerplate React application with Vite and connect the application to our smart contract running on Ropsten. Alchemy provides a managed node that enables connecting to various tools in the blockchain ecosystem.
Create Project
This article is heavily based on Nader Dabit's definitive article, The Complete Guide to Full Stack Ethereum Development. I've made a few alternations including using Vite instead of Create React App and the inclusion of dotenv for environment variables but all credit due to Sensei Dabit.
pnpm create vite ajcwebdev-ethers --template react
cd ajcwebdev-ethers
Remove "type": "module" from package.json.
Install Dependencies
In addition to Ethers and Hardhat we will also install Waffle and Chai for testing our contracts.
pnpm add dotenv ethers hardhat chai ethereum-waffle \
   @nomiclabs/hardhat-ethers @nomiclabs/hardhat-waffle
Create a .env file to store environment variables later in the tutorial.
touch .envThe file will include the following three variables:
ALCHEMY_URL=
ALCHEMY_KEY=
VITE_GREETER_ADDRESS=
Initialize Hardhat Environment
Developing smart contracts requires the ability to deploy your contracts, run tests, and debug Solidity code. We will also need a way to compile Solidity code into code that can be run in a client-side application. Hardhat compiles your contracts and runs them on a development network. This lets you develop without having to deal with live environments.
We'll create the following files/directories:
hardhat.config.js- Entire Hardhat setup including config, plugins, and custom tasks.scripts- Contains a script nameddeploy.jsthat deploys your smart contract when executedcontracts- Contains a file calledGreeter.solwith an example Solidity smart contract
mkdir scripts contracts
echo > scripts/deploy.js
echo > contracts/Greeter.sol
echo > hardhat.config.js
Sample Deployment Script
In deploy.js we use getContractFactory to create a ContractFactory, an abstraction used to deploy new smart contracts. Greeter is a factory for instances of our greeting contract. Calling deploy() on a ContractFactory will start the deployment, and return a Promise that resolves to a Contract. This is the object that has a method for each of your smart contract functions. Modify the text to send your own message.
// scripts/deploy.js

const hre = require("hardhat")

async function main() {
  const Greeter = await hre.ethers.getContractFactory("Greeter")
  const greeter = await Greeter.deploy("Hello from ajcwebdev!")
  await greeter.deployed()
  console.log("Greeter deployed to:", greeter.address)
}

main()
  .then(() => process.exit(0))
  .catch((error) => {
    console.error(error)
    process.exit(1)
  })
I'll also add a few more console logs to the main function to log additional pieces of information including the signer, hash, and blockHash.
// scripts/deploy.js

const hre = require("hardhat")

async function main() {
  const Greeter = await hre.ethers.getContractFactory("Greeter")
  const greeter = await Greeter.deploy("Hello from ajcwebdev!")
  await greeter.deployed()

  console.log("Greeter deployed to " + greeter.address + " address")
  console.log("Greeter deployed by " + JSON.stringify(greeter.signer) + " signer")
  console.log("Deploy transaction hash: " + greeter.deployTransaction.hash)
  console.log("Deploy transaction block hash: " + greeter.deployTransaction.blockHash)
}

main()
  .then(() => process.exit(0))
  .catch((error) => {
    console.error(error)
    process.exit(1)
  })
Hardhat Configuration
When Hardhat is run, it searches for the closest hardhat.config.js file starting from the current working directory. This file normally lives in the root of your project. The entirety of your Hardhat setup, including your config, plugins and custom tasks, is contained in this file.
We need to make a couple changes to our hardhat.config.js file. Update the chain ID to 1337 and change the location for the artifacts of the compiled contracts to the src directory of the React app.
// hardhat.config.js

require("@nomiclabs/hardhat-waffle")

task("accounts", "Prints the list of accounts", async (taskArgs, hre) => {
  const accounts = await hre.ethers.getSigners()
  for (const account of accounts) {
    console.log(account.address)
  }
})

/**
 * @type import('hardhat/config').HardhatUserConfig
 */
module.exports = {
  solidity: "0.8.7",
  paths: {
    artifacts: './src/artifacts',
  },
  networks: {
    hardhat: {
      chainId: 1337
    }
  }
}
Greeter Solidity Contract
Solidity files start with a pragma that is used by the Solidity compiler to validate its version. contract specifies the main building block for the smart contract, which is named Greeter.
// contracts/Greeter.sol

//SPDX-License-Identifier: MIT
pragma solidity ^0.8.7;

import "hardhat/console.sol";

contract Greeter { }
The constructor is executed only once when the contract is created. The Greeter constructor will set a greeting variable and expose a function (greet) that can be called to return the greeting. It also exposes a function called setGreeting that allows a user to update the greeting.
// contracts/Greeter.sol

//SPDX-License-Identifier: MIT
pragma solidity ^0.8.7;

import "hardhat/console.sol";

contract Greeter {
  string private greeting;

  constructor(string memory _greeting) {
    console.log("Deploying a Greeter with greeting: ", _greeting);
    greeting = _greeting;
  }

  function greet() public view returns (string memory) {
    return greeting;
  }

  function setGreeting(string memory _greeting) public {
    console.log("Changing greeting from '%s' to '%s'", greeting, _greeting);
    greeting = _greeting;
  }
}
These methods will be available for a user to interact with when deployed to the Ethereum blockchain. These methods represent the two ways of interacting with a smart contract:
greetreads from the blockchain and does not require money for gas.setGreetingwrites to the blockchain and requires payment for the transaction if you want to deploy to mainnet and not a testnet.
Deploy to Testnet
To deploy to the local network, you first need to compile your contract and then start a local test node. Our React app will interact with the smart contract using a combination of the Ethers library, the contract address, and the ABI that will be created from the contract by hardhat.
Compile Application Binary Interface
ABI stands for application binary interface. It is the interface between your client-side application and the Ethereum blockchain where the smart contract you are going to be interacting with is deployed.
pnpm hardhat compileABIs are typically compiled from Solidity smart contracts by a development framework like Hardhat. You can also often find the ABIs for a smart contract on Etherscan.
Start Test Node
pnpm hardhat nodeThis will return a list of addresses and private keys.
Started HTTP and WebSocket JSON-RPC server at http://127.0.0.1:8545/

Accounts
========
Account #0: 0xf39fd6e51aad88f6f4ce6ab8827279cfffb92266 (10000 ETH)
Private Key: 0xac0974bec39a17e36ba4a6b4d238ff944bacb478cbed5efcae784d7bf4f2ff80

Account #1: 0x70997970c51812dc3a010c7d01b50e0d17dc79c8 (10000 ETH)
Private Key: 0x59c6995e998f97a5a0044966f0945389dc9e86dae88c7a8412f4603b6b78690d

...
We will need to pick an account and corresponding private key. I will use Account #11:
Account #11: 0x71be63f3384f5fb98995898a86b02fb2426c5788 (10000 ETH)
Private Key: 0x701b615bbdfb9de65240bc28bd21bbc0d996645a3dd57e7b12bc2bdf6f192c82
Leave this terminal running and open another for the next command.
Run Deployment Script
Run the deploy script and give a flag to the CLI to let it know that we would like to deploy to our local network:
pnpm hardhat run scripts/deploy.js \
  --network localhost
This will result in the following output in your terminal:
Greeter deployed to 0x5FbDB2315678afecb367f032d93F642f64180aa3 address
Greeter deployed by "<SignerWithAddress 0xf39Fd6e51aad88F6F4ce6aB8827279cffFb92266>" signer
Deploy transaction hash: 0x74b10cb0666183a9f2d5d20dff6cbf12f2d026d39ce7c48db0f9bb02f52f2ee1
Deploy transaction block hash: 0xfb0865cdff882c11ee07521ed2732b4c961c915d88d407953336484e6ffd2395
The address returned on the first line (0x5FbDB2315678afecb367f032d93F642f64180aa3) is what we will use in our client application to talk to the smart contract. Save this address somewhere that you can access later as we will need to use it when connecting to the contract from the client application.
Connect to MetaMask
To send transactions to the smart contract, we will need to connect our MetaMask wallet using one of the accounts created when we ran pnpm hardhat node. In the terminal running our local node, you will see the following output verifying that the Greeter contract was successfully deployed.
web3_clientVersion
eth_chainId
eth_accounts
eth_blockNumber
eth_chainId (2)
eth_estimateGas
eth_getBlockByNumber
eth_feeHistory
eth_sendTransaction
  Contract deployment: Greeter
  Contract address:    0x5fbdb2315678afecb367f032d93f642f64180aa3
  Transaction:         0x74b10cb0666183a9f2d5d20dff6cbf12f2d026d39ce7c48db0f9bb02f52f2ee1
  From:                0xf39fd6e51aad88f6f4ce6ab8827279cfffb92266
  Value:               0 ETH
  Gas used:            505488 of 505488
  Block #1:            0xfb0865cdff882c11ee07521ed2732b4c961c915d88d407953336484e6ffd2395

  console.log:
    Deploying a Greeter with greeting: Hello from ajcwebdev!

eth_chainId
eth_getTransactionByHash
eth_chainId
eth_getTransactionReceipt
In the list of contracts that the CLI logs out, you should see both an Account number as well as a Private Key for the account you originally chose at the beginning of the tutorial. We can import this account into MetaMask in order to start using some of its fake Eth. To do so, first open MetaMask and check the available networks.
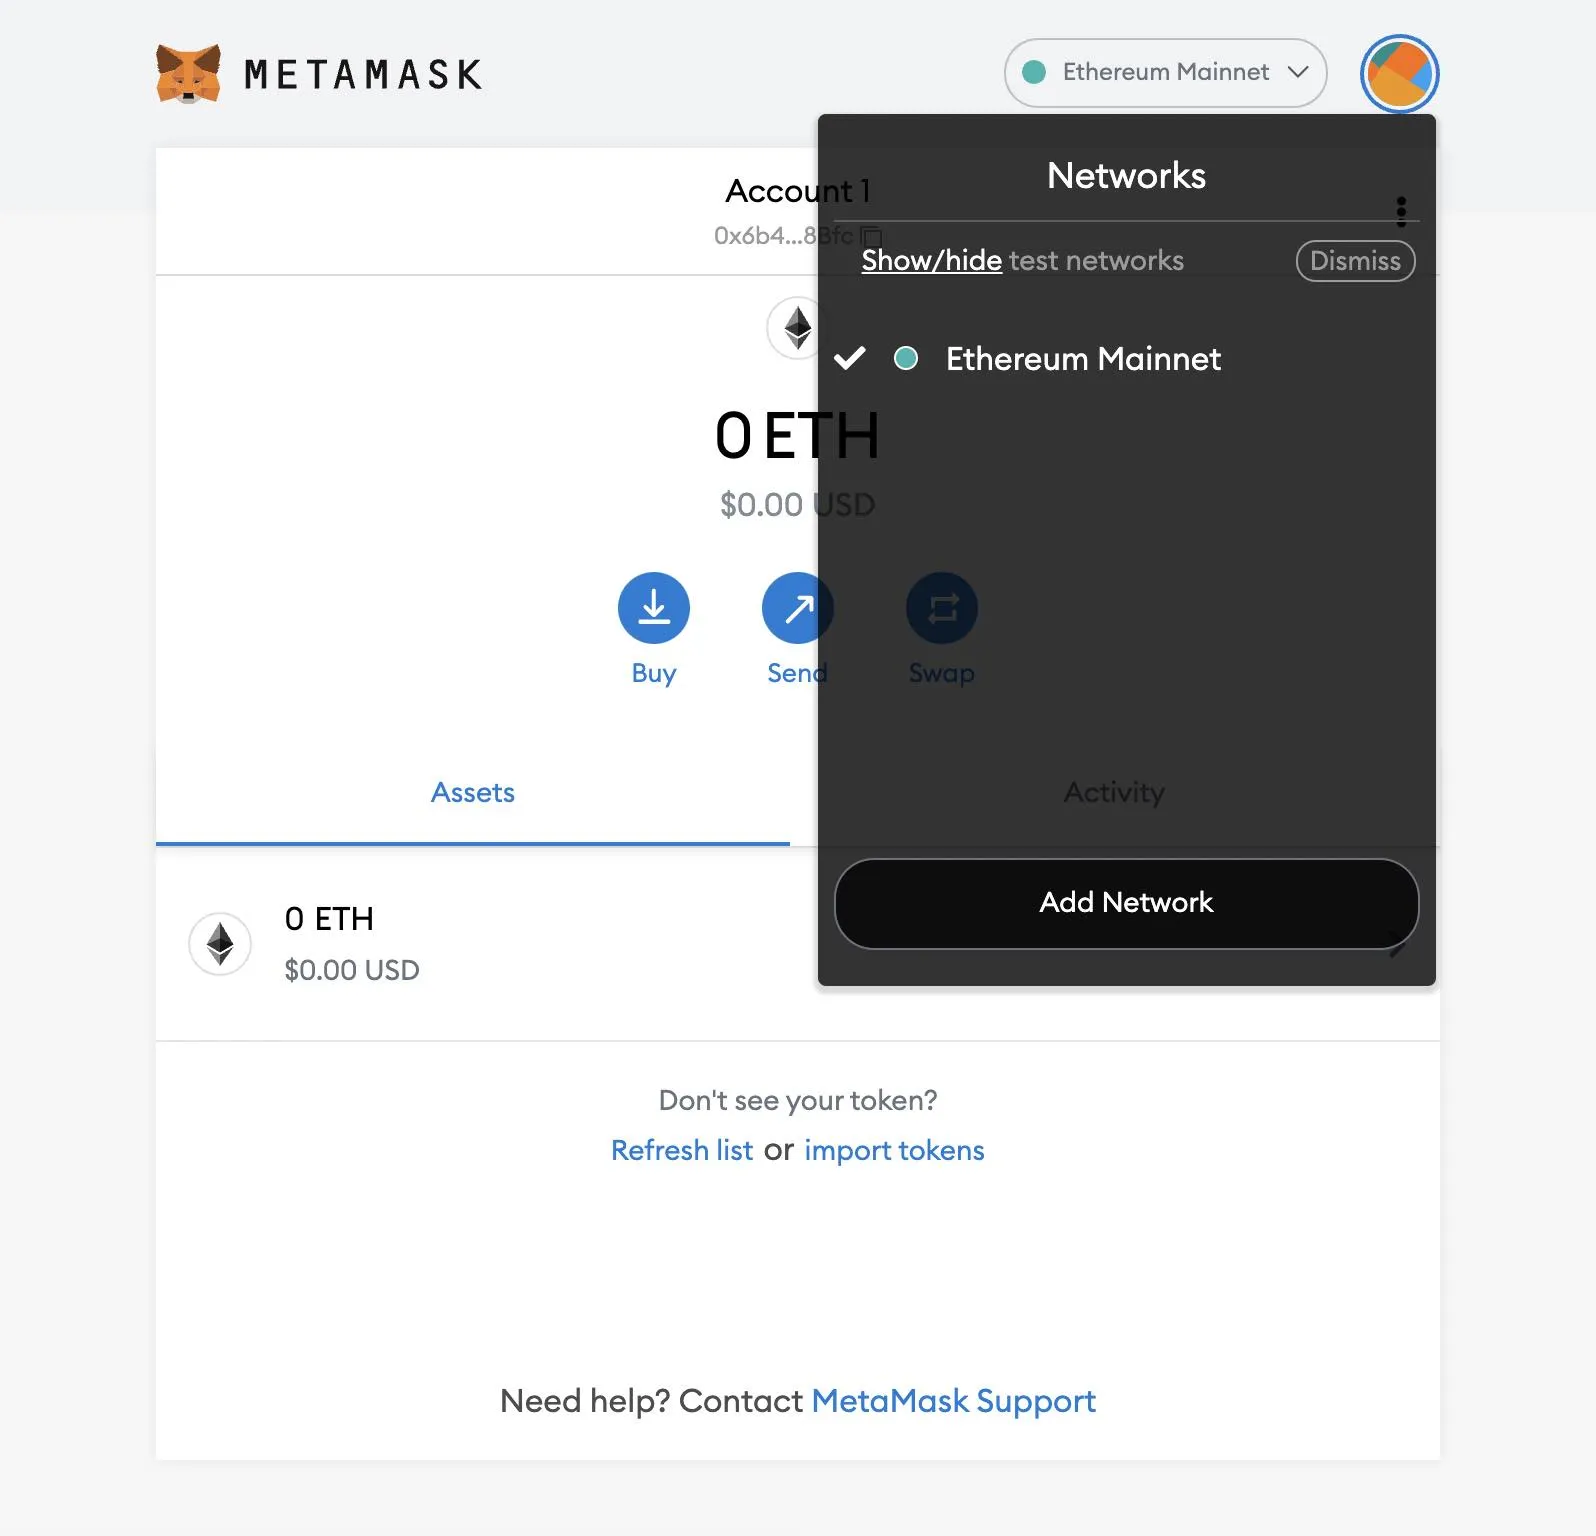
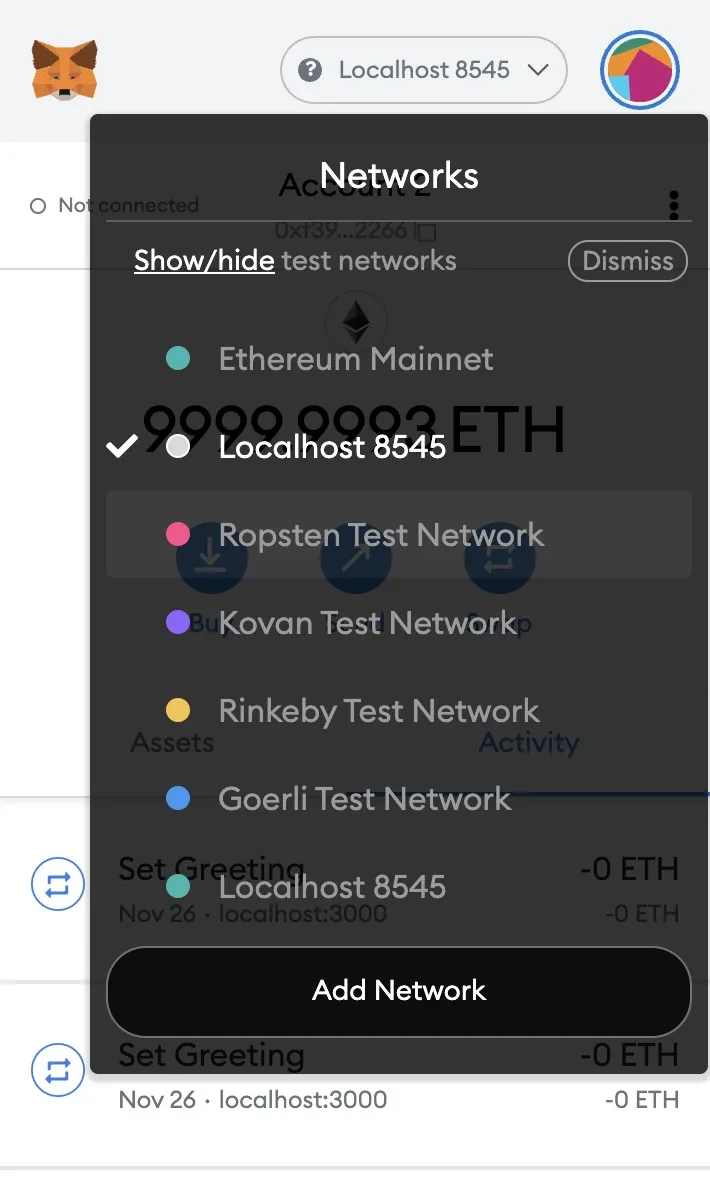
If you only see the Ethereum Mainnet, go to Settings > Advanced and make sure "Show test networks" is set to ON.
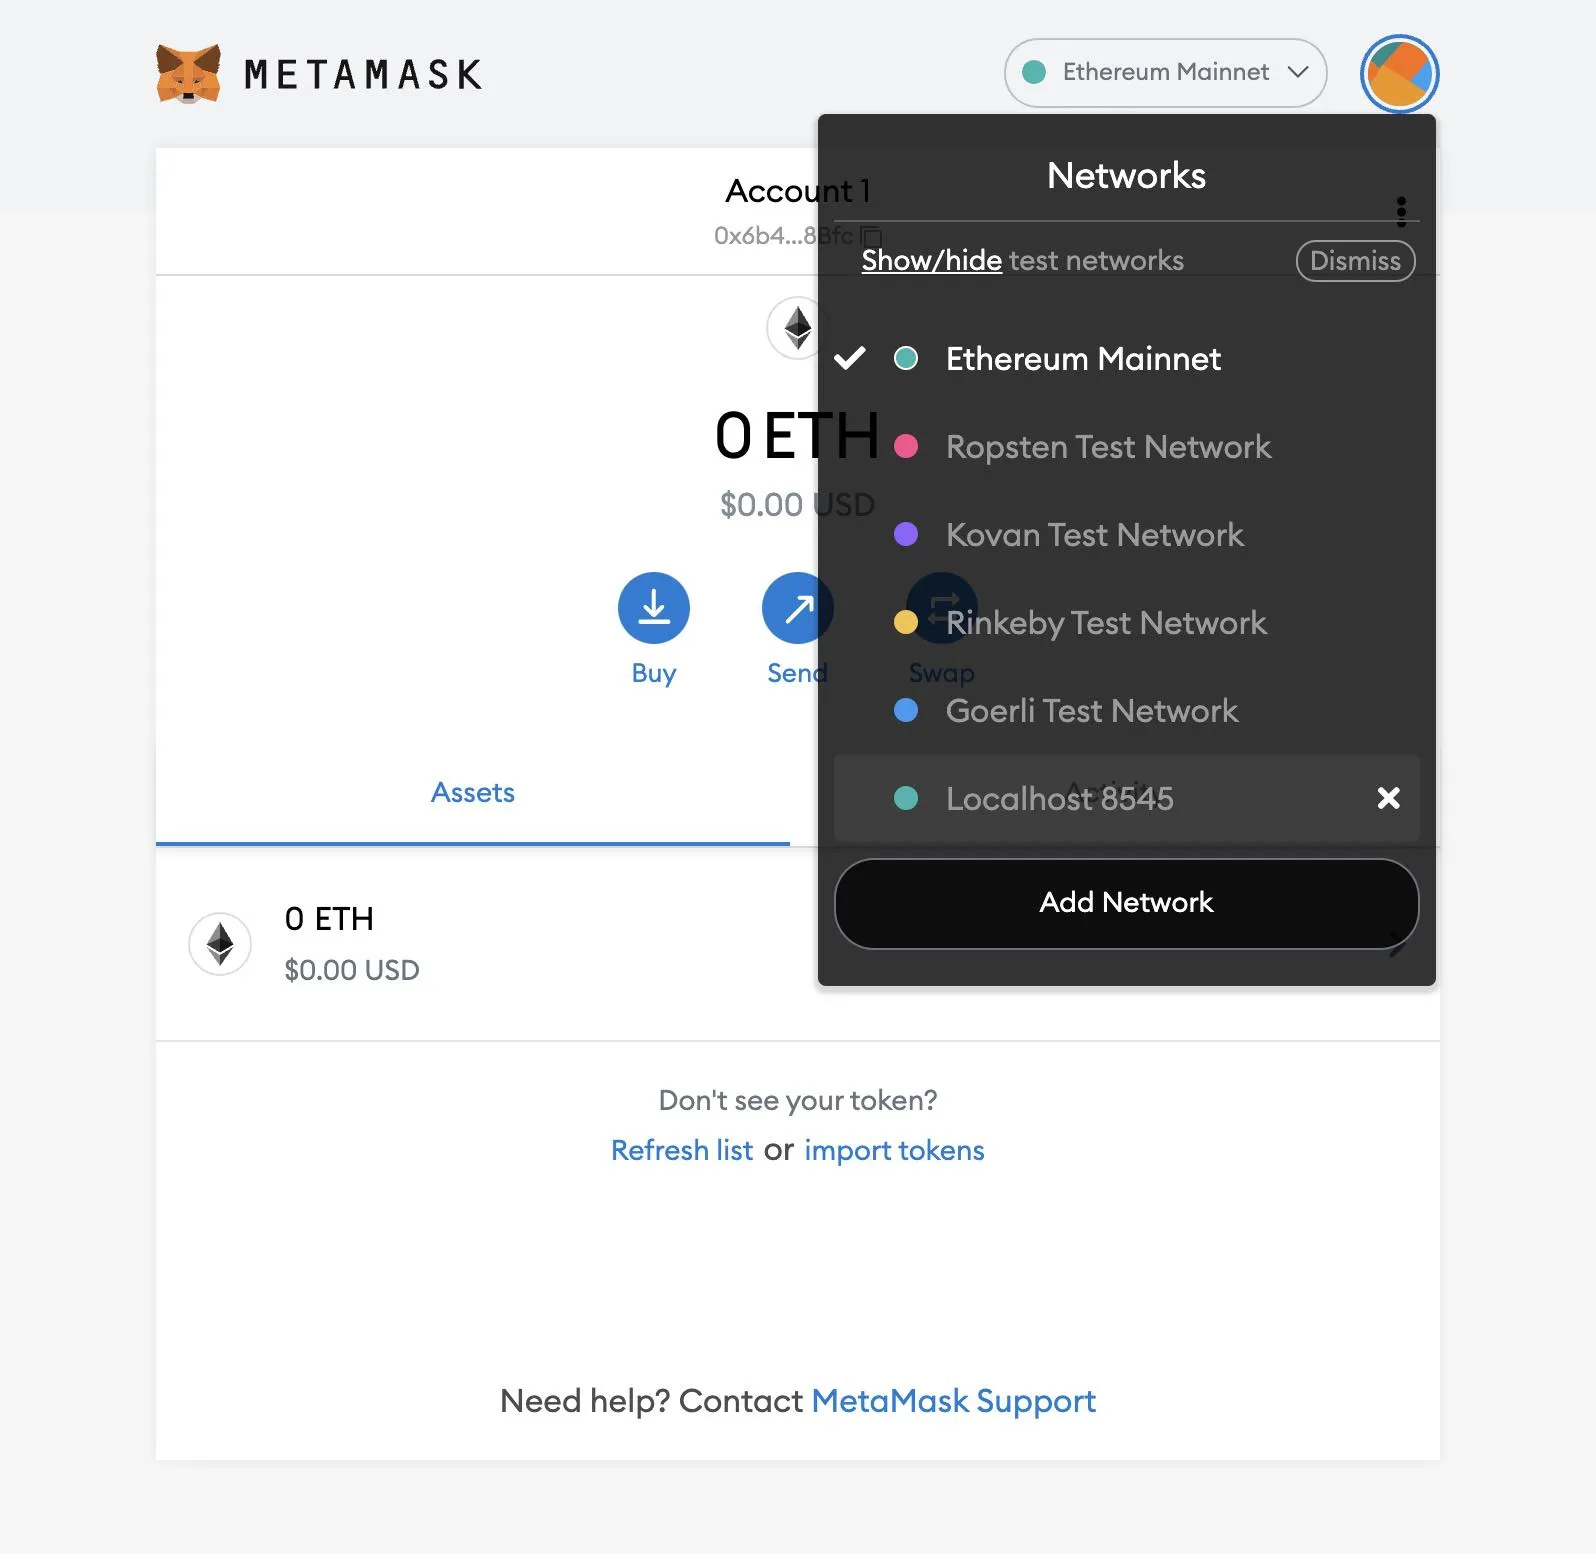
Update the network to Localhost 8545.
Import Account into MetaMask
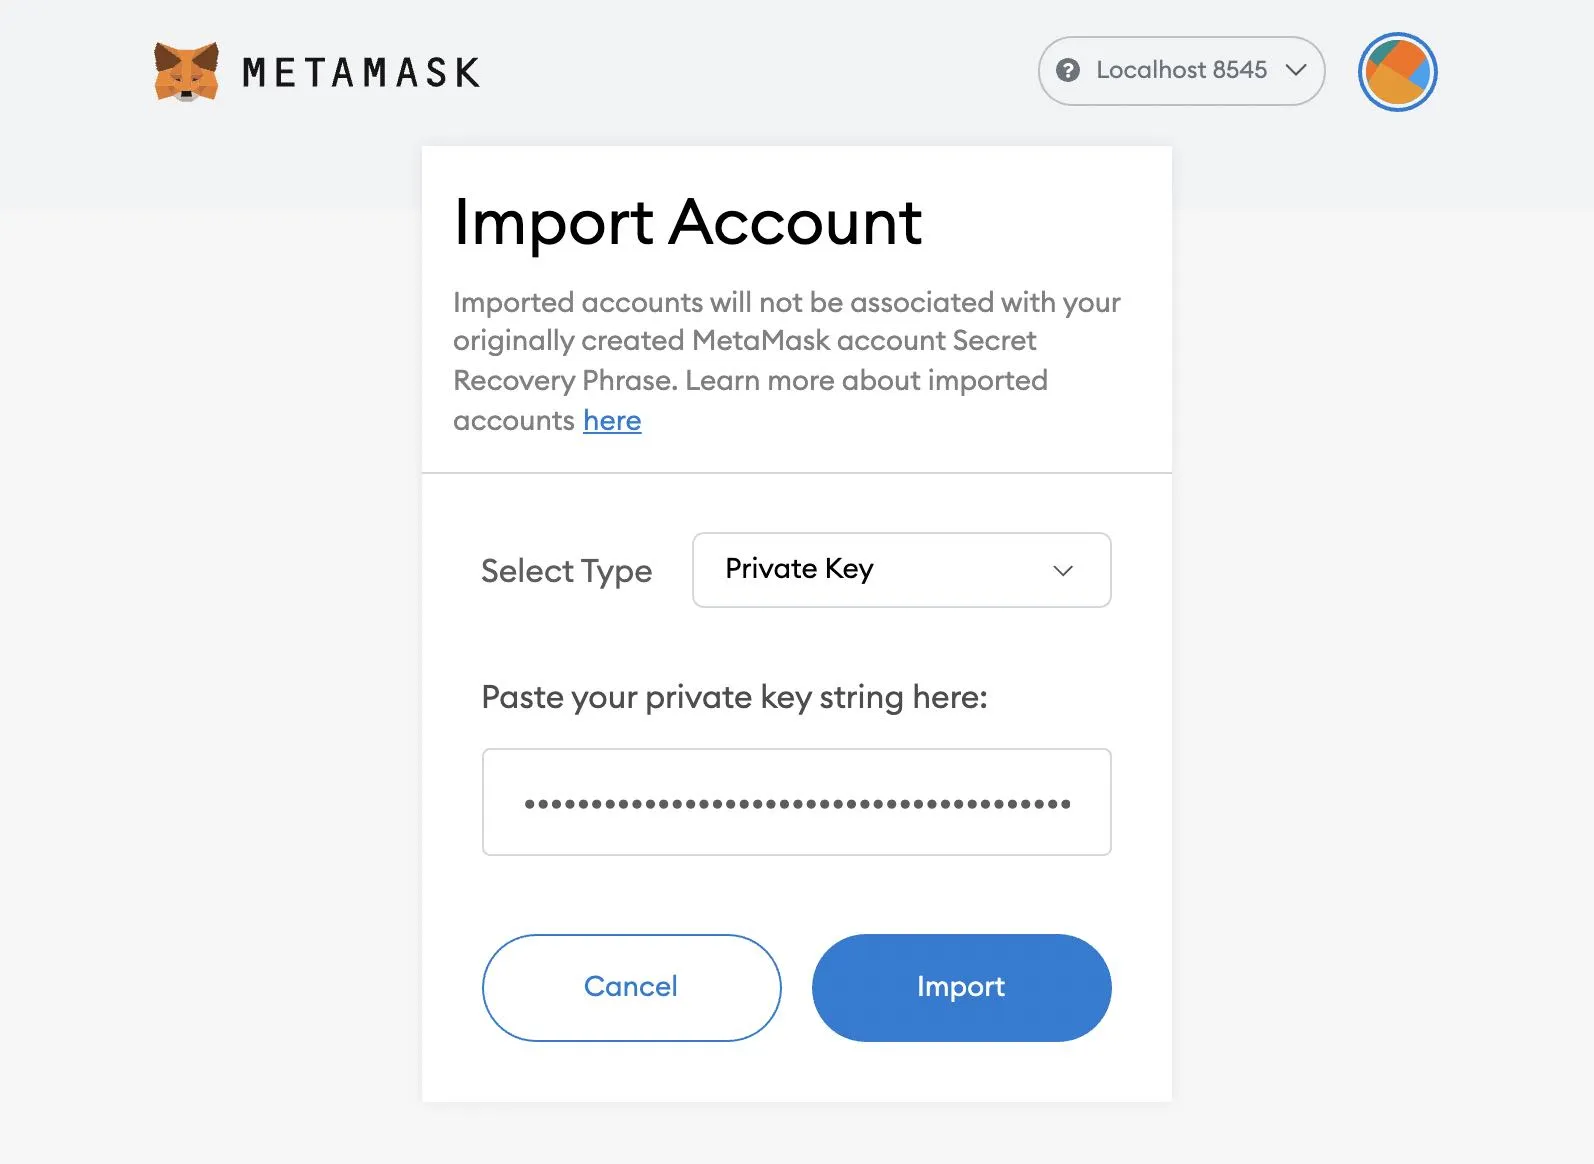
Once you are connected to Localhost 8545, click the icon at the top right to see your accounts. Select "Import Account."
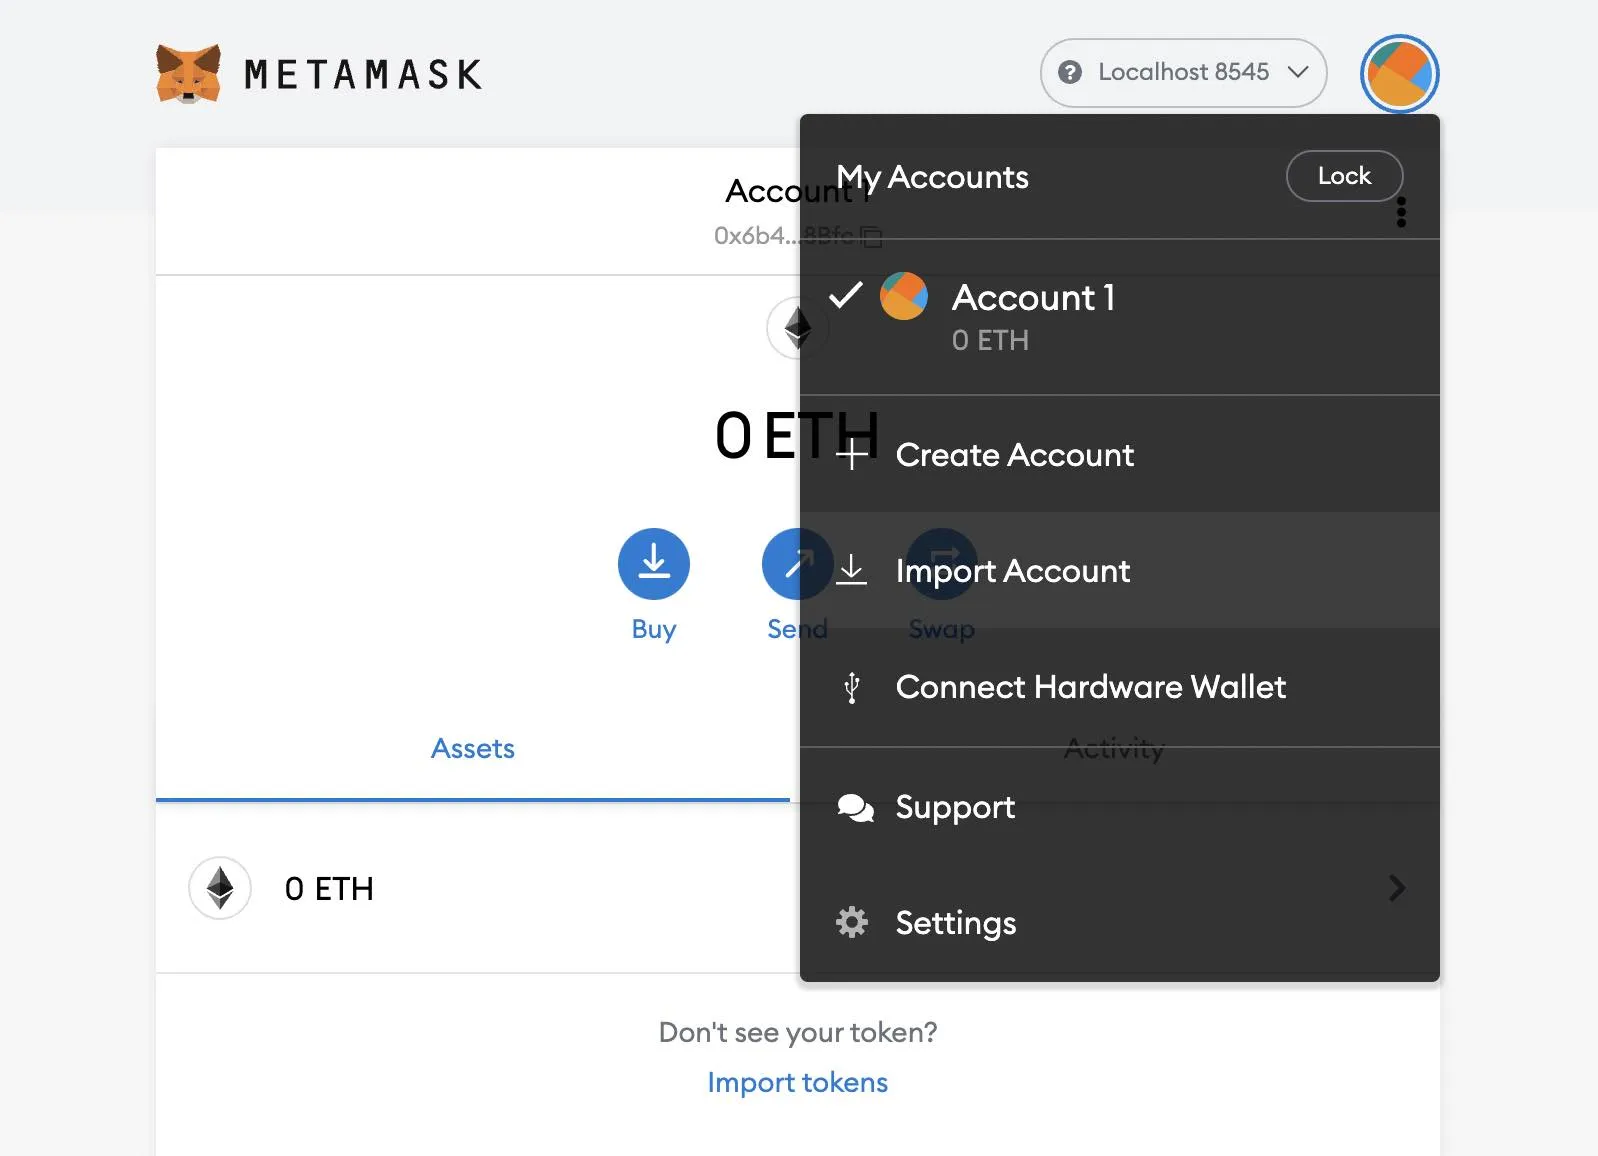
Go back to the list of accounts printed by pnpm hardhat node and copy the account's private keys. I'll be using Account #11.
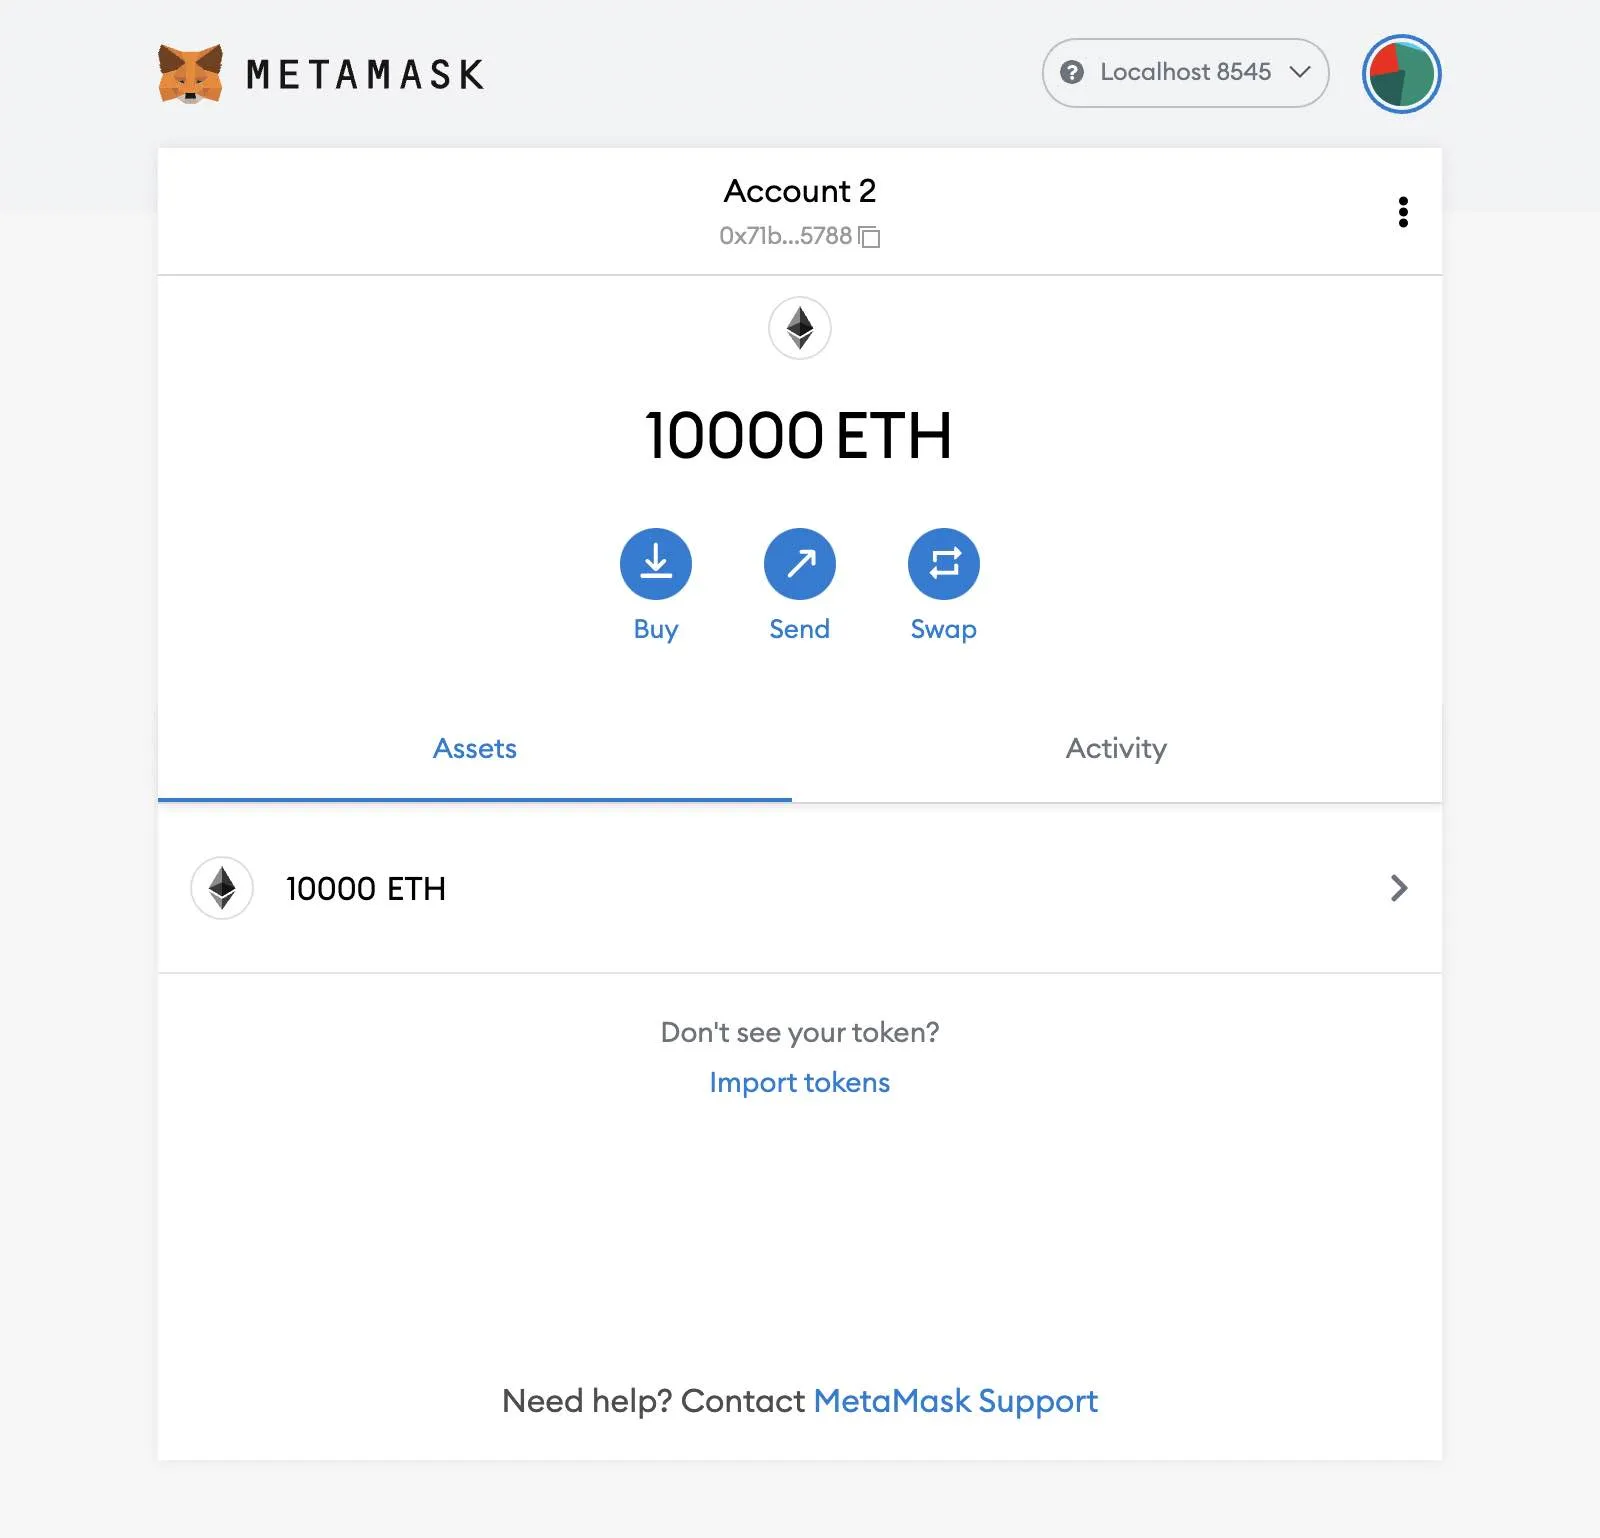
After importing the account you will see ether in the account.
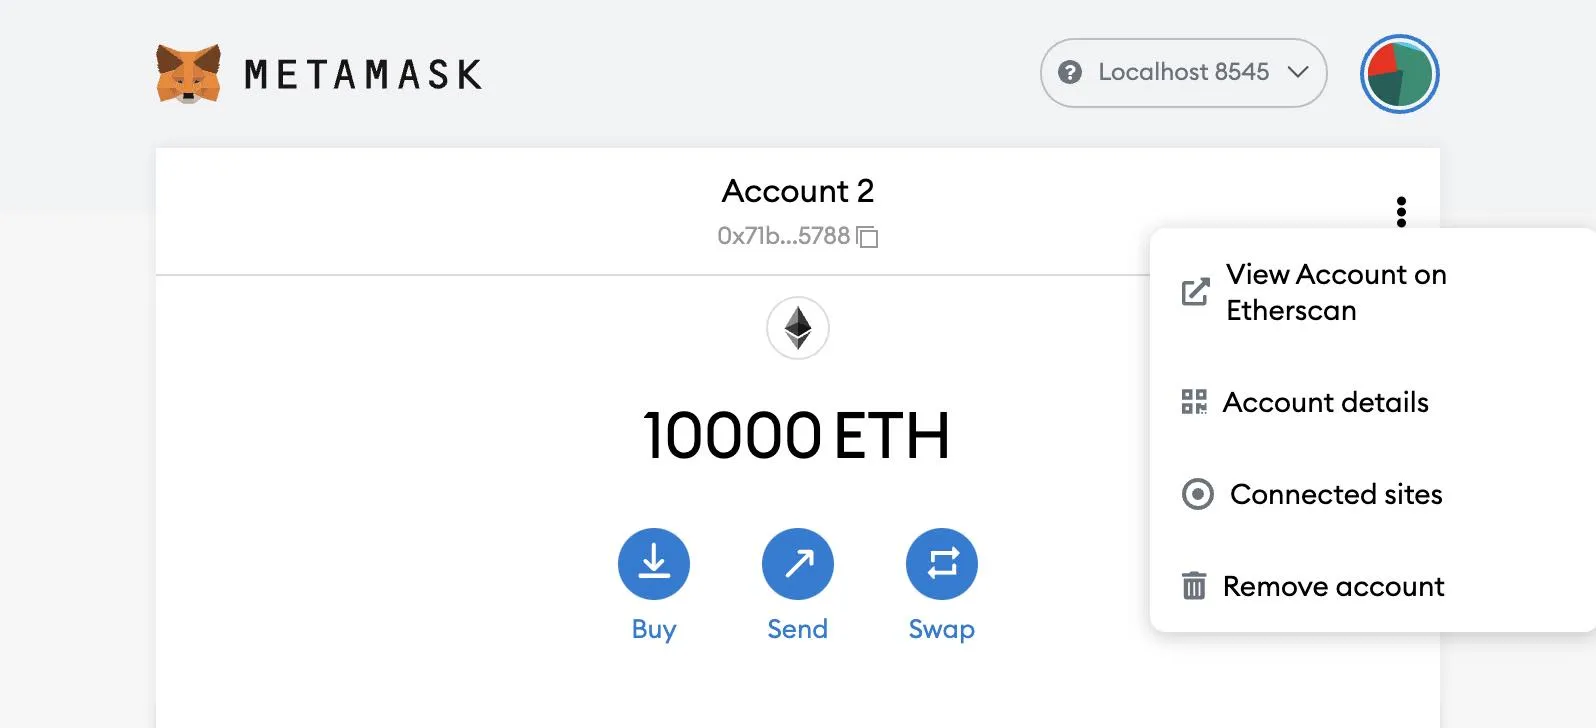
If you are using MetaMask for other purposes, it will be important to distinguish this account from an account that is actually holding funds. Go to "Account details."
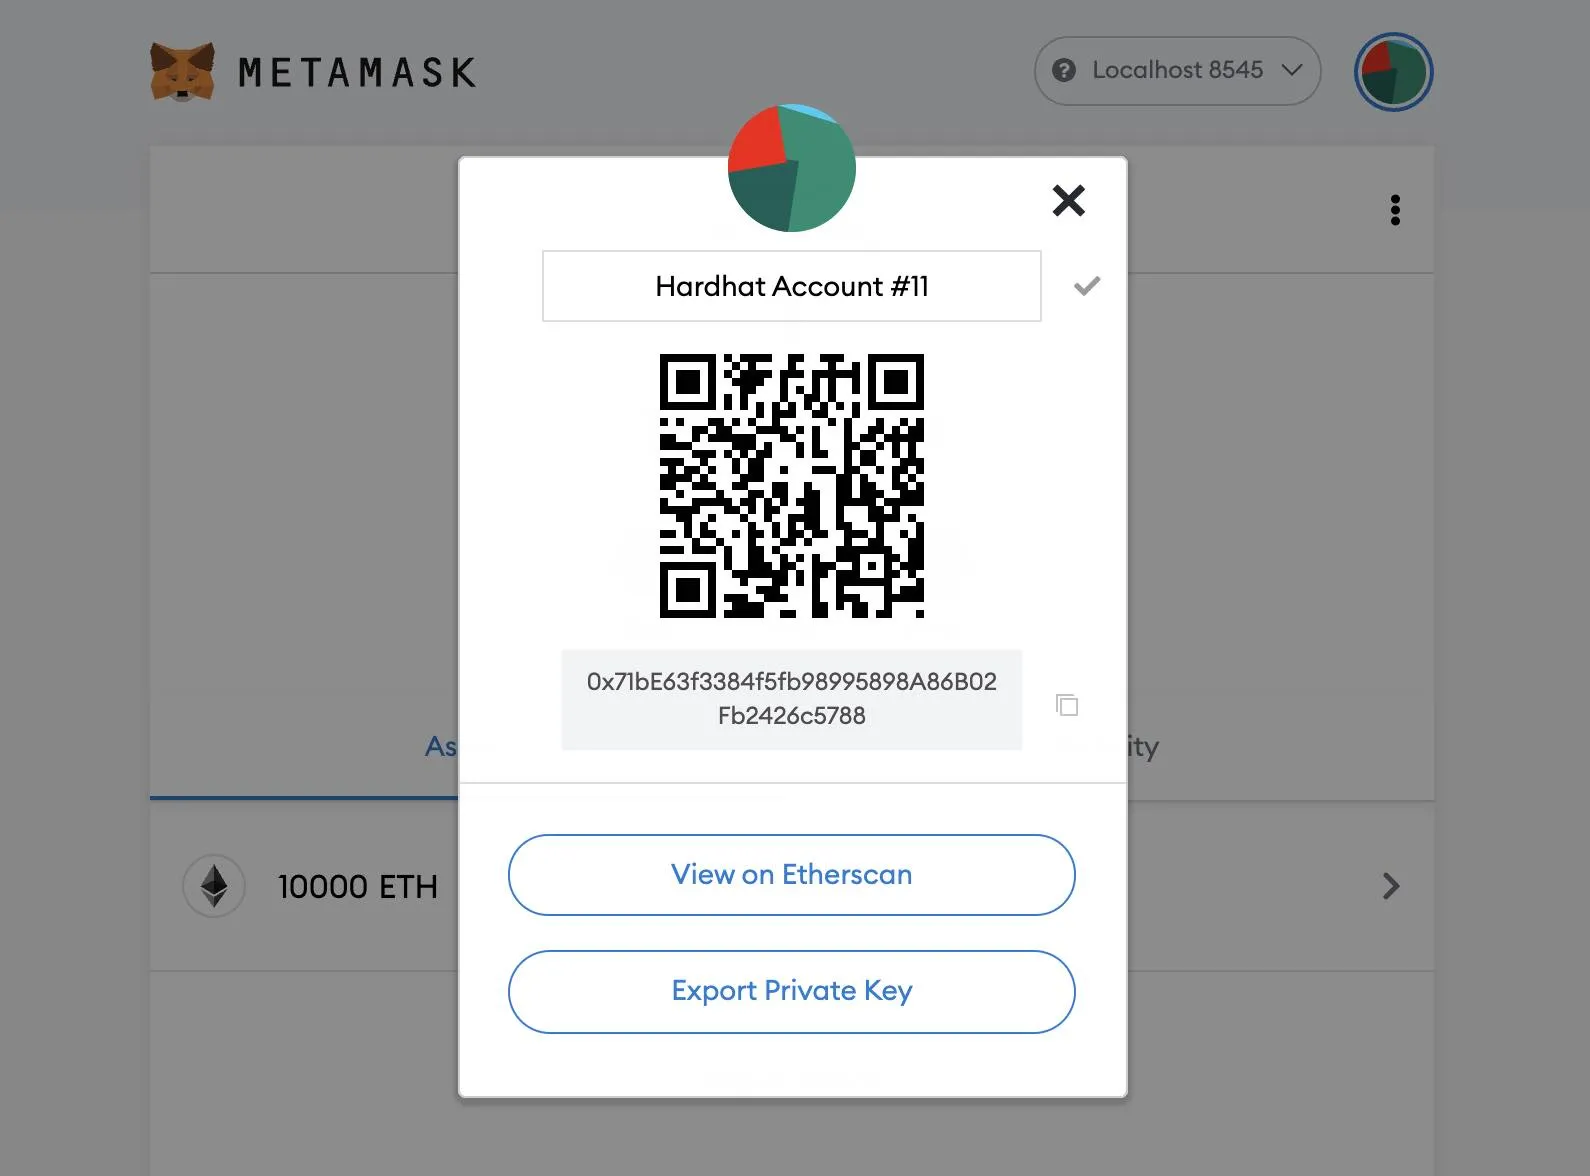
Click the pencil icon next to the account name to give it a more descriptive name.
Create React App
Set greeterAddress to the contract address logged out to the CLI when it was deployed. I have created an environment variable named VITE_GREETER_ADDRESS in a .env file. Any environment variables that need to be exposed on the client must be prefixed with VITE_.
// src/App.js

import { useState } from 'react'
import { ethers } from 'ethers'
import Greeter from './artifacts/contracts/Greeter.sol/Greeter.json'

const greeterAddress = import.meta.env.VITE_GREETER_ADDRESS

function App() { }

export default App
We'll import the useState hook and set the state to greeting with setGreetingValue. fetchGreeting will call the smart contract and read the current greeting value.
// src/App.js

import { useState } from 'react'
import { ethers } from 'ethers'
import Greeter from './artifacts/contracts/Greeter.sol/Greeter.json'

const greeterAddress = import.meta.env.VITE_GREETER_ADDRESS

function App() {
  const [greeting, setGreetingValue] = useState()

  async function requestAccount() {
    await window.ethereum.request({ method: 'eth_requestAccounts' })
  }

  async function fetchGreeting() {
    if (typeof window.ethereum !== 'undefined') {
      const provider = new ethers.providers.Web3Provider(window.ethereum)
      const contract = new ethers.Contract(greeterAddress, Greeter.abi, provider)
      try {
        const data = await contract.greet()
        setGreetingValue(data)
        console.log('Greeting: ', data)
        console.log('Contract Address: ', contract.address)
        console.log('Contract Network: ', contract.provider._network.name)
      } catch (err) {
        console.log("Error: ", err)
      }
    }
  }

  return (
    <div>
      <header>
        <h1>Ethers.js, Hardhat, Solidity</h1>
        <h2>and React, Alchemy, and MetaMask</h2>
      </header>

      <main>
        <h3>Greeting</h3>

        <button onClick={fetchGreeting}>
          Fetch Greeting
        </button>

        <div>{greeting}</div>
      </main>
    </div>
  )
}

export default App
I'll include Water.css in index.html for some nice looking CSS defaults.
<!-- index.html -->

<!DOCTYPE html>
<html lang="en">
  <head>
    <meta charset="UTF-8" />
    <link rel="icon" type="image/svg+xml" href="/vite.svg" />
    <meta name="viewport" content="width=device-width, initial-scale=1.0" />
    <link rel="stylesheet" href="https://cdn.jsdelivr.net/npm/water.css@2/out/water.css">
    <title>A First look at Ethers and Hardhat</title>
  </head>

  <body>
    <div id="root"></div>
    <script type="module" src="/src/main.jsx"></script>
  </body>
</html>
Start Development Server
Start the development server with pnpm dev.
pnpm devOpen localhost:3000.
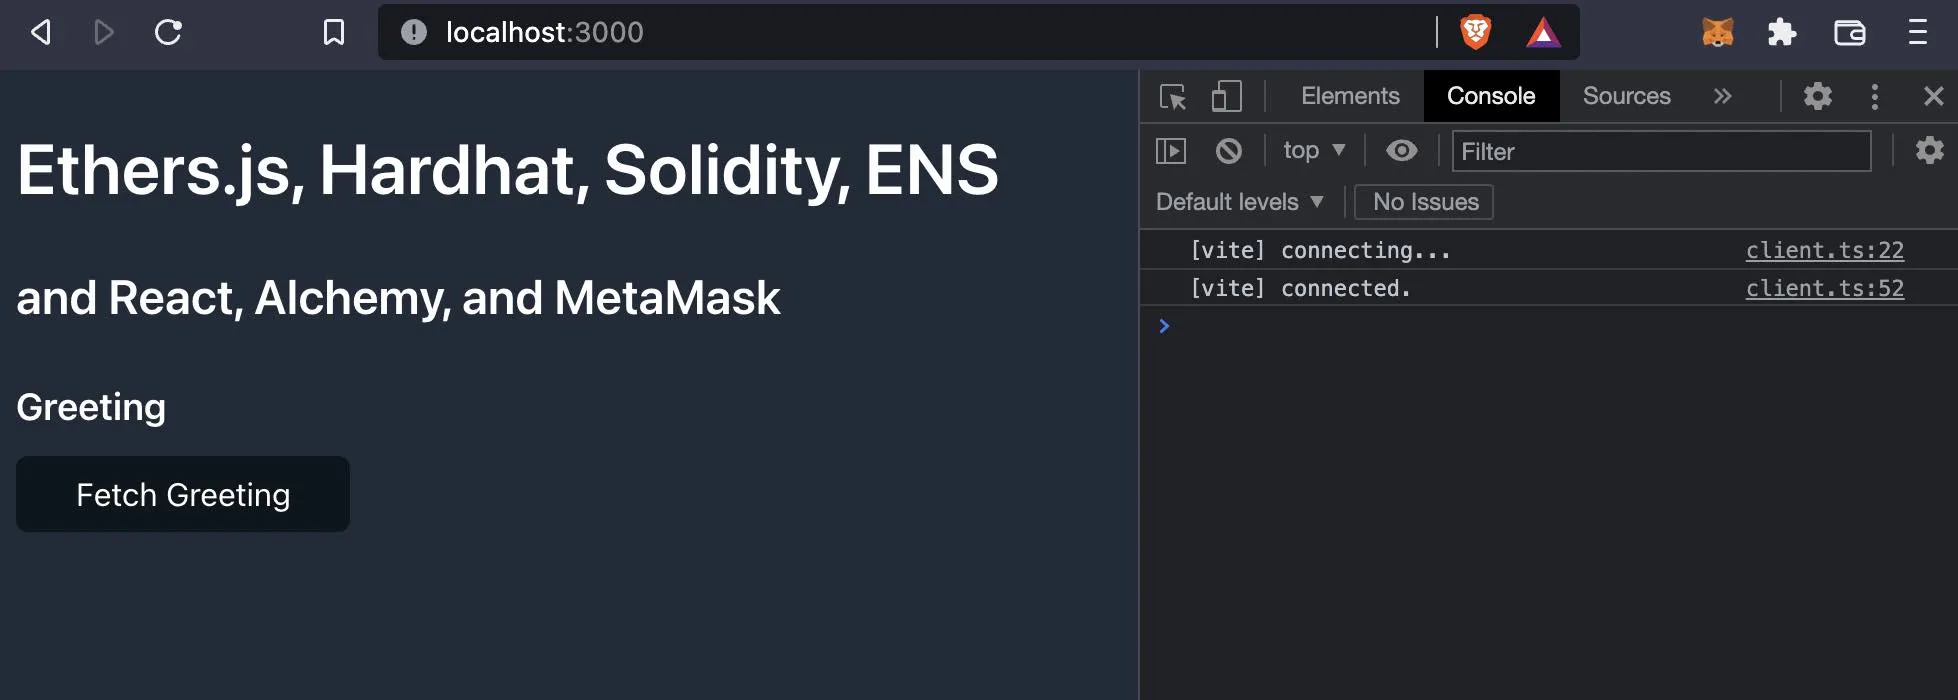
Click the "Fetch Greeting" button to display the greeting from the deployed contract.

setGreeting calls the smart contract and sends an update.
// src/App.js
import { useState } from 'react'
import { ethers } from 'ethers'
import Greeter from './artifacts/contracts/Greeter.sol/Greeter.json'
const greeterAddress = import.meta.env.VITE_GREETER_ADDRESS
function App() {
const [greeting, setGreetingValue] = useState()
async function requestAccount() {
await window.ethereum.request({ method: 'eth_requestAccounts' })
}
async function fetchGreeting() {
if (typeof window.ethereum !== 'undefined') {
const provider = new ethers.providers.Web3Provider(window.ethereum)
const contract = new ethers.Contract(greeterAddress, Greeter.abi, provider)
try {
const data = await contract.greet()
setGreetingValue(data)
console.log('Greeting: ', data)
console.log('Contract Address: ', contract.address)
console.log('Contract Network: ', contract.provider._network.name)
} catch (err) {
console.log("Error: ", err)
}
}
}
async function setGreeting() {
if (!greeting) return
if (typeof window.ethereum !== 'undefined') {
await requestAccount()
const provider = new ethers.providers.Web3Provider(window.ethereum)
const signer = provider.getSigner()
const contract = new ethers.Contract(greeterAddress, Greeter.abi, signer)
const transaction = await contract.setGreeting(greeting)
await transaction.wait()
fetchGreeting()
}
}
return (
<div>
<header>
<h1>Ethers.js, Hardhat, Solidity</h1>
<h2>and React, Alchemy, and MetaMask</h2>
</header>
<main>
<h3>Greeting</h3>
<button onClick={fetchGreeting}>
Fetch Greeting
</button>
<div>{greeting}</div>
<input
onChange={e => setGreetingValue(e.target.value)}
placeholder="Set greeting"
/>
<button onClick={setGreeting}>
Set Greeting
</button>
</main>
</div>
)
}
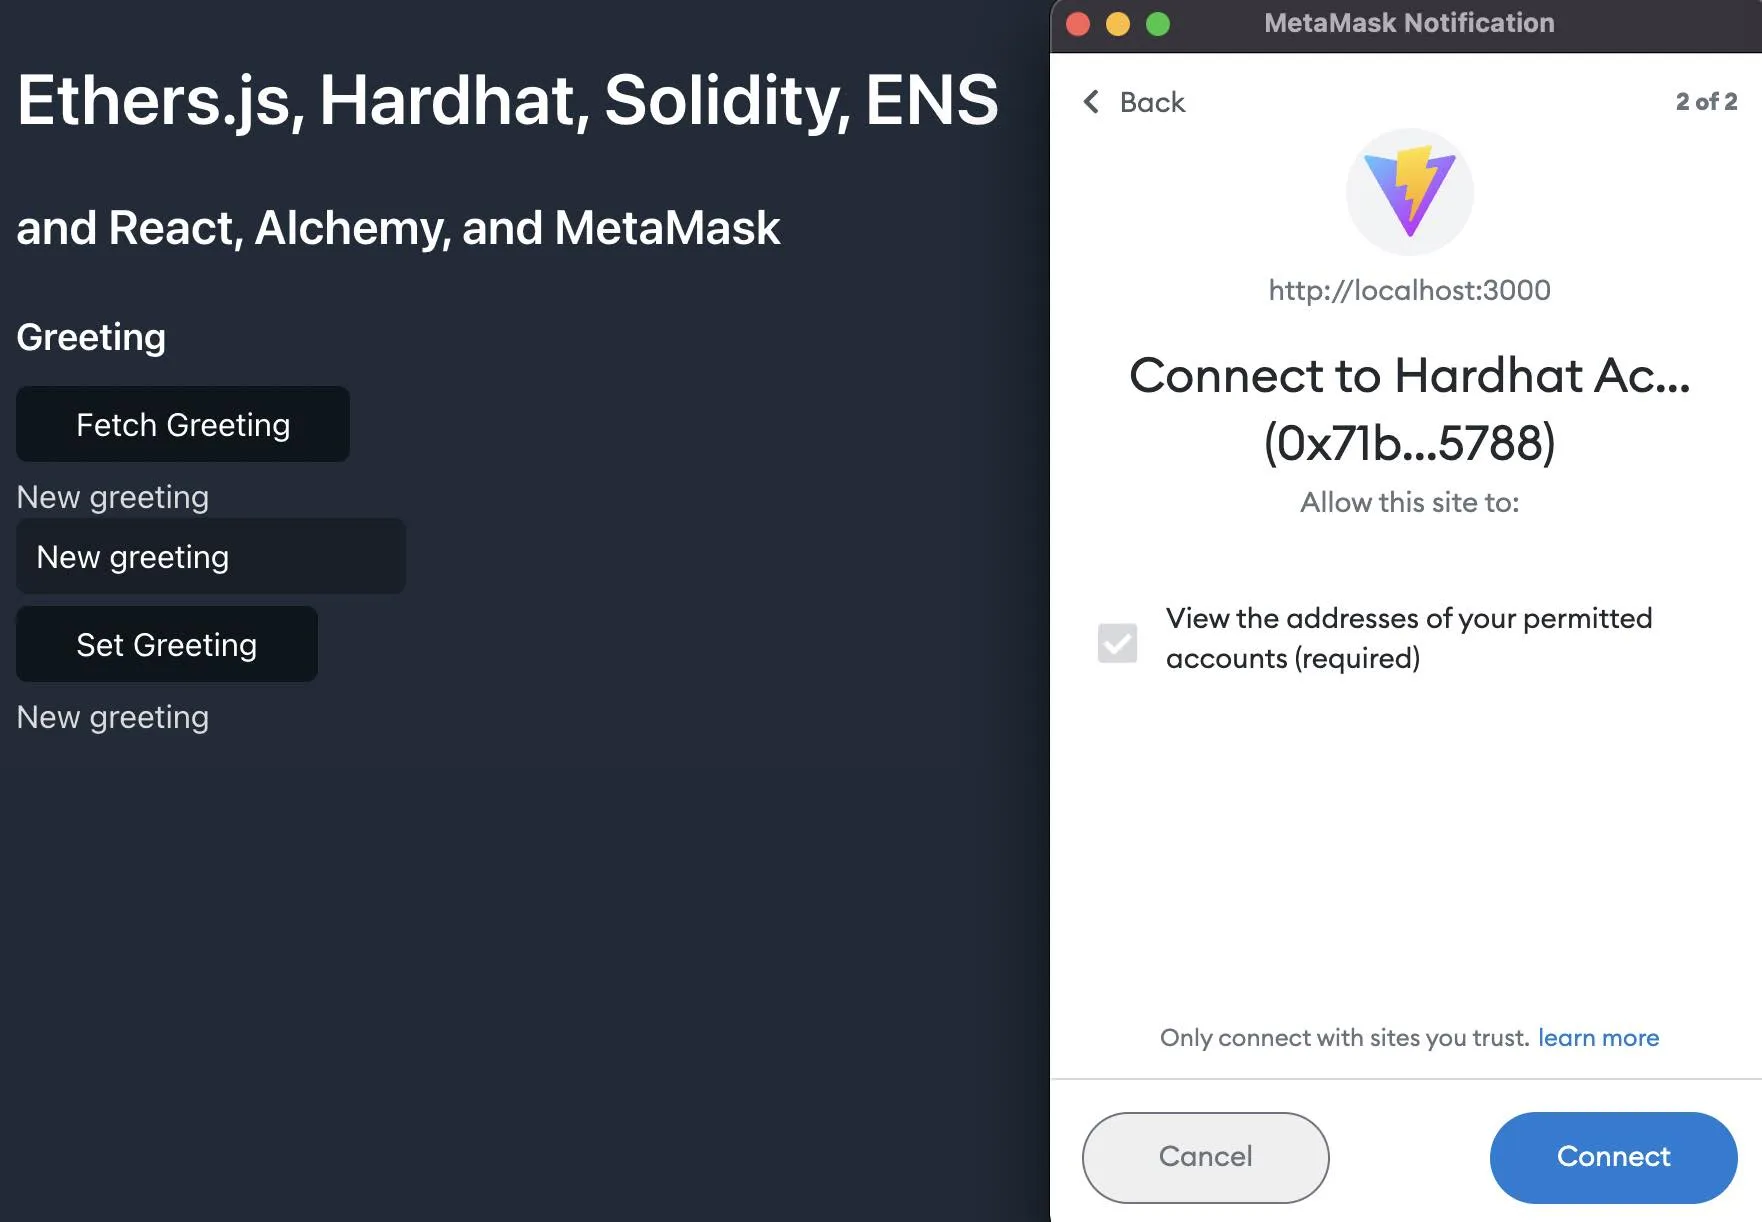
export default AppConnect React App to MetaMask
Select account to connect with MetaMask.
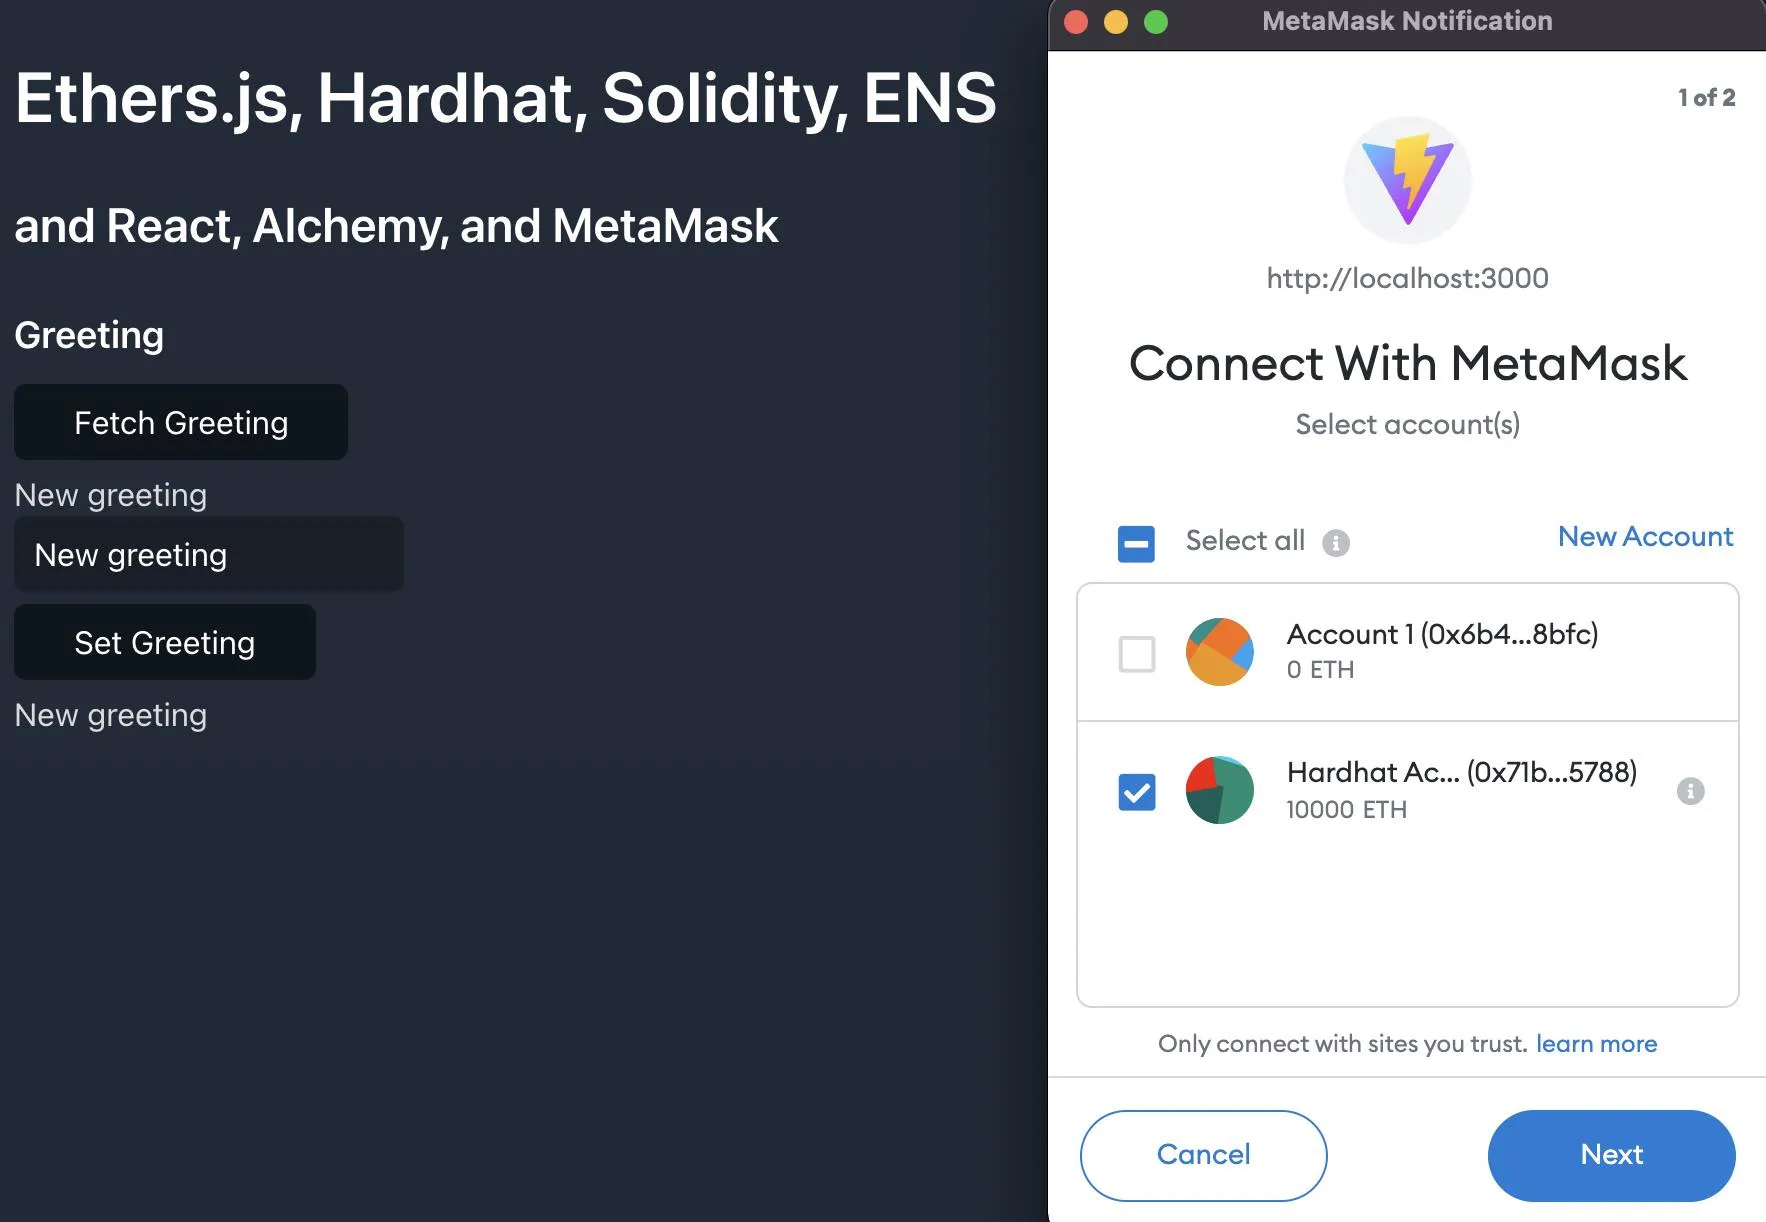
Connect to the account.
Enter input and click Set Greeting. You will be asked to pay a gas fee.
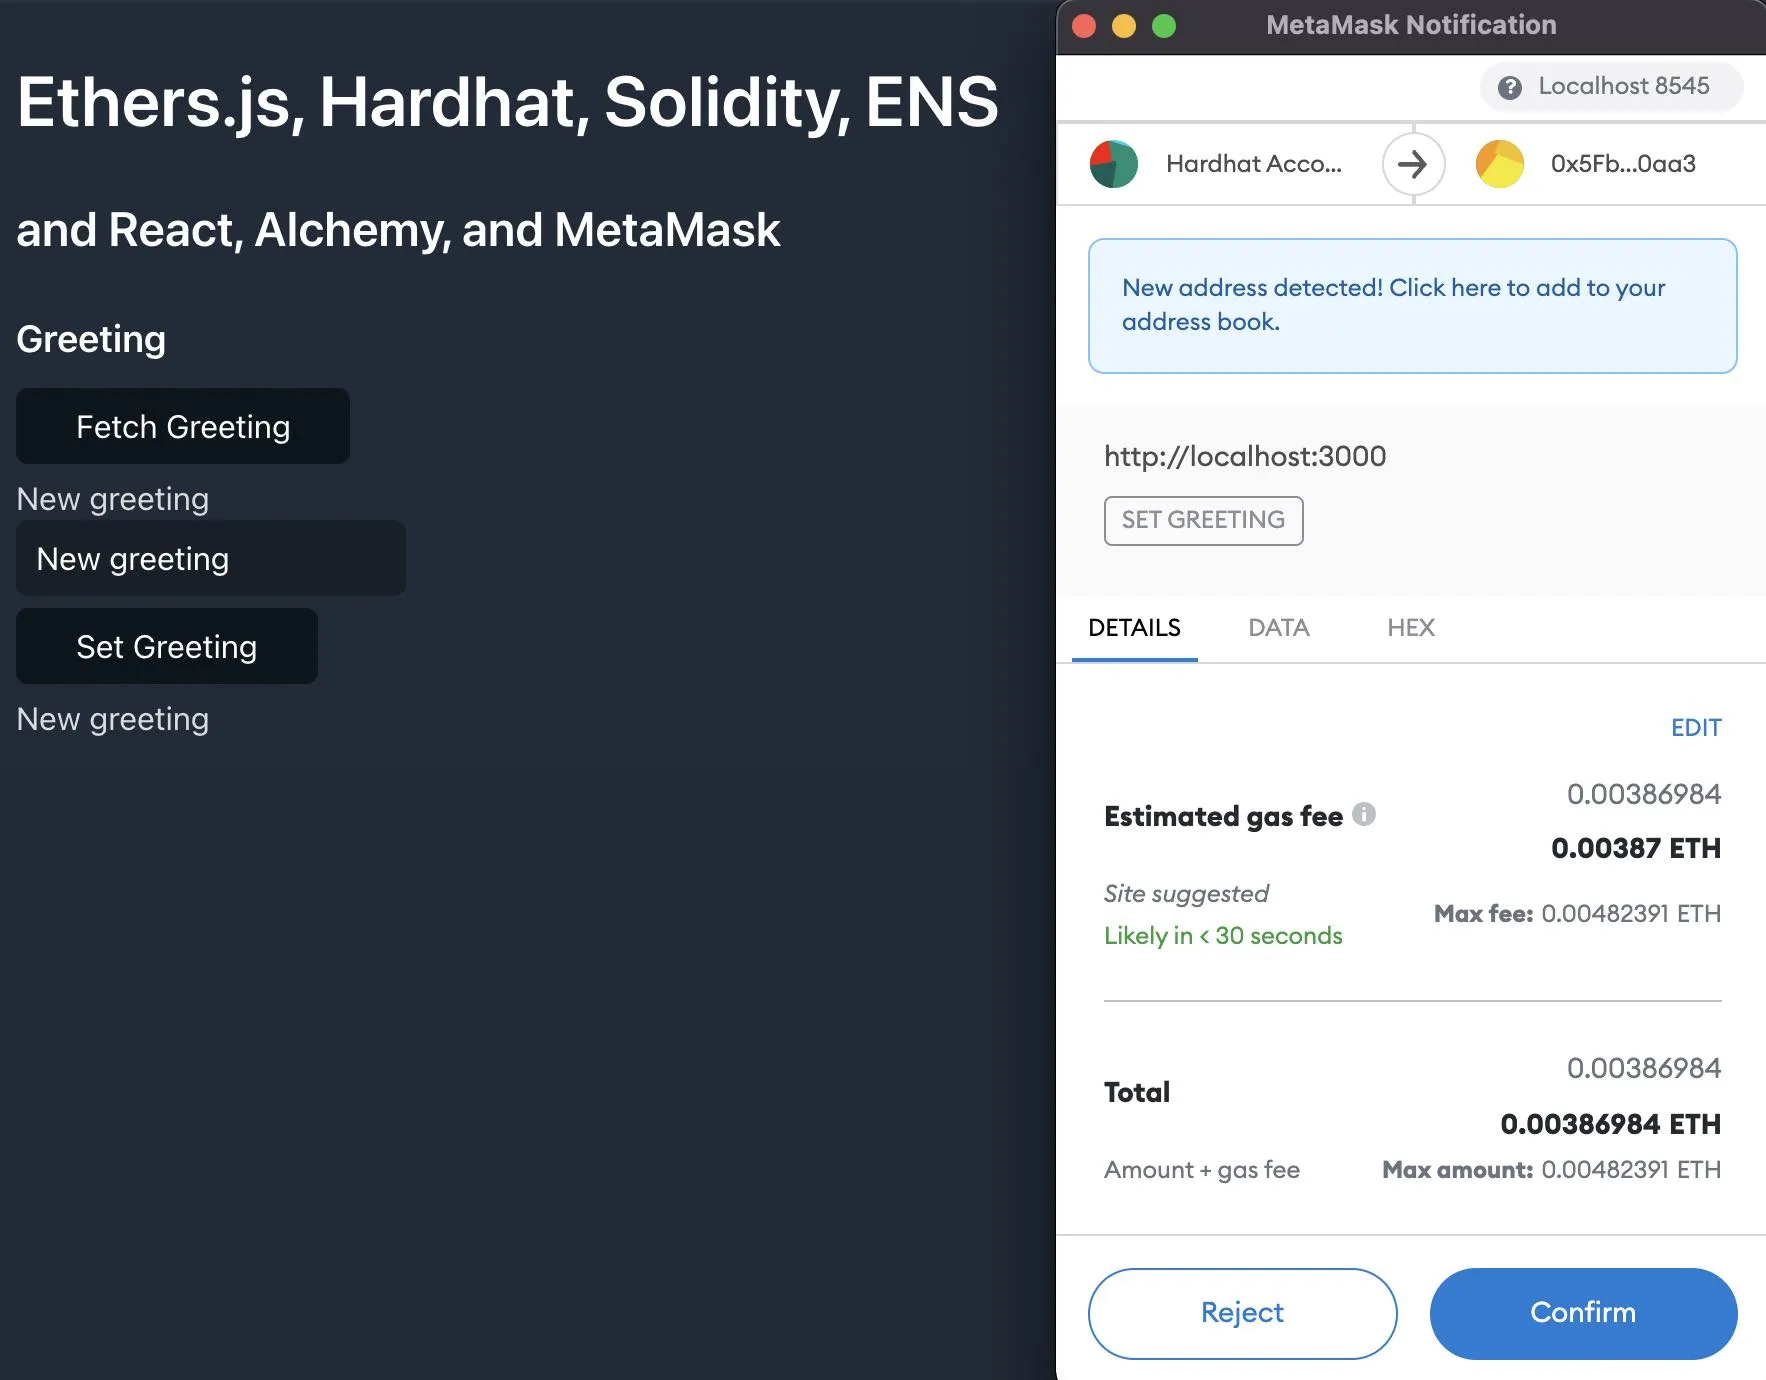
The greeting value will be set to the new inputted greeting.
Deploy to Ropsten Testnet
Ethereum provides test networks like Ropsten, Rinkeby, or Kovan that we can use to deploy a publicly accessible version of our contract without having to deploy it to the mainnet.
Connect MetaMask to Ropsten
Update your MetaMask wallet to connect to the Ropsten network.
We can get access to Ropsten and other test networks by using a service like Infura, Alchemy, or QuickNode.
Create an Alchemy Account
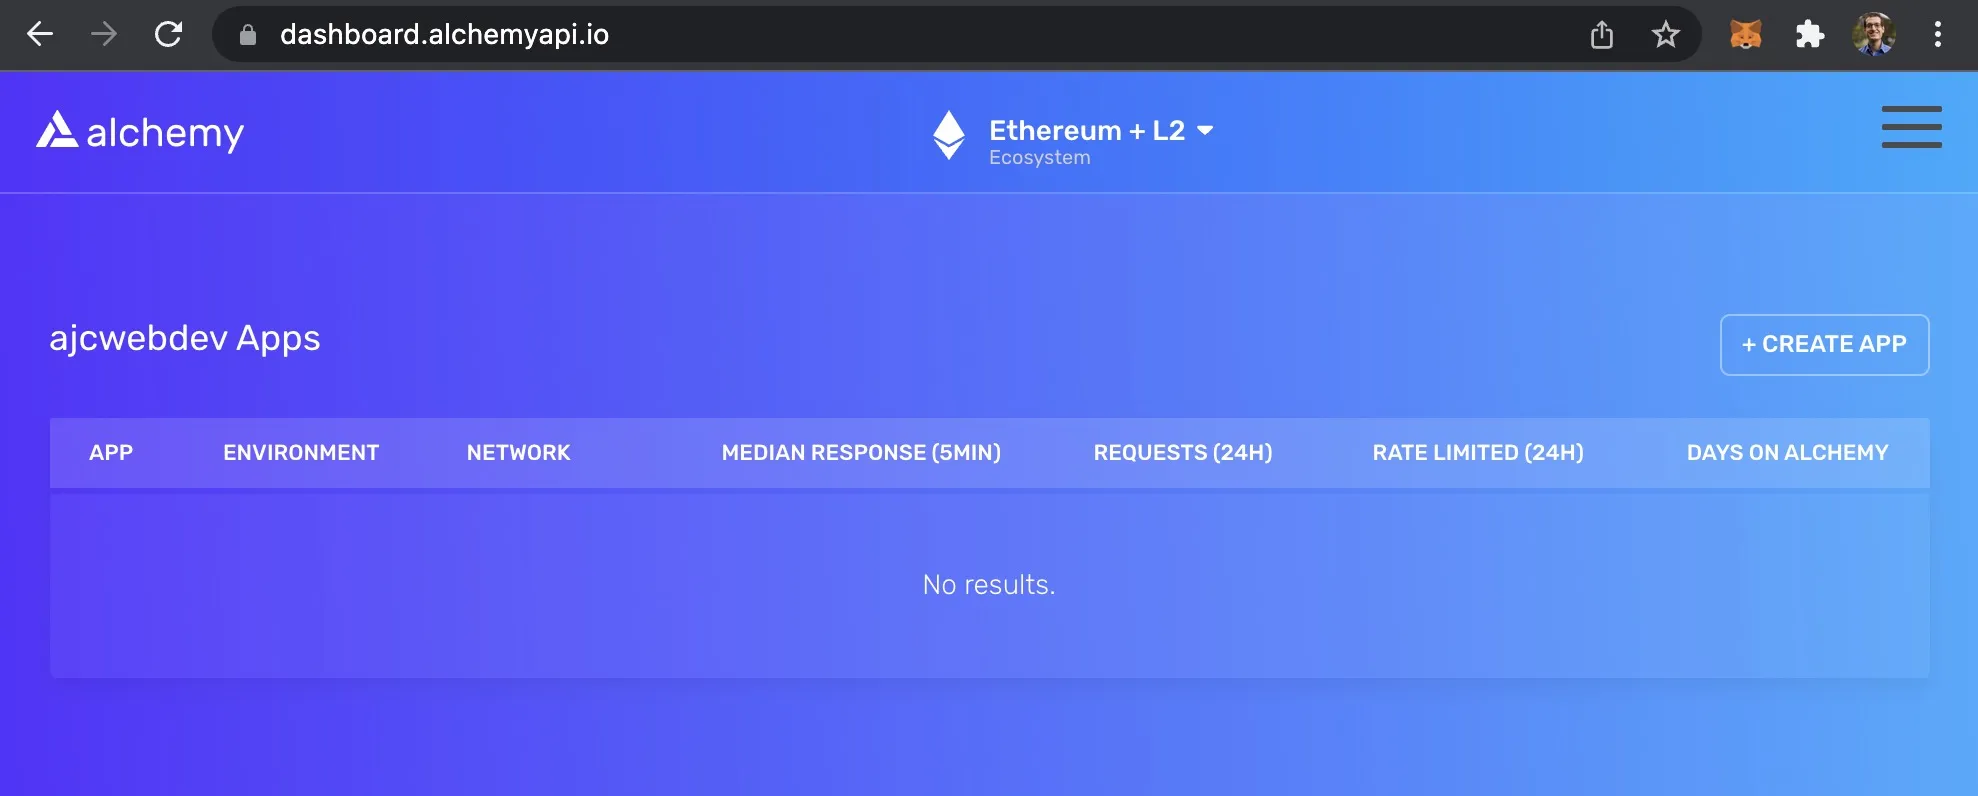
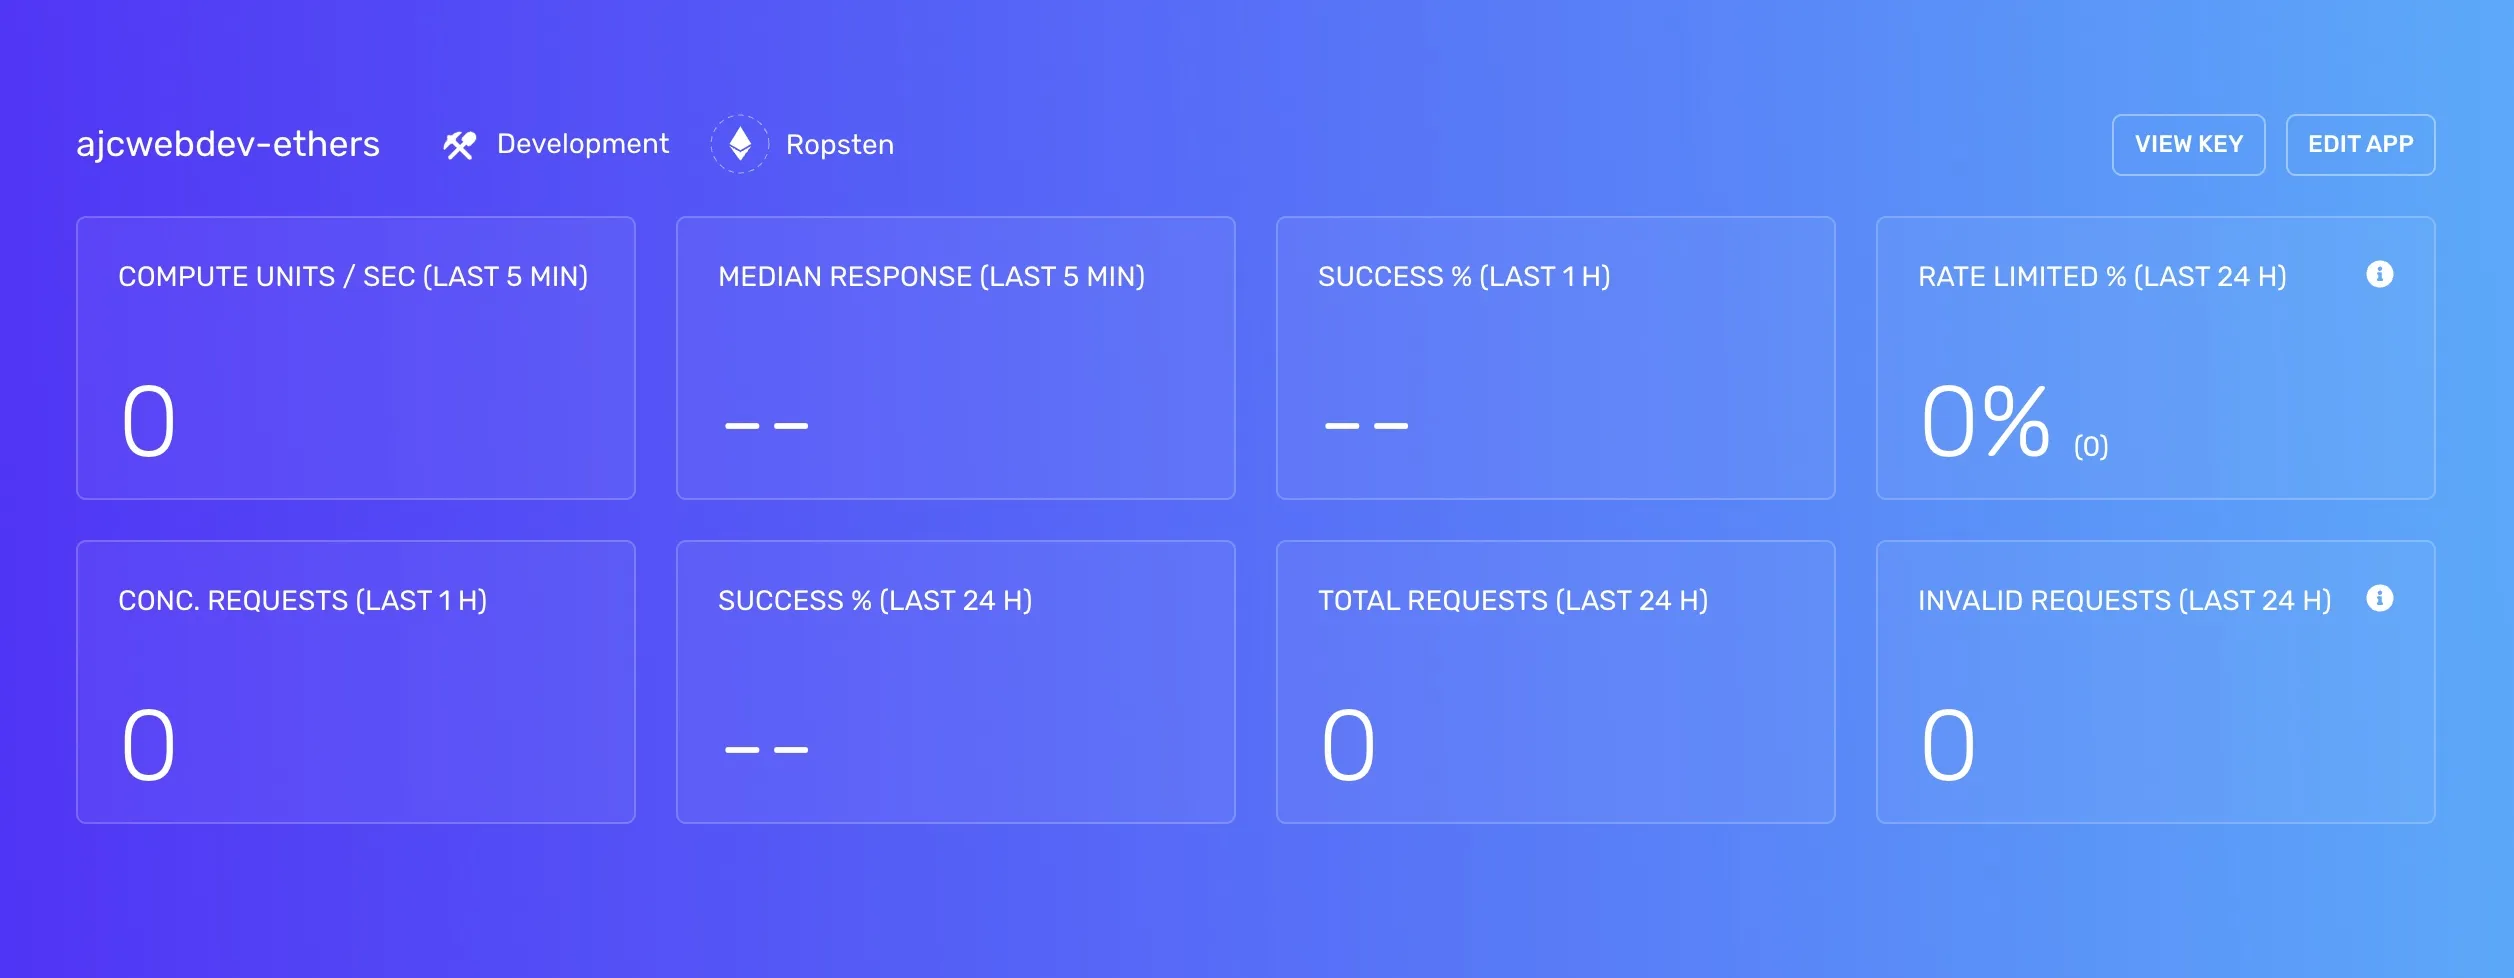
Alchemy Supernode is a blockchain API that can connect to various tools in the blockchain ecosystem such as Ethereum, Polygon, Arbitrum, Optimism, and Flow. It provides common node functionality including JSON-RPC support with built in reliability, data correctness and scalability. After creating an account, you will see your dashboard.
Create an Alchemy Application
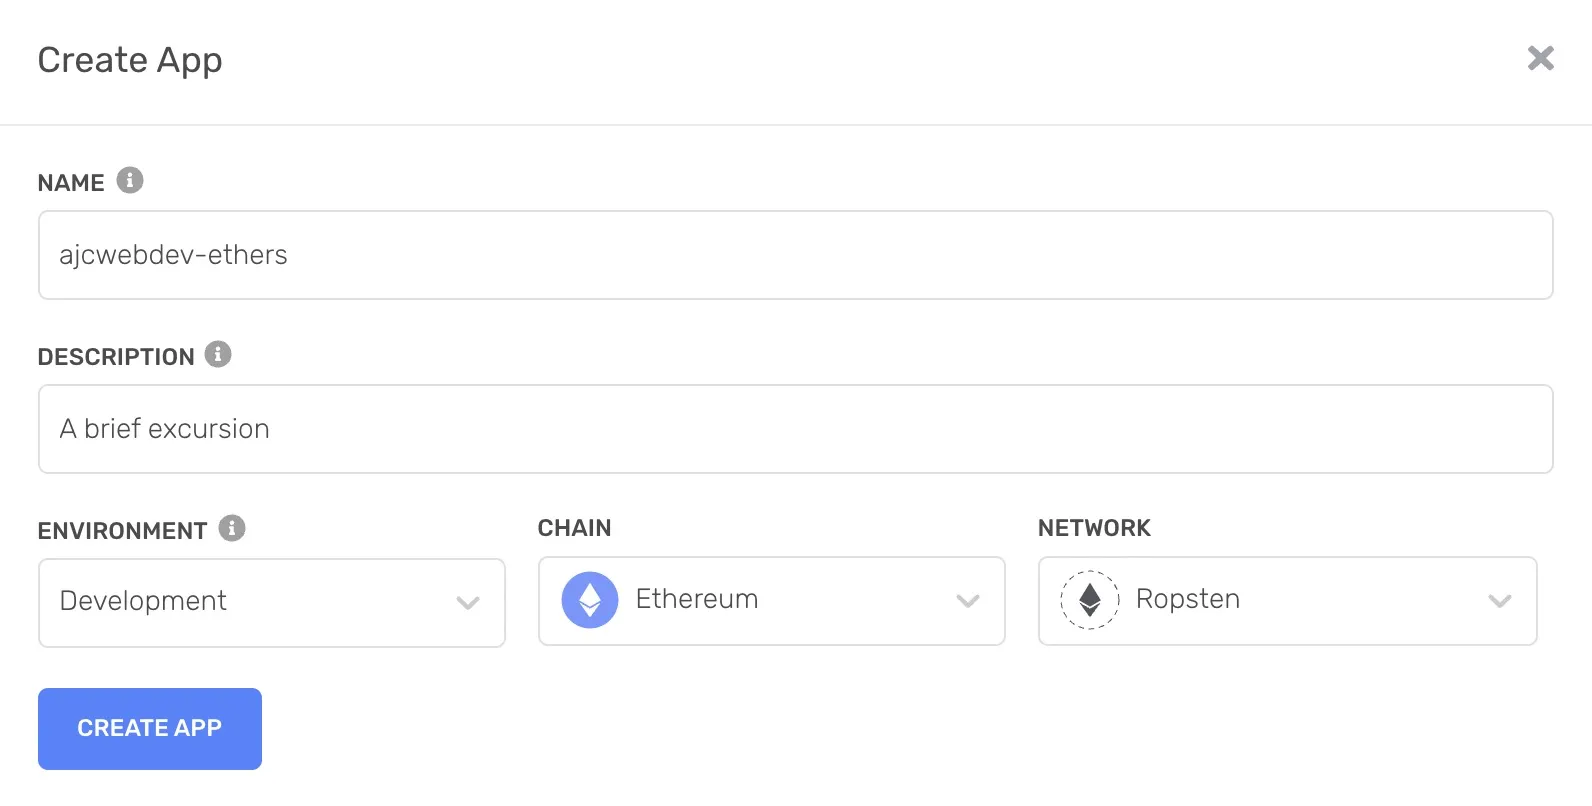
Click Create App and give your app a name and description. Select development for the environment, Ethereum for the chain, and Ropsten for the network.
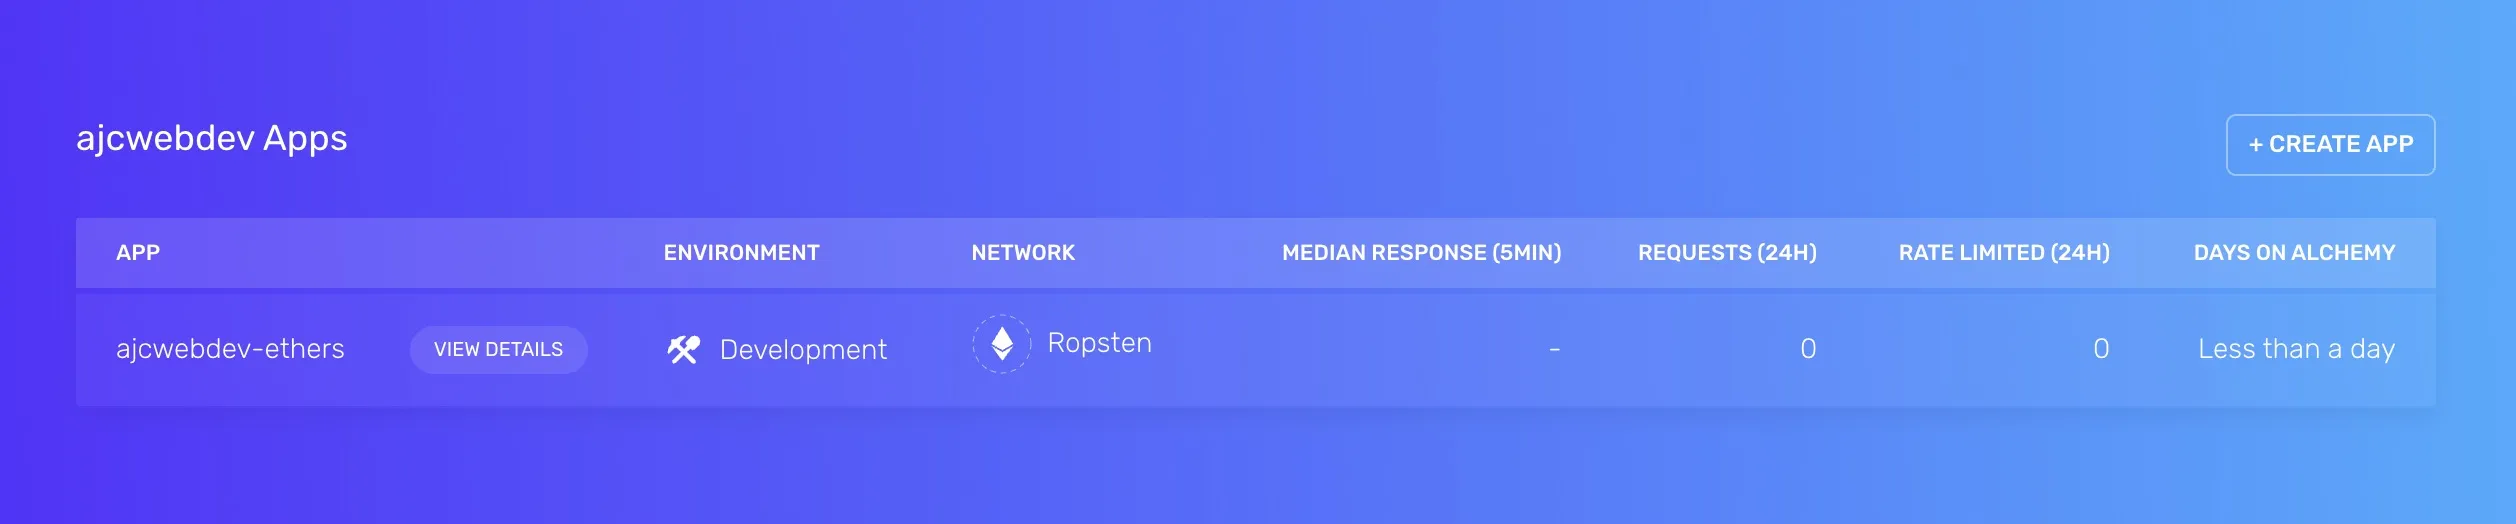
After creating the app you will see it appear in your dashboard.
Get Alchemy Key
Click the name of the app to see more details.
Click View Key to see your endpoints.
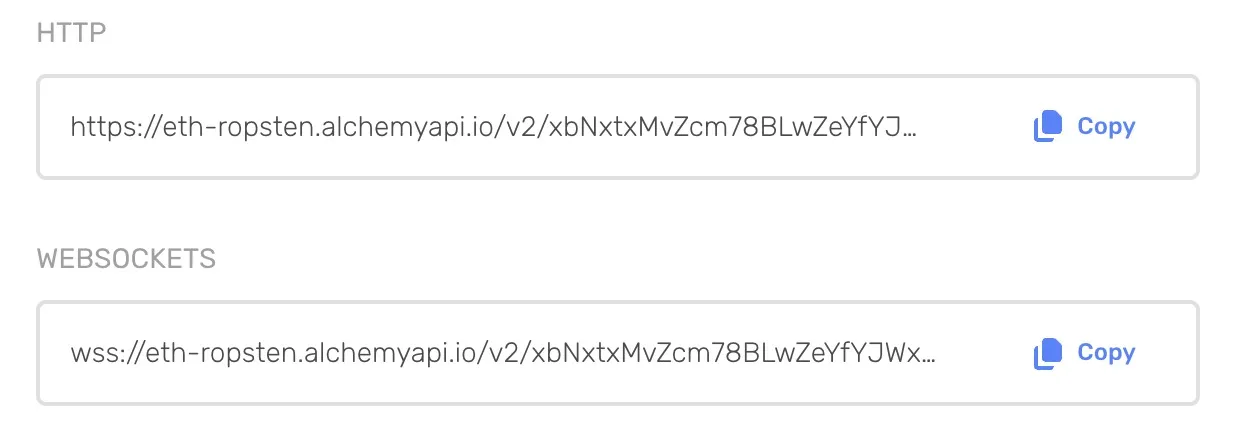
The https endpoint will look something like this:
https://eth-ropsten.alchemyapi.io/v2/PROJECT_IDClick Edit App and add the account address from App.jsx to the allowed accounts.
Add Alchemy Endpoint to Hardhat Configuration
Open hardhat.config.js and add networks property.
// hardhat.config.js

require("@nomiclabs/hardhat-waffle")
require('dotenv').config()

const { ALCHEMY_URL, ALCHEMY_KEY } = process.env

task("accounts", "Prints the list of accounts", async (taskArgs, hre) => {
  const accounts = await hre.ethers.getSigners()

  for (const account of accounts) {
    console.log(account.address)
  }
})

/**
 * @type import('hardhat/config').HardhatUserConfig
 */
module.exports = {
  solidity: "0.8.7",
  defaultNetwork: "hardhat",
  paths: {
    artifacts: './src/artifacts',
  },
  networks: {
    hardhat: {},
    ropsten: {
      url: `${ALCHEMY_URL}`,
      accounts: [`0x` + `${ALCHEMY_KEY}`]
    }
  }
}
Deploy Contract to Ropsten
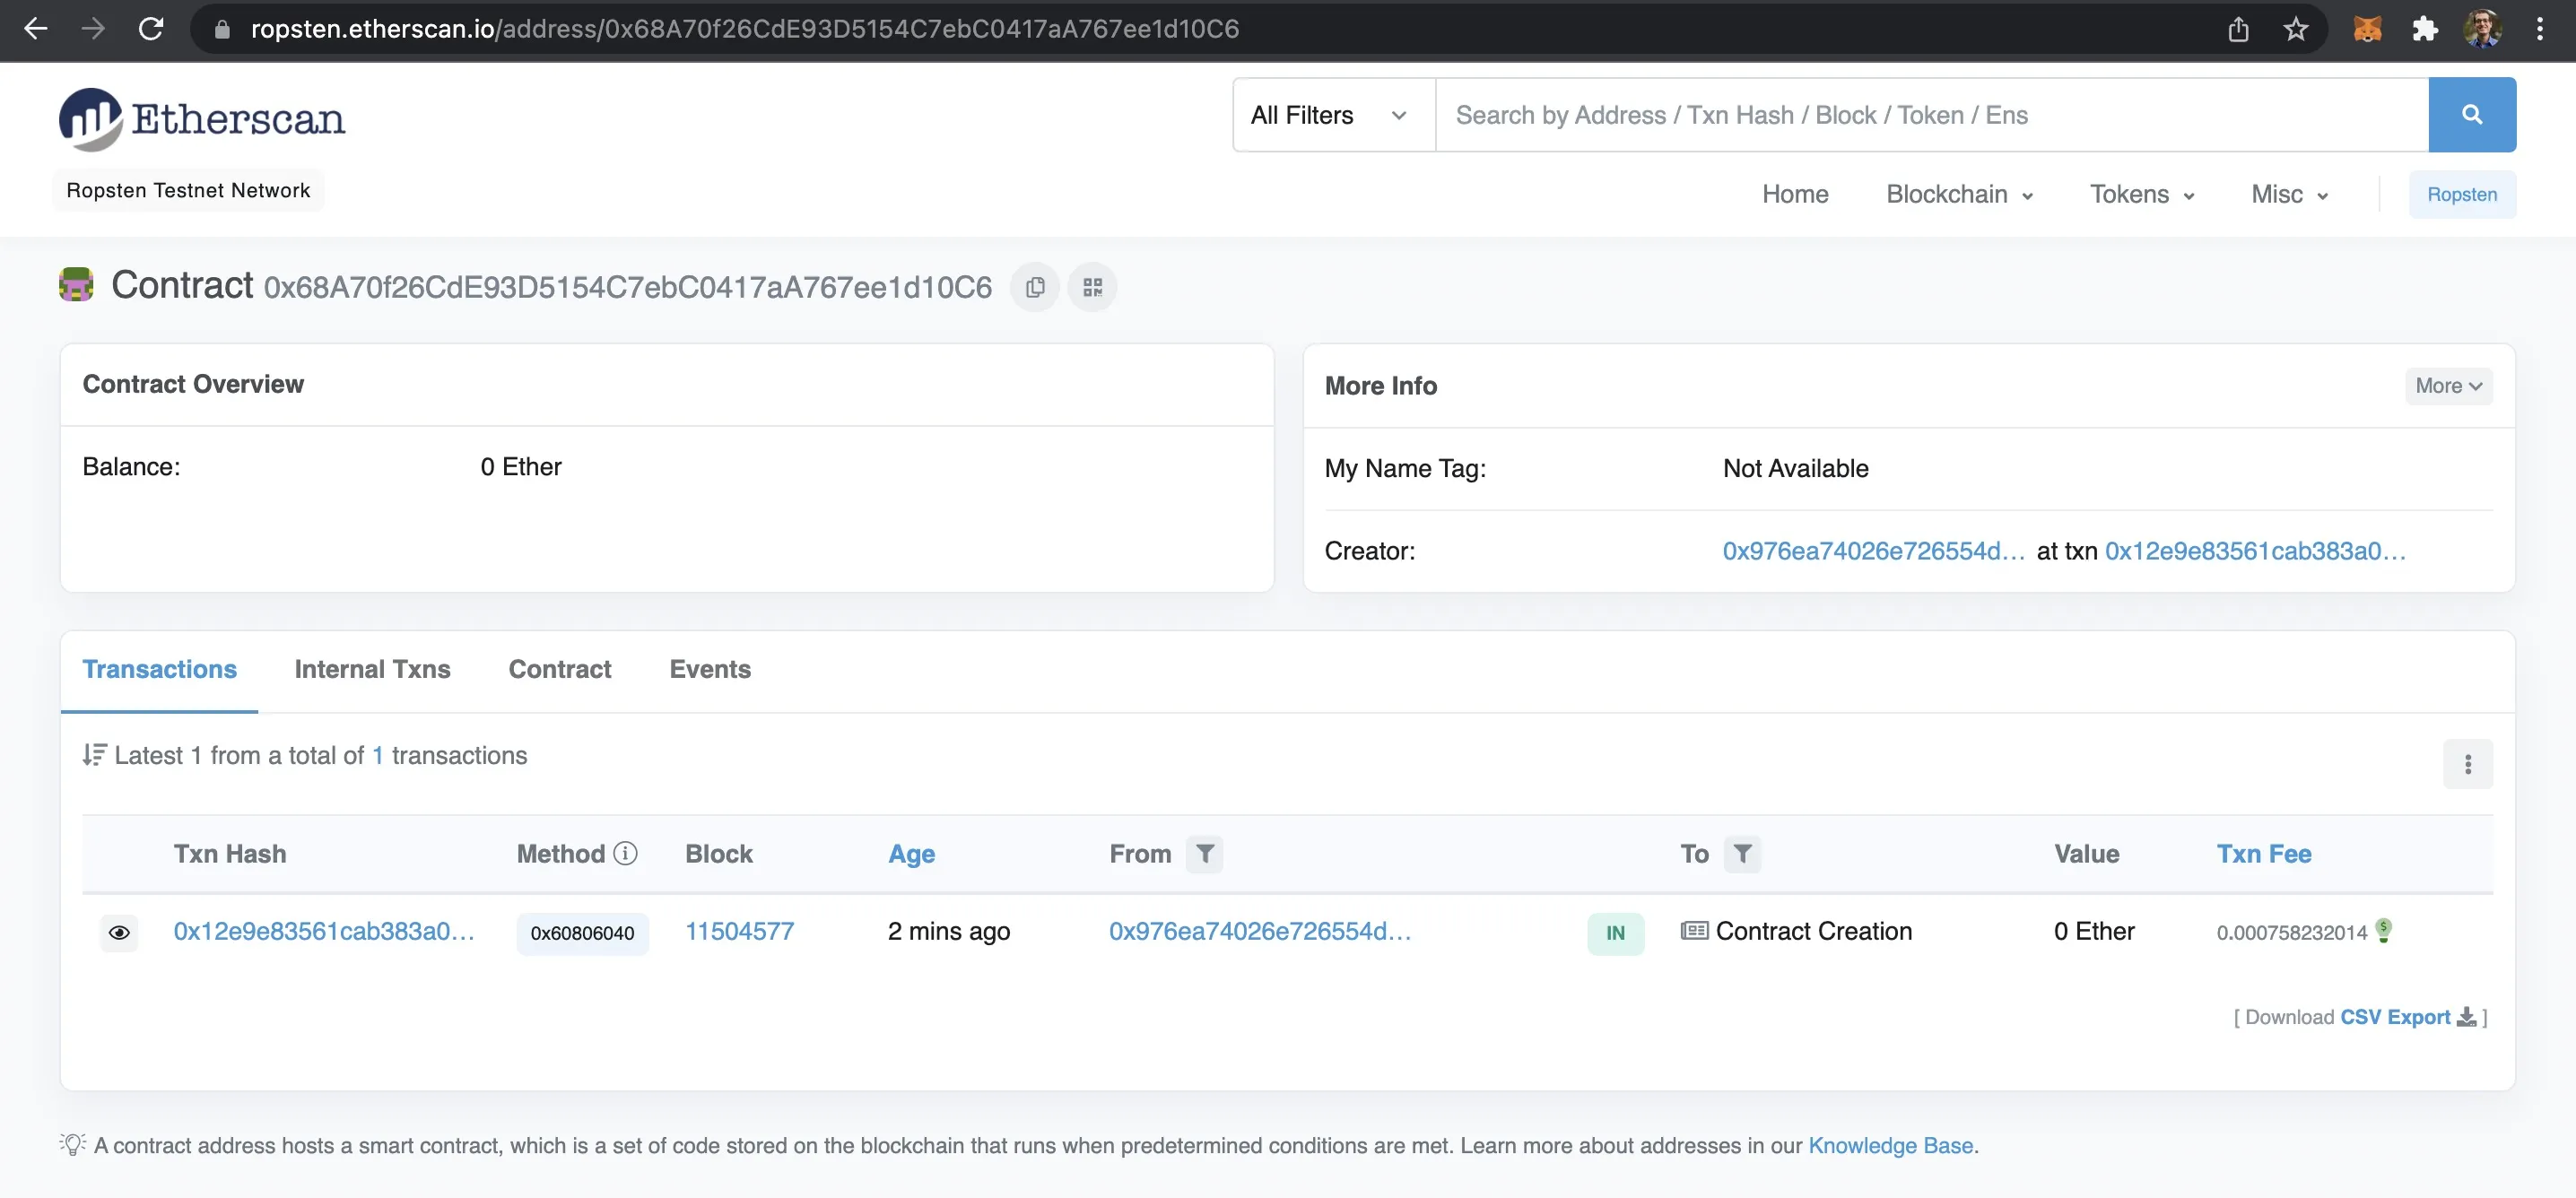
Send yourself test Ether by visiting a test faucet like faucet.ropsten.be. Run the following script to deploy.
pnpm hardhat run scripts/deploy.js \
  --network ropsten
Greeter deployed to 0x42839A6cD421B0C29AcD3FB900feAa6a76f34684 address
Greeter deployed by "<SignerWithAddress 0x71bE63f3384f5fb98995898A86B02Fb2426c5788>" signer
Deploy transaction hash: 0x9f5875c939d804501767690d843aefb05d91f4b1f5d34d477dbe6d7327c83ca4
Deploy transaction block hash: nullOnce your contract is deployed you can view the live contract on Etherscan Ropsten Testnet Explorer.