# A First Look at create-t3-app
> create-t3-app is a fullstack, typesafe React framework with Next.js, tRPC, Prisma, and Tailwind deployed on Vercel and Fly.
- **Collection:** Blog post
- **Published:** 2022-08-13
- **Author:** Anthony Campolo
- **Canonical URL:** https://ajcwebdev.com/first-look-create-t3-app/
- **Markdown URL:** https://ajcwebdev.com/first-look-create-t3-app/index.md
- **JSON URL:** https://ajcwebdev.com/first-look-create-t3-app/index.json
---
> ___All of this project's code can be found in the [First Look monorepo](https://github.com/ajcwebdev/a-first-look/tree/main/backend/t3/) on my GitHub.___
## Introduction
[`create-t3-app`](https://create.t3.gg/) is a fullstack React framework and CLI that has emerged as an evolution of the T3 stack recommended on Theo Browne's website [`init.tips`](https://init.tips/). It's described by its creators as "kind of a template," which is meant to stress that it is ["NOT a template"](https://x.com/t3dotgg/status/1544394504685645824).
### Why the t3 Stack Was Created
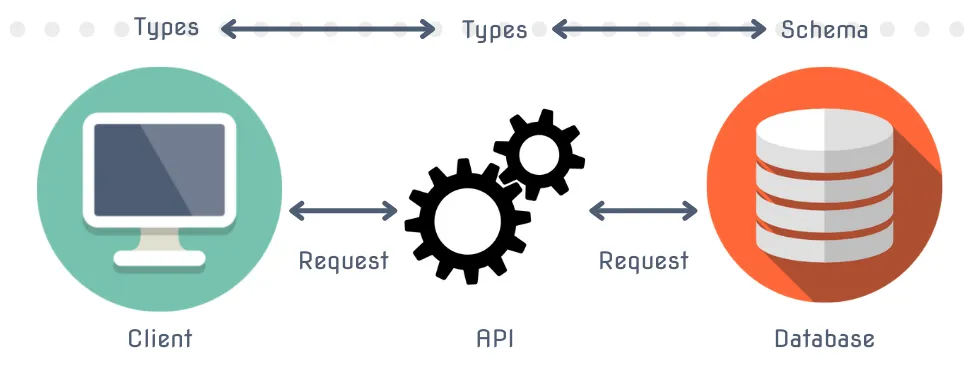
`ct3a`'s goal is to provide the quickest way to start a new fullstack, typesafe web application. To achieve this goal, the stack is architected around three foundational constituents that together can be bundled together and used to develop monolithic applications:
* Typed React frontend ([TypeScript](https://www.typescriptlang.org/) and [Next.js](https://nextjs.org/))
* Typed database client ([Prisma](https://www.prisma.io/))
* Typed remote procedure calls ([tRPC](https://trpc.io/))
Depending on your background and perspective that may sound like a ground breaking innovation, a completely obvious repackaging of techniques used over two decades ago, or an absolute heresy because you've been taught that developing monoliths is a sin.
> _Source: Sabin Adams - [End-To-End Type Safety](https://sabinadams.hashnode.dev/end-to-end-type-safety-what-why-and-how)_
As someone who has resisted TypeScript until now, this is terrifying to me. But I'm going to make an exception and embrace TypeScript for the first time in my life if this stack can actually provide a smooth and streamlined TypeScript experience.
But for those already in love with TypeScript and fullstack React frameworks, you are probably feeling a strange sense of deja-vu right now. This is an almost identical stack to Blitz.js and shares many of the same architectural principles. The notable difference is that CTA includes tRPC (which itself [has frequently been compared to Blitz.js](https://github.com/trpc/trpc/blob/7b492cfbf3cd8039587670cea9d6b7506a1a83f2/www/docs/further/further-reading.md#differences-to-blitzjs)).
### History of the t3 Stack and Create Nex App
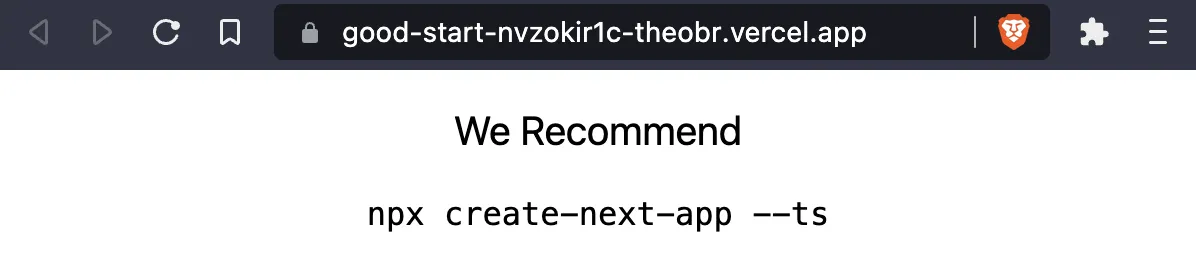
The first iteration of the `init.tips` site suggested only one command was needed to initialize a mostly optimal boilerplate for the majority of web applications in 2021. This suggestion (in its infinite wisdom) was: *Create a Next.js app,* ***but with TypeScript***.
As people began to consider this advice, many developers inevitably asked:
> _"Mmmm, but what about all that other stuff not included in this stack that I need to make an even borderline functional application?"_
This lead to [other recommendations](https://init.tips/others) for add-ons to the stack. These add-ons targeted specific use cases such as:
* **Prisma** for managing database migrations and SQL queries through an ORM
* **Next-auth** for client side authentication
* **Tailwind** for CSS and UI styling
* **tRPC** for end-to-end typesafe APIs
If these were being frequently recommended, it stood to reason that it would make sense to create a new, more full featured command. This would generate not only a typed Next.js project, but one with an ORM, authentication, styling, and API protocol.
These would be automatically included while also giving you the ability to opt out if you still want the bare-bones version. I'm happy that this is taking off and that some consider it a novel idea.
I've spent the last two years relentlessly promoting frameworks assembling different versions of these kinds of stacks. RedwoodJS, Blitz.js, and Bison all have extremely similar but also slightly different stacks. To understand how these relate to each other, I would break it down like so:
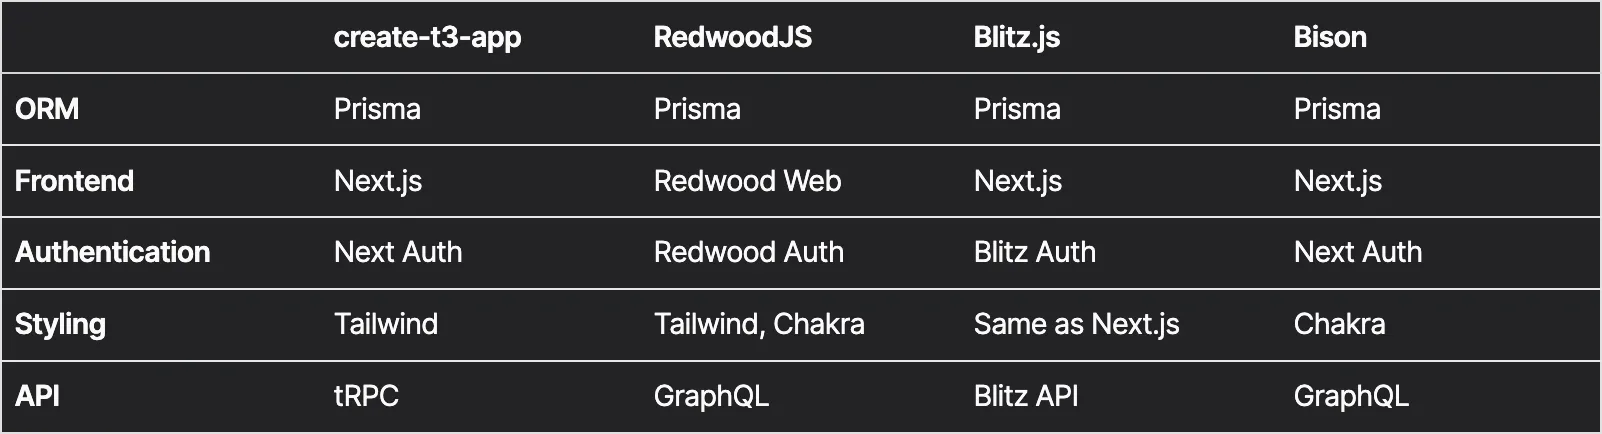
> _This is not meant to be an exhaustive list and I've purposefully left off things like tests, mocks, Storybook, deployment, and other non-architectural pieces._
As the project has evolved from `init.tips` to `create-t3-app`, it has taken on a life of its own. Theo has stated numerous times that he did not actually initiate the creation of `create-t3-app`, he simply talked about the idea numerous times in public.
In fact, he never would have had the time to build or manage such a project. On top of full time content creation, he's the [CEO of a startup](https://t3.gg/blog/post/dream-job-revisited) building [ping.gg](https://ping.gg/), a collaborative streaming tool. His influence over the project primarily stemmed from his various public discussions of the stack.
These discussions inspired a group of people who were members of his recently formed [Discord](https://discord.com/invite/tEAQjDseSX) server. This online space was created to bring together fans of his [Twitch](https://www.twitch.tv/Theo) and [YouTube](https://www.youtube.com/c/theobrowne1017) channels. A group independently began building out a full fledged project. This activity was centered around the work of Shoubhit Dash.
Known as [nexxel](https://www.nexxel.dev/) or [nexxeln](https://github.com/nexxeln) online, Shoubhit took the initiative to formalize the stack by developing an interactive CLI tool that would be able to scaffold out a project using arbitrary combinations of the various technologies used in the stack. nexxel, a 17 year old self-taught developer, is the true rosetta stone to this project.
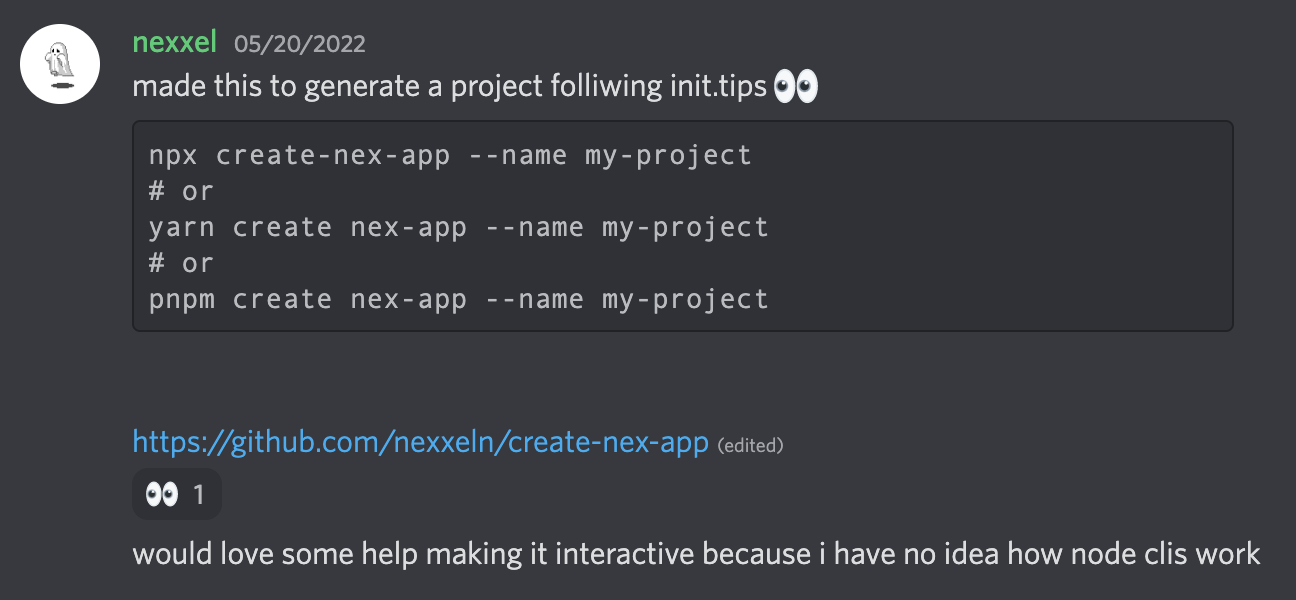
Nexxel was blogging about tRPC in May right before launching the framework. [Build end to end typesafe APIs with tRPC](https://dev.to/nexxeln/build-end-to-end-typesafe-apis-with-trpc-3o3f) signaled the birth of the framework on May 21, 2022 along with an [initial commit](https://github.com/nexxeln/create-nex-app/commit/dac862ad595bf7e3c5e8a2bfbc6d29c8df2f92ed) on May 20, 2022. Originally called [Create Nex App](https://github.com/t3-oss/create-t3-app/commit/7c82cb02f88cc9eadd691f864521b993b6c7b4b1), the [README](https://github.com/t3-oss/create-t3-app/commit/a7a8f79083158c0a93ffb2ac3a5cbd51054a2944) described the project like so:
> _Scaffold a starting project using the [t3 stack](https://init.tips) using this interactive CLI._
The early prototypes of the project included Next.js, Tailwind, and TypeScript along with tRPC. Throughout June, the project began attracting around a dozen contributors. Julius Marminge ([juliusmarminge](https://github.com/juliusmarminge)) was one of the earliest contributors and remains active today.
Roughly a month later on June 26, 2022, nexxel published [T3 stack and my most popular open source project ever](https://www.nexxel.dev/blog/ct3a). This blog post was published after working with the other contributors to fully integrate Prisma and Next Auth, marking the completion of the stack's initial integration phase.
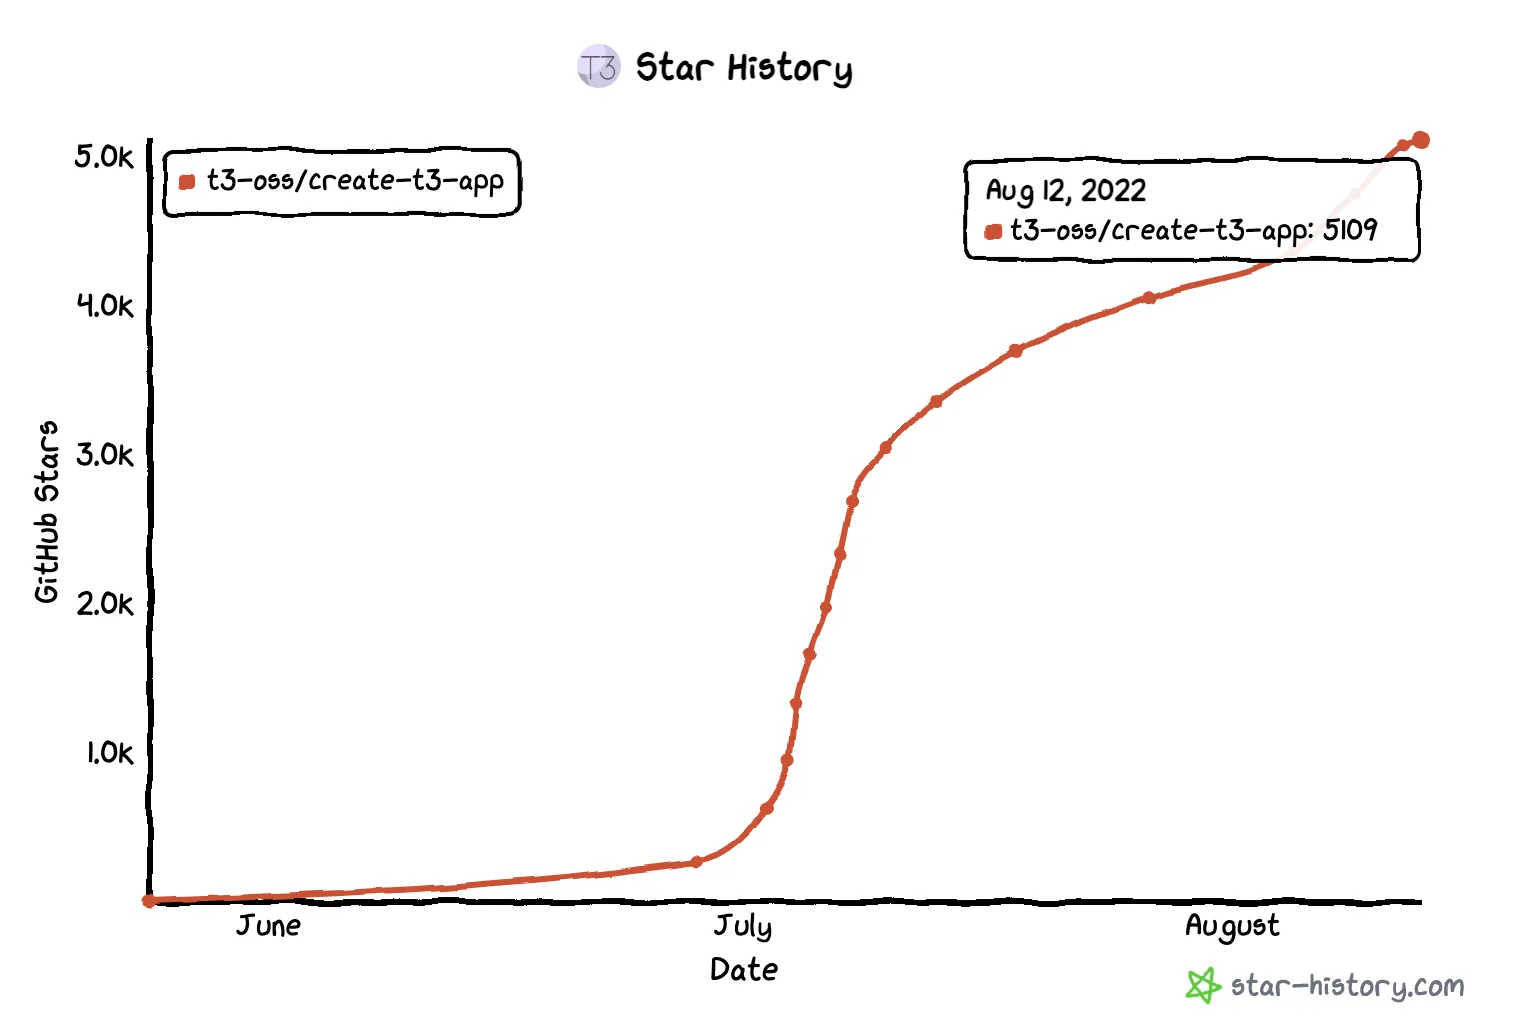
Throughout the month of June, the GitHub repo [gained nearly 2,000 GitHub stars](https://twitter.com/t3dotgg/status/1544845624113131520). Despite having only been created at [the end of May](https://github.com/t3-oss/create-t3-app/commit/7c82cb02f88cc9eadd691f864521b993b6c7b4b1), the project had reached nearly unprecedented levels of momentum. On July 17, 2022, nexxel [migrated his personal blog to create-t3-app](https://github.com/nexxeln/nexxel.dev/commit/ad25e652dc86b217cb8dd7b2de09d55932484f4f) and by the middle of August the project had over 5,000 stars.
## Create t3 App
To get started with `ct3a`, you can run any of the following three commands and answer the command prompt questions:
```bash wrap=false
npx create-t3-app@latest
```
```bash wrap=false
yarn create t3-app
```
```bash wrap=false
pnpm dlx create-t3-app@latest
```
The following CLI options are currently available:
| Option | Description |
| ----------------- | ----------------------------------------------------------------------- |
| `--noGit` | Explicitly tell the CLI to not initialize a new git repo in the project |
| `-y`, `--default` | Bypass CLI and use all default options to bootstrap new t3-app |
| `[dir]` | Include a directory argument with a name for the project |
| `--noInstall` | Generate project without installing dependencies |
We'll give our project a name and select all available options with the exception of NextAuth.
```bash wrap=false
pnpm dlx create-t3-app@latest ajcwebdev-t3
```
I will select the following options:
```
? Will you be using JavaScript or TypeScript? TypeScript
? Which packages would you like to enable? prisma, tailwind, trpc
? Initialize a new git repository? Yes
? Would you like us to run 'pnpm install'? Yes
```
Including the `-y` option will select the default configuration which bundles all four packages into the project. The interactive CLI prompt will also ask whether you want to use JavaScript or TypeScript. If you try to select JavaScript though, you will discover that the option is but a mere illusion. In fact, you must use TypeScript and also there is no God.
```
Using: pnpm
✔ ajcwebdev-t3 scaffolded successfully!
✔ Successfully setup boilerplate for prisma
✔ Successfully setup boilerplate for tailwind
✔ Successfully setup boilerplate for trpc
✔ Successfully setup boilerplate for envVariables
✔ Successfully installed dependencies!
✔ Successfully initialized git
```
Enter your project directory and start the development server.
```bash wrap=false
cd ajcwebdev-t3
pnpm dev
```
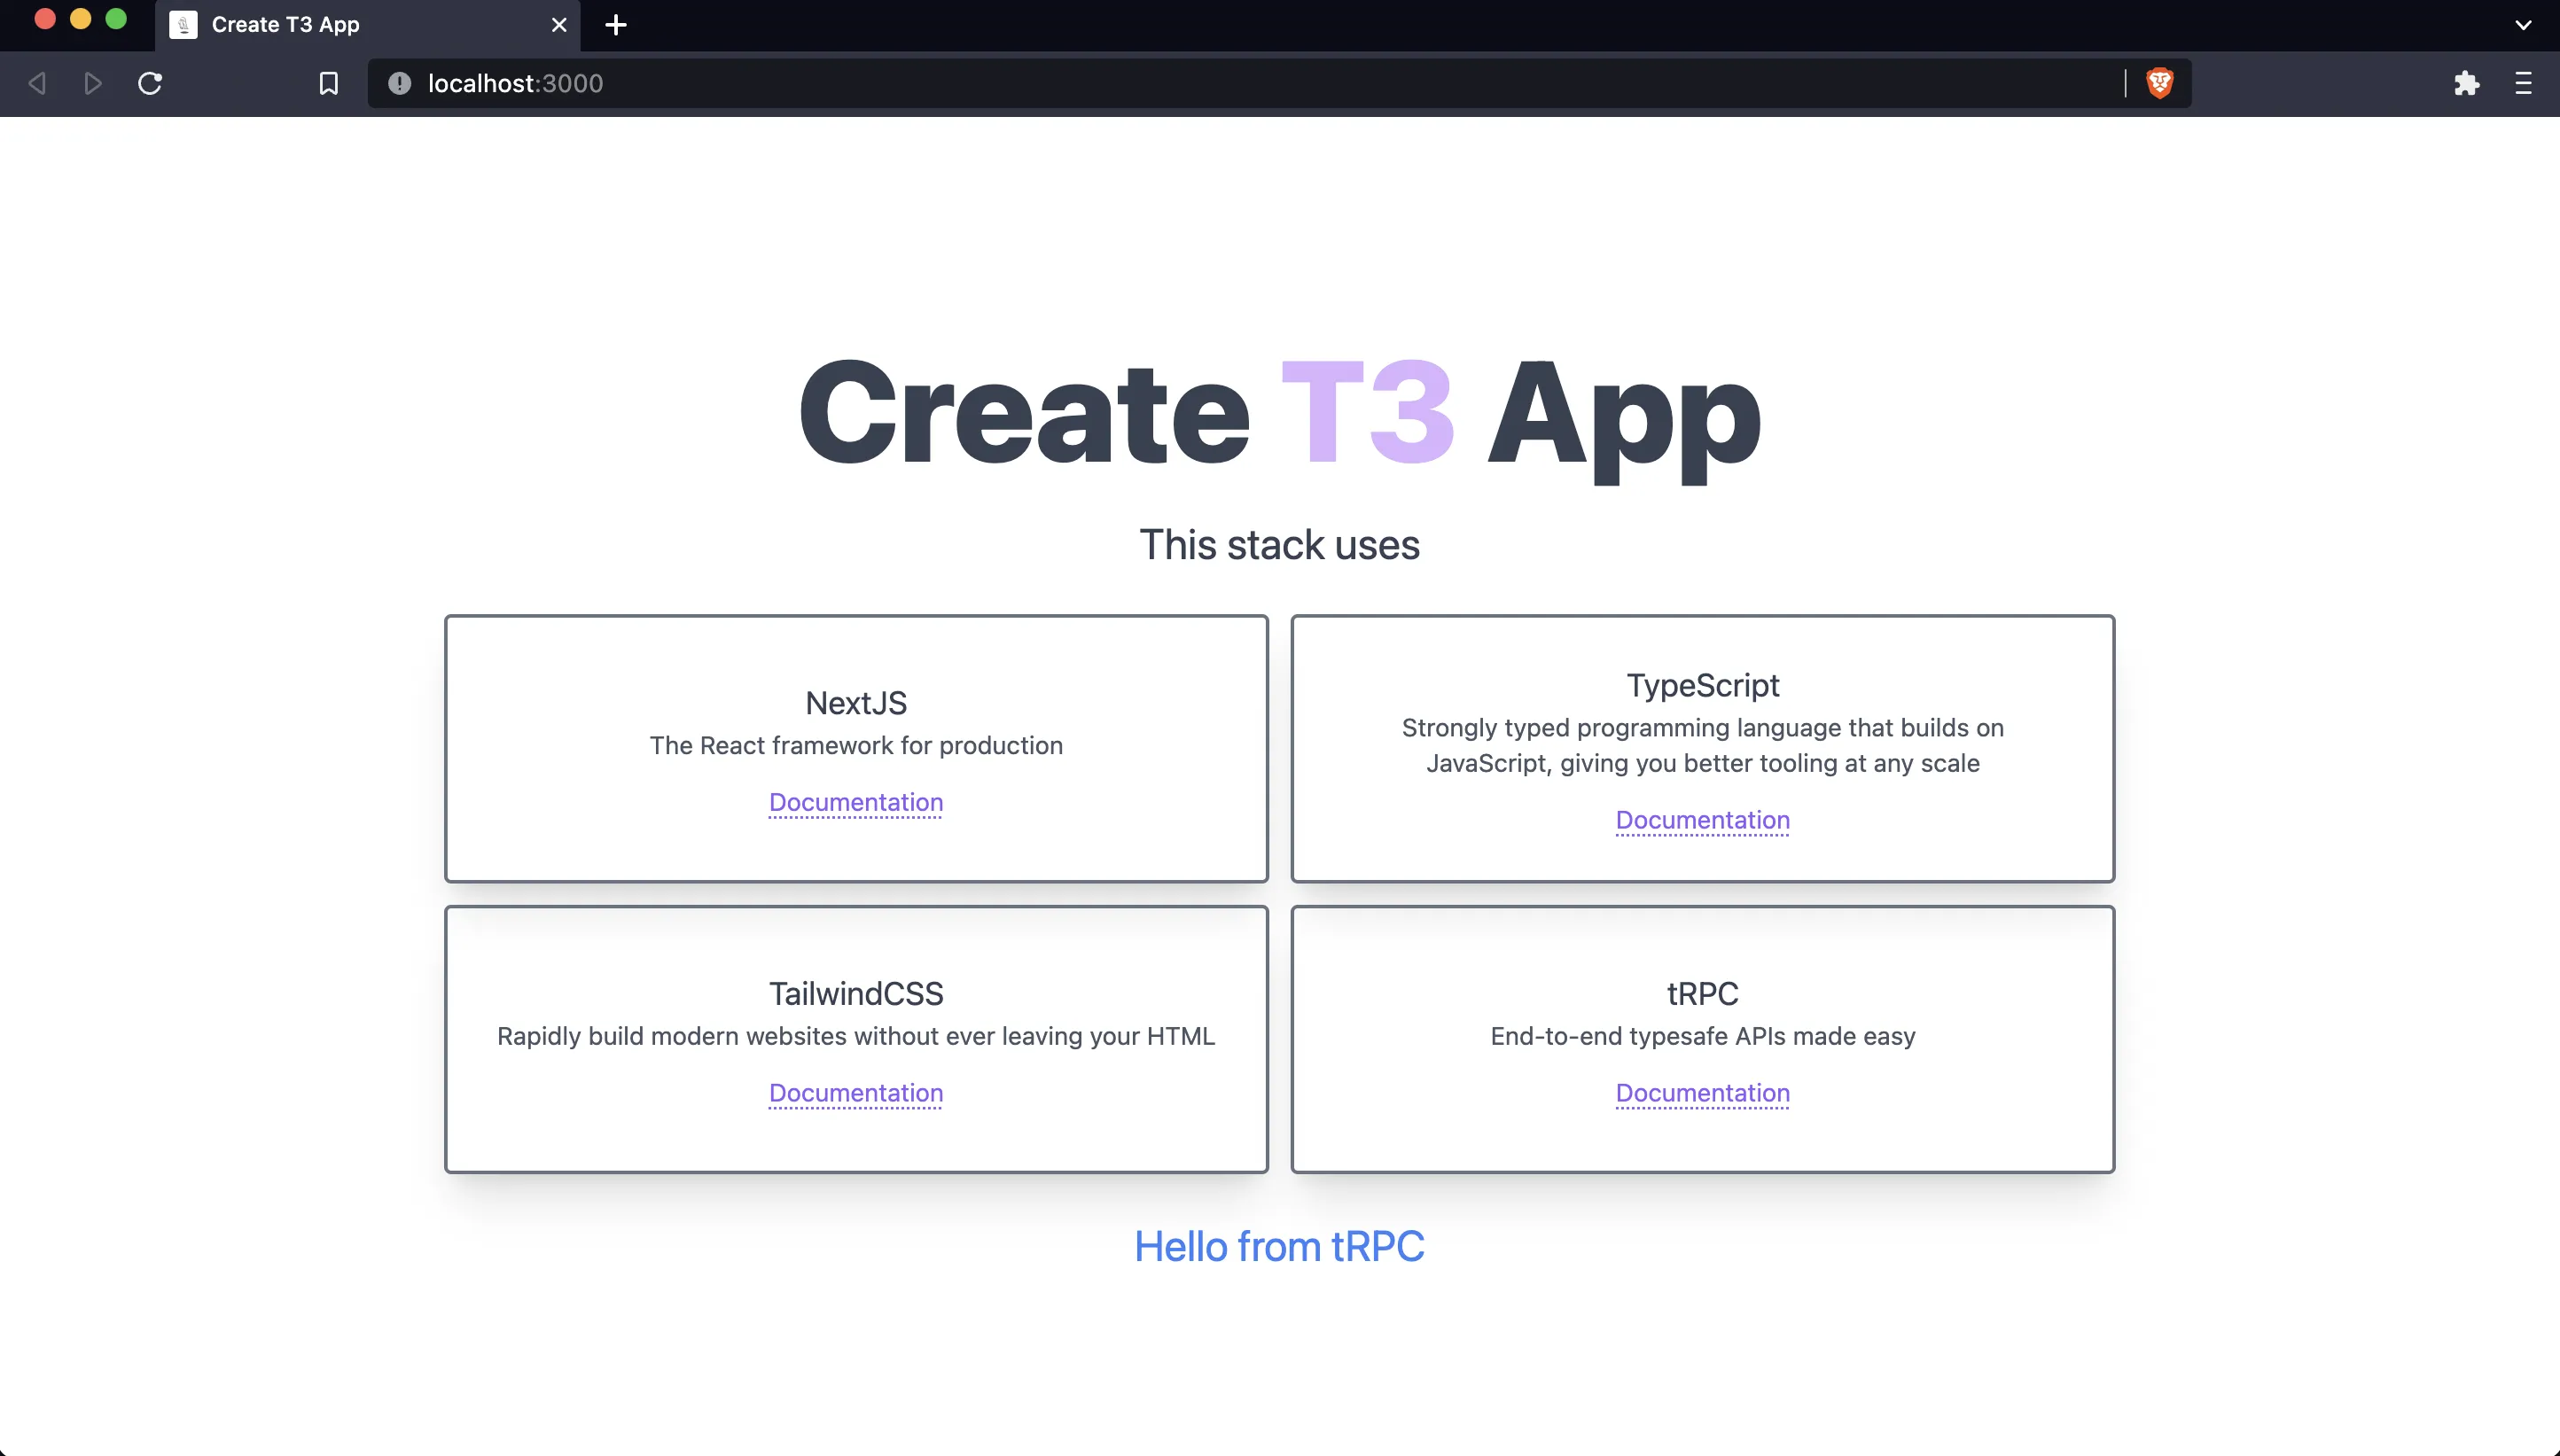
Open [localhost:3000](http://localhost:3000) to see the generated project.
### Project Structure
If we ignore the configuration files in the root of our project then our folder and file structure includes the following:
```
.
├── prisma
│ └── schema.prisma
├── public
│ └── favicon.ico
└── src
├── env
│ ├── client.mjs
│ ├── schema.mjs
│ └── server.mjs
├── pages
│ ├── _app.tsx
│ ├── api
│ │ ├── examples.ts
│ │ └── trpc
│ │ └── [trpc].ts
│ └── index.tsx
├── server
│ ├── db
│ │ └── client.ts
│ └── trpc
│ ├── context.ts
│ ├── router
│ │ ├── _app.ts
│ │ └── example.ts
│ └── trpc.ts
├── styles
│ └── globals.css
└── utils
└── trpc.ts
```
We'll break down each of these different directories and files as we progress through the tutorial. But as a quick overview, we'll be primarily working with:
- Pages and API Routes
- `src/pages/index.tsx`
- `src/pages/api/examples.ts`
- `src/pages/api/trpc/[trpc].ts`
- Server and Database
- `src/server/db/client.ts`
- `src/server/trpc/context.ts`
- `src/server/trpc/router/_app.ts`
- `src/server/trpc/router/example.ts`
- `src/server/trpc/trpc.ts`
- Styling
- `src/styles/globals.css`
- Utilities
- `src/utils/trpc.ts`
### Tailwind Styles
Open `src/pages/index.tsx` and make some changes to customize the home page. Feel free to follow along or make your own alterations, there are many different ways this project could be organized. First, I will create a file called file called `home-styles.ts` to hold all styling that will be used on the home page of the website.
```bash wrap=false
echo > src/styles/home-styles.ts
```
I will export a variable defining each Tailwind style that can be reused throughout the project.
```tsx wrap=false
// src/styles/home-styles.ts
export const appContainer = "container mx-auto flex flex-col items-center justify-center min-h-screen p-4"
export const title = "text-5xl md:text-[5rem] leading-normal font-extrabold text-gray-700"
export const purple = "text-purple-300"
export const body = "text-2xl text-gray-700"
export const grid = "grid gap-3 pt-3 mt-3 text-center md:grid-cols-2 lg:w-2/3"
export const queryResponse = "pt-6 text-2xl text-blue-500 flex justify-center items-center w-full"
```
- `appContainer` styles the `main` content
- `title` styles the page's `h1` header
- `purple` styles T3 with its signature purple color
- `body` styles the `p` tag introducing the list of technologies included in the stack
- `grid` styles the `div` wrapping the `TechnologyCard` components
- `queryResponse` styles the `div` wrapping the tRPC `hello` query
Add these style variables to the `Home` component.
```tsx wrap=false
// src/pages/index.tsx
import Head from "next/head"
import { trpc } from "../utils/trpc"
import {
appContainer, title, purple, body, grid, queryResponse
} from "../styles/home-styles"
export default function Home() {
const hello = trpc.useQuery([
"example.hello",
{ text: "from tRPC" }
])
return (
<>
A First Look at create-t3-app
Create T3 App
This stack uses:
...
...
)
}
```
```bash wrap=false
echo > src/styles/card-styles.ts
```
Add style variables to the `TechnologyCard` component:
- `cardSection` styles the card's container on the `section` element
- `cardTitle` styles the technology's title on each card
- `cardDescription` styles the description of each technology
- `link` styles the link on each card
```tsx wrap=false
// src/styles/card-styles.ts
export const cardSection = "flex flex-col justify-center p-6 duration-500 border-2 border-gray-500 rounded shadow-xl motion-safe:hover:scale-105"
export const cardTitle = "text-lg text-gray-700"
export const cardDescription = "text-sm text-gray-600"
export const link = "mt-3 text-sm underline text-violet-500 decoration-dotted underline-offset-2"
```
```tsx wrap=false
// src/pages/index.tsx
import Head from "next/head"
import { trpc } from "../utils/trpc"
import { appContainer, title, purple, body, grid, queryResponse } from "../styles/home-styles"
import { cardSection, cardTitle, cardDescription, link } from "../styles/card-styles"
type TechnologyCardProps = {...}
const TechnologyCard = ({ name, description, documentation }: TechnologyCardProps) => {
return (
{name}
{description}
Documentation
)
}
```
Now I will modify the four cards to include links to my blog and social media profiles. With that change in mind, I will use `url` instead of `documentation` for a more appropriate prop name. I will also change the links to include the entire card within the anchor tags so clicking anywhere on the card will open the hyperlink.
```tsx wrap=false
// src/pages/index.tsx
import Head from "next/head"
import { trpc } from "../utils/trpc"
import {
appContainer, title, purple, body, grid, queryResponse, cardSection, cardTitle, cardDescription, link
} from "../styles/home-styles"
type TechnologyCardProps = {
name: string
url: string
}
const TechnologyCard = ({ name, url }: TechnologyCardProps) => {
return (
{url}
)
}
export default function Home() {
const hello = trpc.useQuery([
"example.hello",
{ text: "from tRPC" }
])
return (
<>
A First Look at create-t3-app
Hello from ajcwebdev
{
hello.data
?
{hello.data.greeting}
:
Loading..
}
)
}
```
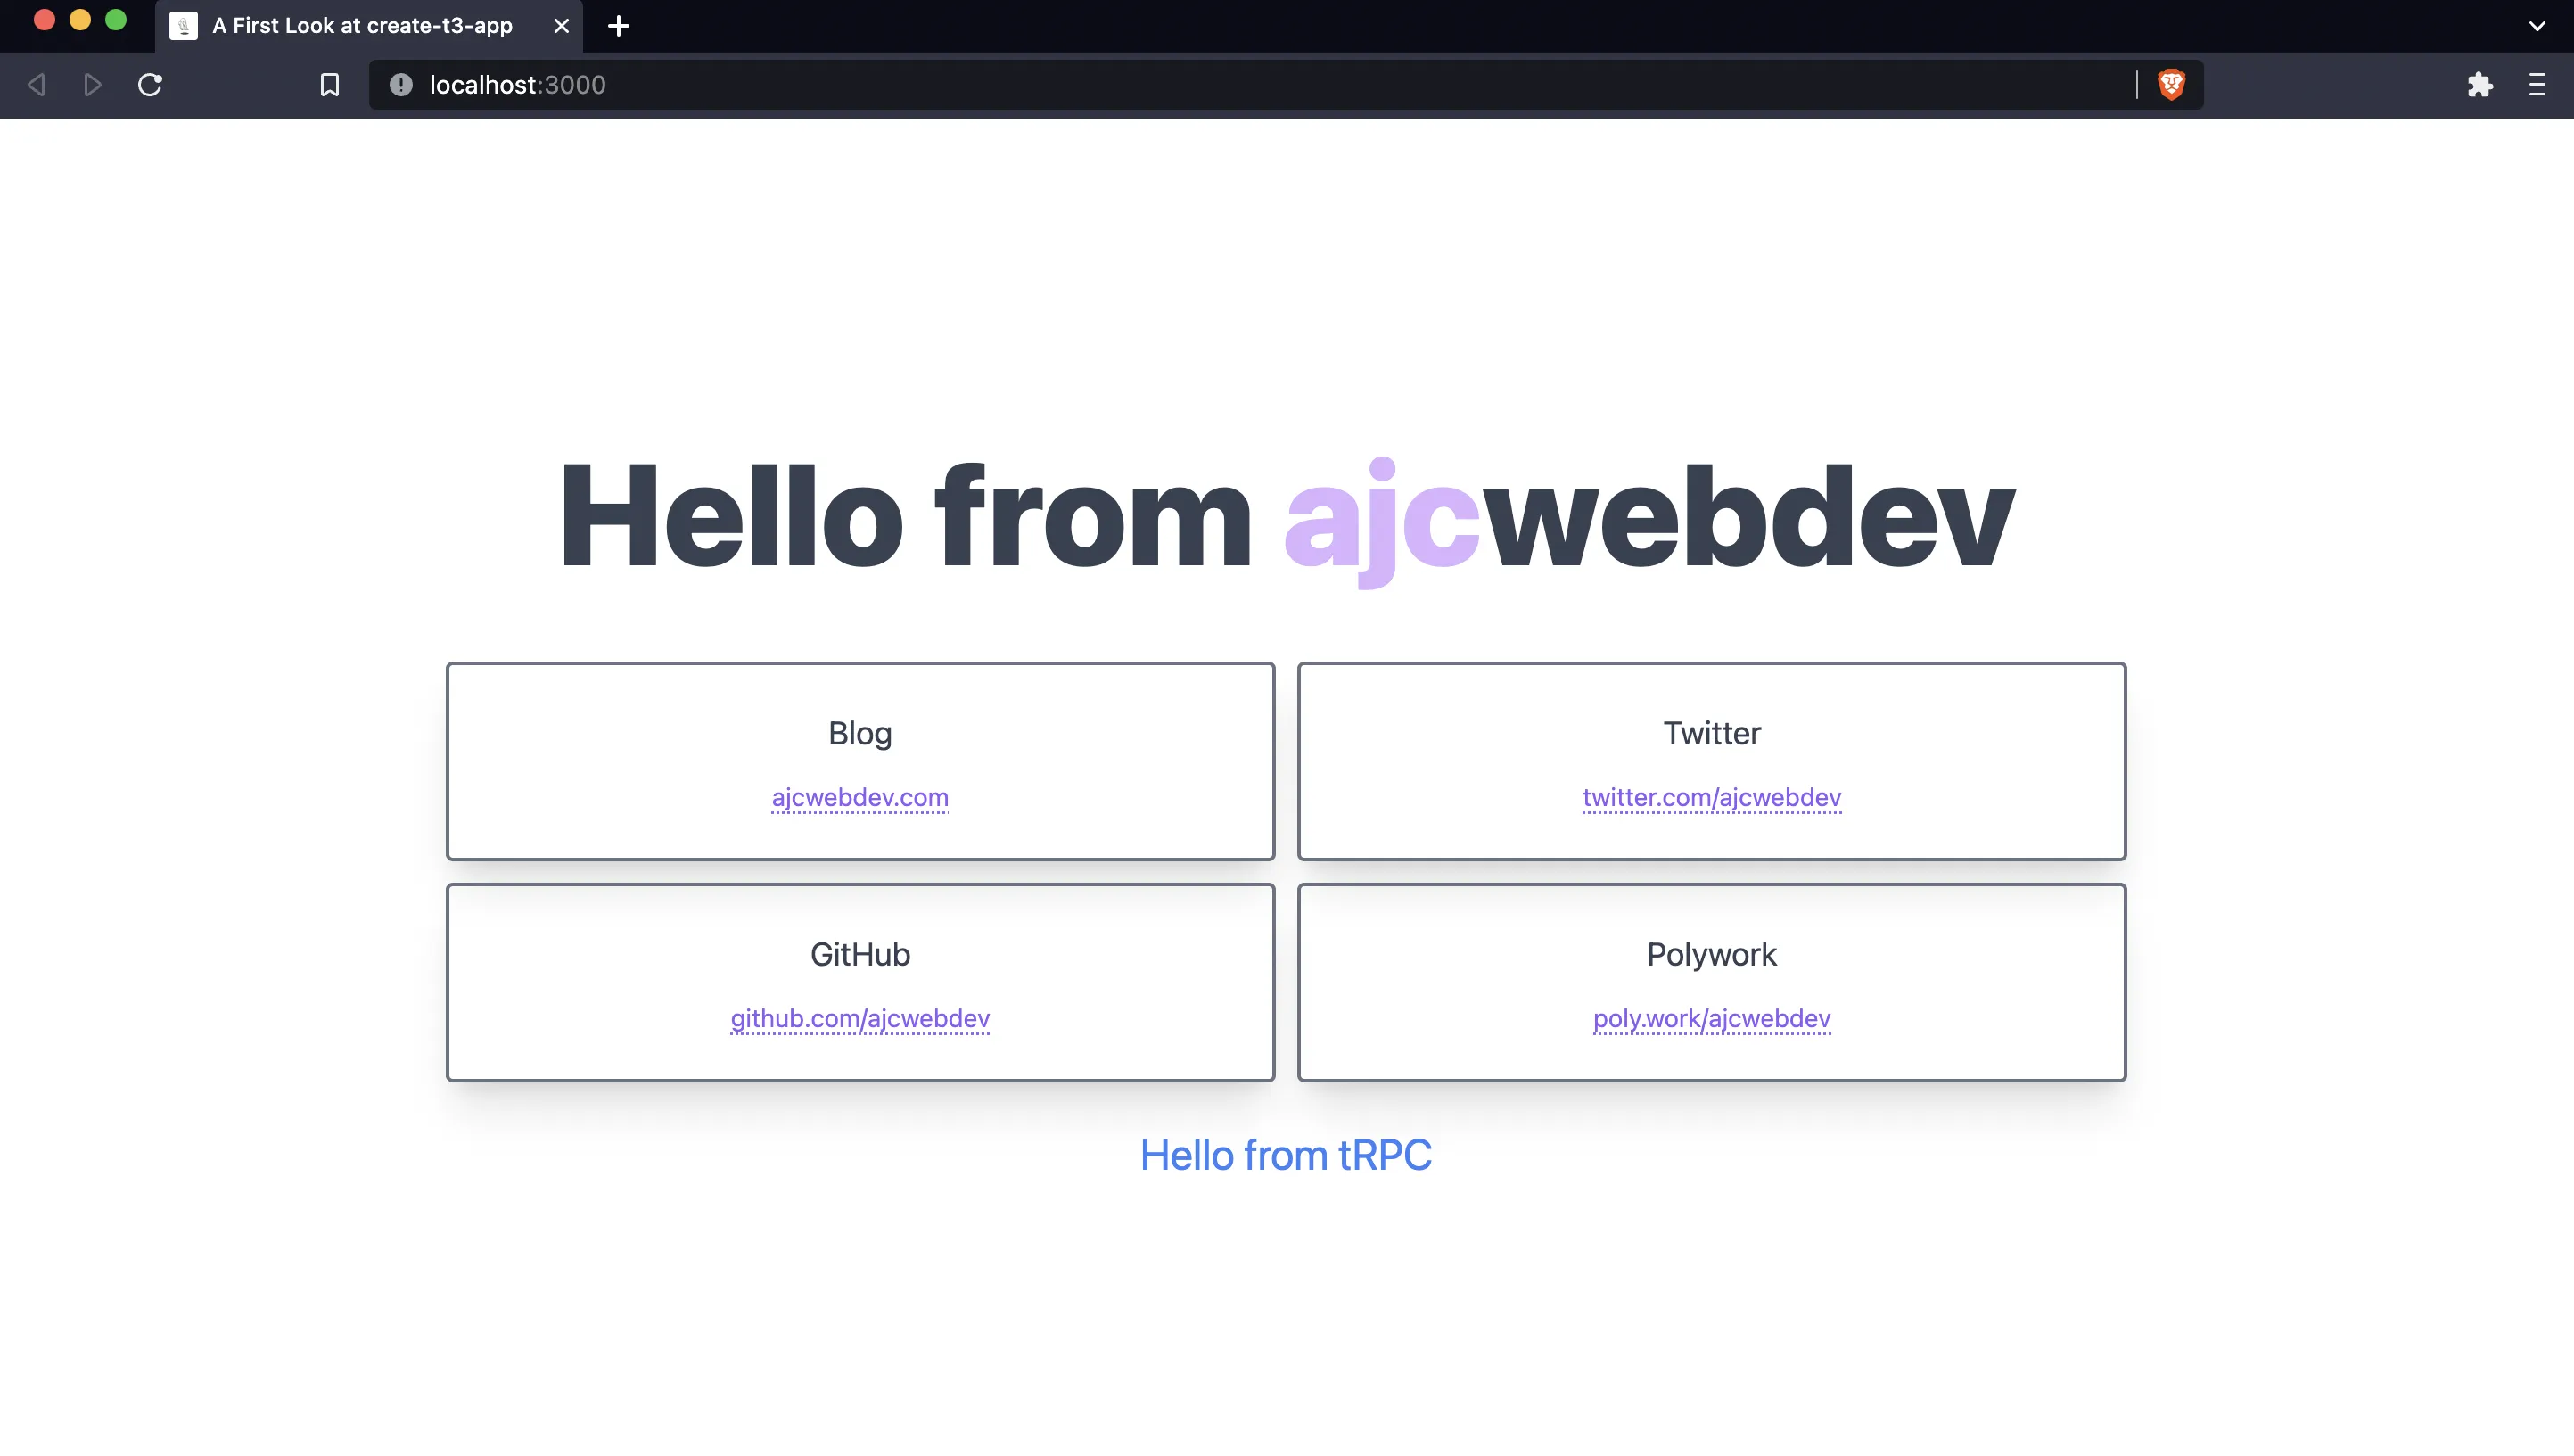
Return to [localhost:3000](http://localhost:3000) to see the changes.
Lastly, I will abstract out the `TechnologyCard` component into its own file and rename it to `Card`.
```bash wrap=false
mkdir src/components
echo > src/components/Card.tsx
```
Rename `TechnologyCardProps` to `CardProps` and create a `Card` component.
```tsx wrap=false
// src/components/Card.tsx
import { cardSection, cardTitle, link } from "../styles/home-styles"
type CardProps = {
name: string
url: string
}
export default function Card({
name, url
}: CardProps) {
return (
{url}
)
}
```
Import `Card` into `src/pages/index.tsx` and remove `CardProps`.
```tsx wrap=false
// src/pages/index.tsx
import Head from "next/head"
import Card from "../components/Card"
import { appContainer, title, purple, grid } from "../styles/home-styles"
export default function Home() {
return (
<>
A First Look at create-t3-app
Hello from ajcwebdev
)
}
```
## Provision PostgreSQL Database
Since this a fullstack framework, it already includes a tool called Prisma for working with our database. Our models will be defined in the `prisma/schema.prisma` file along with our specific database provider.
### Add Posts Model to Prisma Schema
The initial generated project has the database `datasource` set to SQLite. Since we want to use a real database, open `schema.prisma` and update the `datasource` to the PostgreSQL provider.
```prisma
// prisma/schema.prisma
generator client {
provider = "prisma-client-js"
}
datasource db {
provider = "postgresql"
url = env("DATABASE_URL")
}
```
In addition to the current models in the schema, add a `Post` model with an `id`, `title`, `description`, `body`, and `createdAt` timestamp.
```prisma
// prisma/schema.prisma
model Post {
id String @id
title String
description String
body String
createdAt DateTime @default(now())
}
```
Also, uncomment all appearances of `@db.Text` on the `Account` model.
```prisma
// prisma/schema.prisma
model Account {
id String @id @default(cuid())
userId String
type String
provider String
providerAccountId String
refresh_token String? @db.Text
access_token String? @db.Text
expires_at Int?
token_type String?
scope String?
id_token String? @db.Text
session_state String?
user User @relation(fields: [userId], references: [id], onDelete: Cascade)
@@unique([provider, providerAccountId])
}
```
### Initialize Railway Database and Run Migration
We'll use Railway to provision a PostgreSQL database. First, you need to [create a Railway account](https://railway.com) and install the [Railway CLI](https://docs.railway.com/guides/cli). If you are unable to login through the browser, run `railway login --browserless` instead.
```bash wrap=false
railway login
```
Run the following command, select "Empty Project," and give your project a name.
```bash wrap=false
railway init
```
To provision the database, add a plugin to your Railway project and select PostgreSQL.
```bash wrap=false
railway add
```
Set the `DATABASE_URL` environment variable for your database and create a `.env` file to hold it.
```bash wrap=false
echo DATABASE_URL=`railway variables get DATABASE_URL` > .env
```
Run a migration with `prisma migrate dev` to generate the folders and files necessary to create a new migration. We'll name our migration `init` with the `--name` argument.
```bash wrap=false
pnpm prisma migrate dev --name init
```
After the migration is complete, generate the Prisma client with `prisma generate`.
```bash wrap=false
pnpm prisma generate
```
### Seed a Blog Post
Right now we'll avoid implementing an endpoint through our app with write, update, or delete functionality since we'll not be including authentication in this section. However, there are at least five different ways you can write data to your database. If you want to skip this section, the tl;dr is send raw SQL queries through the Railway Query dashboard.
The Railway dashboard provides three separate methods for accessing your database (not including using the connection string itself as an environment variable in the project as we'll do later):
- Execute raw SQL queries under the **Query tab**
- Connect to database with the [`psql`](https://www.postgresql.org/docs/current/app-psql.html) command under the **Connect tab**
- Enter data with Railway's UI under the **Data tab**
For Prisma, you can either:
- Login to the [**Prisma Data Platform**](https://console.prisma.io/) at [cloud.prisma.io](https://cloud.prisma.io/)
- Run [**Prisma Studio**](https://www.prisma.io/studio) on localhost 5555 with `pnpm prisma studio`
> _Note: I'm including Prisma Studio here for completion's sake, but I advise against using it. It's a seemingly sleek and polished product with a very strange input bug that causes it to throw out a value if you don't click away from the input before adding the record to the table. This means you can create a record and have a crucial field get totally wiped and replaced with a blank value._
>
> _Yes, this is should just be for a test database, and yes it's just dummy data. But still, to me, especially for a database tool, this seems fundamentally broken and I honestly can't recommend using this tool in good conscious. I first experienced this bug around the end of 2021 and you can view a recording of the bug in action on an [episode of Teach Jenn Tech recorded in November 2022](https://www.youtube.com/watch?v=6W-Hkczv92U&t=3648s)._
GUIs are more intuitive for developers without much SQL experience. But unfortunately, they can also be buggy or cumbersome. You especially don't want to be entering every row by hand when you need to input large amounts of data at once. SQL commands provide a more consistent and scalable technique for seeding a database or entering ongoing new data.
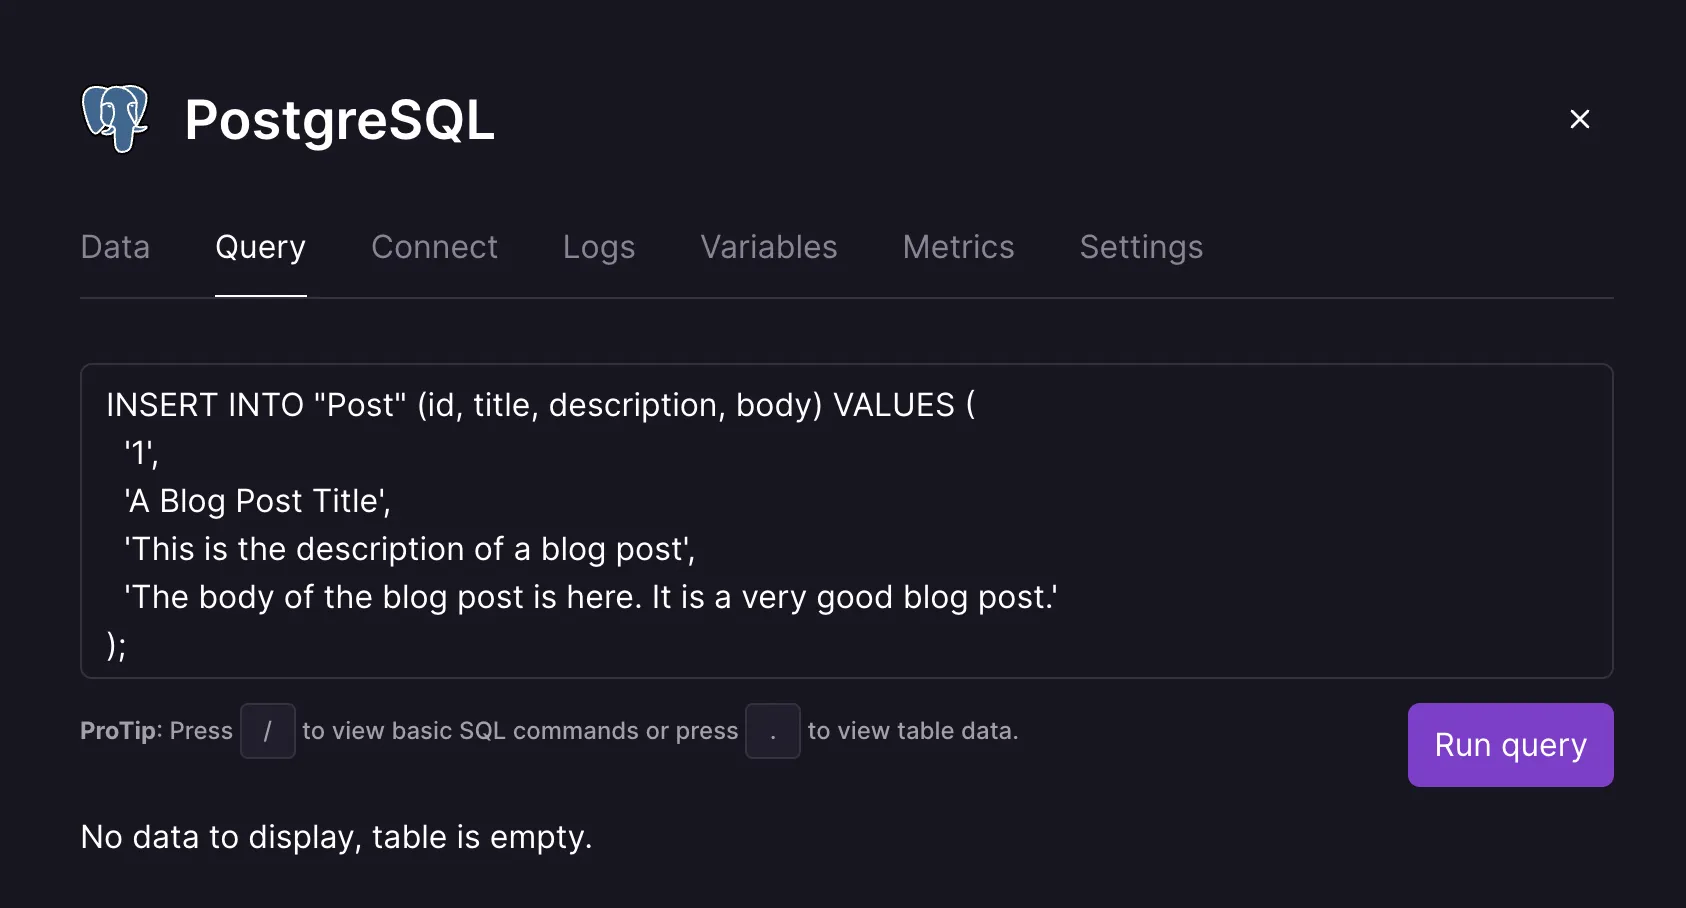
The first option on the list (execute raw SQL queries under the Query tab on Railway's dashboard) gives us the best of both worlds. It does not require entering data into any GUI but it also does not require installing a Postgres client like `psql` to your local machine and connecting to a database instance over the network. We could create a blog post with the following command:
```sql
INSERT INTO "Post" (id, title, description, body) VALUES (
'1',
'A Blog Post Title',
'This is the description of a blog post',
'The body of the blog post is here. It is a very good blog post.'
);
```
This SQL command can be entered directly into the text area under the Query tab.
Click "Run query" and then add two more blog posts:
```sql
INSERT INTO "Post" (id, title, description, body) VALUES (
'2',
'Second Blog Post',
'This is the description of ANOTHER blog post',
'Even better than the last!'
);
INSERT INTO "Post" (id, title, description, body) VALUES (
'3',
'The Final Blog Post',
'This is the description for my final blog post',
'My blogging career is over. This is the end, thank you.'
);
```
## Query Posts with tRPC
tRPC is a library that is designed for writing typesafe APIs. Instead of importing server code, the client only imports a single TypeScript type. tRPC transforms this type into a fully typesafe client that can be called from the frontend.
### Create Post Router
Create a file to initialize a router instance called `postRouter`. This will query for all of our posts.
```bash wrap=false
echo > src/server/router/post.ts
```
Add a query endpoint to the router with the `.query()` method. It with accept two arguments: `name` for the name of the endpoint and `params` for query parameters.
```ts wrap=false
// src/server/router/post.ts
import { createRouter } from "./context"
export const postRouter = createRouter()
.query('all', {
async resolve() {
// Add Prisma query
},
})
```
`params.resolve` implements the endpoint which will be a function with a single `req` argument that runs the Prisma Client [`findMany`](https://www.prisma.io/docs/orm/reference/prisma-client-reference#findmany) query which returns a list of records, in this case `all` posts based on the `post` model.
```ts wrap=false
// src/server/router/post.ts
import { prisma } from "../db/client"
import { createRouter } from "./context"
export const postRouter = createRouter()
.query('all', {
async resolve() {
return prisma.post.findMany()
},
})
```
`params.input` provides input validation and will be discussed in the [Create Default Query Cell](#create-default-query-cell) section.
### Create App Router
In `src/server/router/index.ts`, there is a base `appRouter` for our server entry point. This can be gradually extended with more types and resolved into a single object.
```ts wrap=false
// src/server/router/index.ts
import superjson from "superjson"
import { createRouter } from "./context"
import { exampleRouter } from "./example"
import { protectedExampleRouter } from "./protected-example-router"
export const appRouter = createRouter()
.transformer(superjson)
.merge("example.", exampleRouter)
.merge("question.", protectedExampleRouter)
export type AppRouter = typeof appRouter
```
Import `postRouter` and use the `.merge()` method to combine the following three routes into a single `appRouter` instance:
- `exampleRouter`
- `postRouter`
- `protectedExampleRouter`
```ts wrap=false
// src/server/router/index.ts
import superjson from "superjson"
import { createRouter } from "./context"
import { exampleRouter } from "./example"
import { postRouter } from "./post"
import { protectedExampleRouter } from "./protected-example-router"
export const appRouter = createRouter()
.transformer(superjson)
.merge("example.", exampleRouter)
.merge("post.", postRouter)
.merge("question.", protectedExampleRouter)
export type AppRouter = typeof appRouter
```
Queries related to blog posts will be prefixed with `post` (`post.all`, `post.byId`). The hello query example will be prefixed with `example` as seen earlier with `example.hello`.
### Query Posts with useQuery
Open `src/pages/index.tsx` to query all posts and display them on the home page. Create a `Posts` component and initialize a variable called `postsQuery` above the return statement. Set the `postsQuery` variable to the output of `post.all` with the `useQuery()` hook.
```tsx wrap=false
// src/pages/index.tsx
import Head from "next/head"
import { trpc } from "../utils/trpc"
import {
appContainer, title, purple, body, grid, queryResponse, cardSection, cardTitle, cardDescription, link
} from "../styles/home-styles"
import Card from "../components/Card"
const Posts = () => {
const postsQuery = trpc.useQuery([
'post.all'
])
return (...)
}
export default function Home() {...}
```
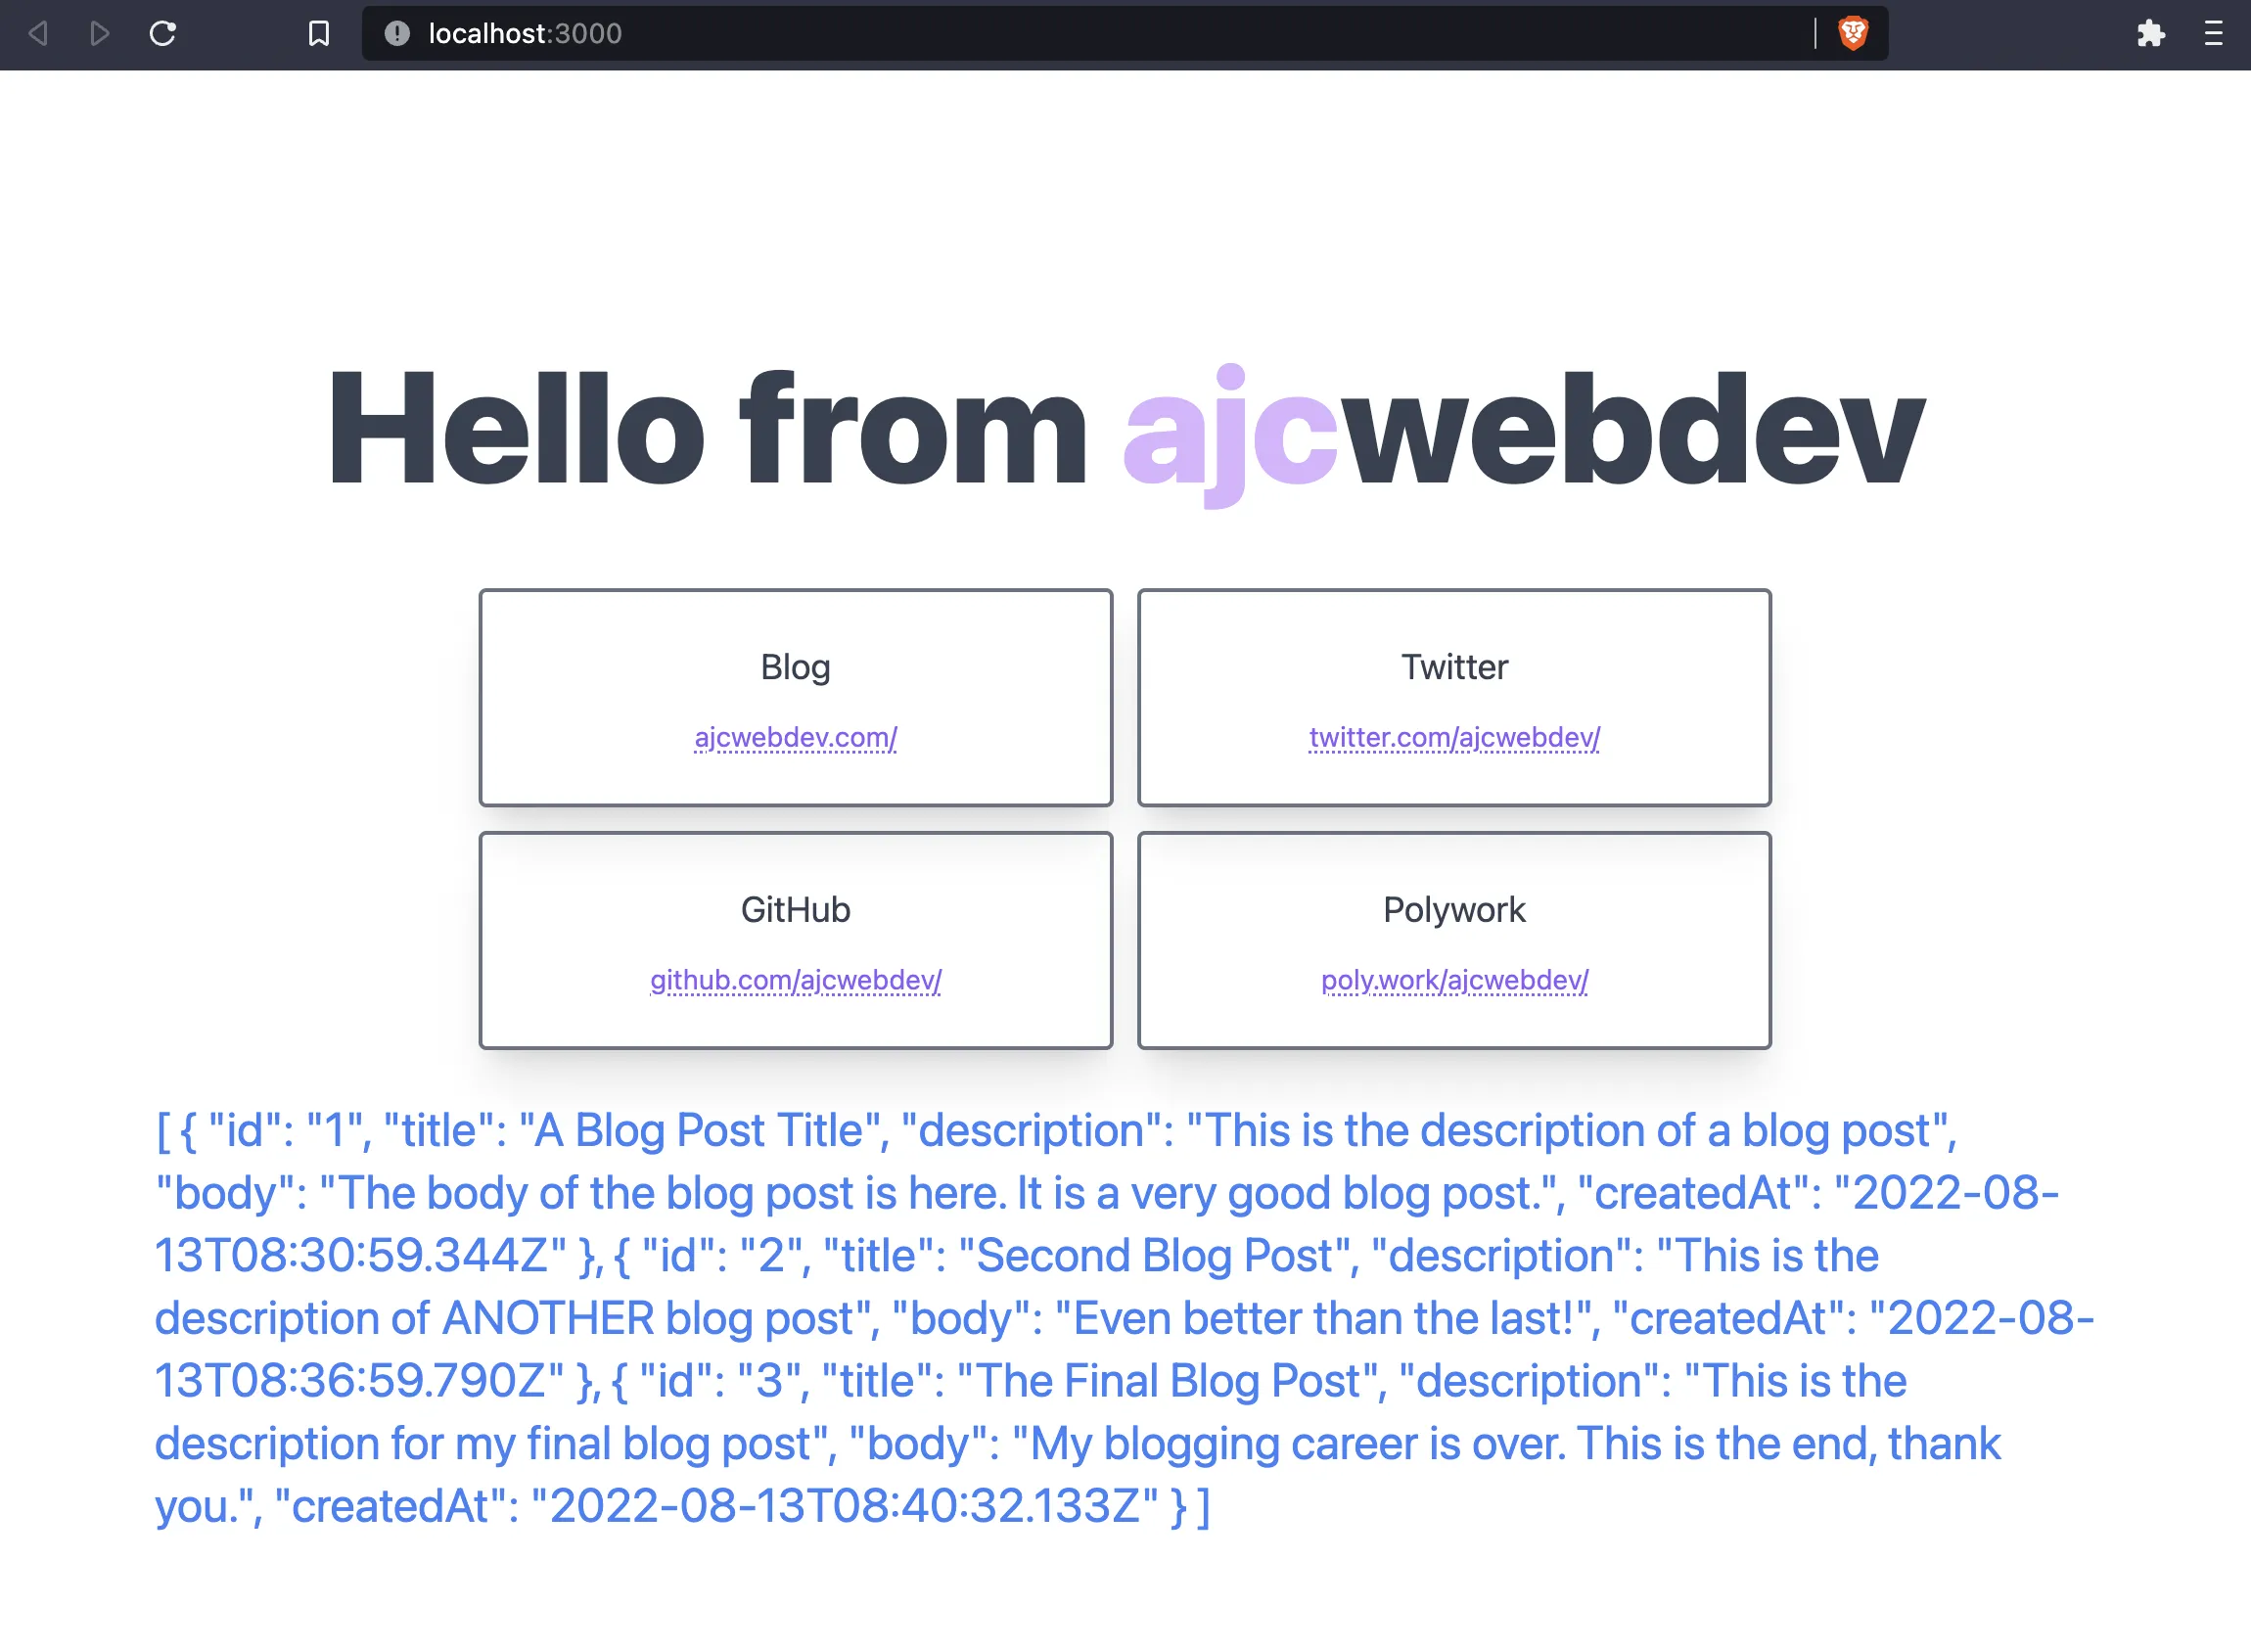
As mentioned in the previous section, the `appRouter` object can be inferred on the client. Stringify the JSON output from `postsQuery.data` and display the data below the title of the page.
```tsx wrap=false
// src/pages/index.tsx
const Posts = () => {
const postsQuery = trpc.useQuery([
'post.all'
])
const { data } = postsQuery
return (
{data
?
{JSON.stringify(data)}
:
Loading..
}
)
}
```
Return `Posts` in the `Home` component.
```tsx wrap=false
// src/pages/index.tsx
export default function Home() {
return (
<>
A First Look at create-t3-app
Hello from ajcwebdev
)
}
```
We have some conditional logic to ensure that a loading message is displayed if the data has not yet returned from the server. But what if there are no blog posts in the database or the server returns an error? This is a case that would be perfectly suited for a Cell.
## Add Cells for Declarative Data Fetching
One of my favorite patterns from Redwood that I have been hoping to see in other frameworks is the concept of a Cell. Cells provide a built-in convention for declarative data fetching that isn't exactly a state machine but shares common benefits and characteristics.
Unlike general purpose finite-state machines, Cells are specifically focused on common data fetching outcomes. They give developers the ability to avoid writing any conditional logic since a cell will manage what happens during the following four potential states of your data fetching:
- **Success** - Display the response data
- **Failure** - Handle the error message and provide instructions to the user
- **Empty** - Show a message or graphic communicating an empty list
- **Loading** - Show a message or graphic communicating the data is still loading
Thankfully, my hopes were fulfilled when lead tRPC maintainer, [Alex Johansson](https://twitter.com/alexdotjs) [opened a PR](https://github.com/trpc/trpc/pull/1734) with a tRPC Cell example that [he acknowledged was influenced by RedwoodJS](https://twitter.com/alexdotjs/status/1541645155647729664).
### Create Default Query Cell
`createQueryCell` is used to bootstrap `DefaultQueryCell` which can be used anywhere in your application.
```bash wrap=false
echo > src/utils/DefaultQueryCell.tsx
```
Ideally this will one day be internal to either tRPC or `create-t3-app` and you'll be able to just write cells without thinking about it. But for now, we need to create this ourselves.
```tsx wrap=false
// src/utils/DefaultQueryCell.tsx
import { TRPCClientErrorLike } from "@trpc/client"
import NextError from "next/error"
import type { AppRouter } from "../server/router/index"
import {
QueryObserverIdleResult,
QueryObserverLoadingErrorResult,
QueryObserverLoadingResult,
QueryObserverRefetchErrorResult,
QueryObserverSuccessResult,
UseQueryResult,
} from "react-query"
type JSXElementOrNull = JSX.Element | null
type ErrorResult =
| QueryObserverLoadingErrorResult
| QueryObserverRefetchErrorResult
interface CreateQueryCellOptions {
error: (query: ErrorResult) => JSXElementOrNull
loading: (query: QueryObserverLoadingResult) => JSXElementOrNull
idle: (query: QueryObserverIdleResult) => JSXElementOrNull
}
interface QueryCellOptions {
query: UseQueryResult
error?: (query: ErrorResult) => JSXElementOrNull
loading?: (query: QueryObserverLoadingResult) => JSXElementOrNull
idle?: (query: QueryObserverIdleResult) => JSXElementOrNull
}
interface QueryCellOptionsWithEmpty
extends QueryCellOptions {
success: (query: QueryObserverSuccessResult, TError>) => JSXElementOrNull
empty: (query: QueryObserverSuccessResult) => JSXElementOrNull
}
interface QueryCellOptionsNoEmpty
extends QueryCellOptions {
success: (query: QueryObserverSuccessResult) => JSXElementOrNull
}
function createQueryCell(
queryCellOpts: CreateQueryCellOptions,
) {
function QueryCell(opts: QueryCellOptionsWithEmpty): JSXElementOrNull
function QueryCell(opts: QueryCellOptionsNoEmpty): JSXElementOrNull
function QueryCell(opts:
| QueryCellOptionsNoEmpty
| QueryCellOptionsWithEmpty,
) {
const { query } = opts
if (query.status === 'success') {
if ('empty' in opts &&
(query.data == null ||
(Array.isArray(query.data) && query.data.length === 0))
) {
return opts.empty(query)
}
return opts.success(query as QueryObserverSuccessResult, TError>)
}
if (query.status === 'error') {
return opts.error?.(query) ?? queryCellOpts.error(query)
}
if (query.status === 'loading') {
return opts.loading?.(query) ?? queryCellOpts.loading(query)
}
if (query.status === 'idle') {
return opts.idle?.(query) ?? queryCellOpts.idle(query)
}
return null
}
return QueryCell
}
type TError = TRPCClientErrorLike
export const DefaultQueryCell = createQueryCell({
error: (result) => (
),
idle: () =>
Loading...
,
loading: () =>
Loading...
,
})
```
We want to be able to query an individual blog post based on its `id`. Create a `post` page with a [dynamic route](https://nextjs.org/docs/pages/building-your-application/routing/dynamic-routes) based on the `id`.
```bash wrap=false
mkdir src/pages/post
echo > src/pages/post/\[id\].tsx
```
Since we'll be sending data to the database, we need to validate the `input`. [`zod`](https://github.com/colinhacks/zod) is a TypeScript schema validator with static type inference. We'll also import `TRPCError` for error handling.
```ts wrap=false
// src/server/router/post.ts
import { prisma } from "../db/client"
import { TRPCError } from "@trpc/server"
import { z } from "zod"
import { createRouter } from "./context"
export const postRouter = createRouter()
.query('all', {
async resolve() {
return prisma.post.findMany()
}
})
```
Add `byId` query to Post router in `src/server/router/post.ts` and destructure the `id` from the `input`.
```ts wrap=false
// src/server/router/post.ts
import { prisma } from "../db/client"
import { TRPCError } from "@trpc/server"
import { z } from "zod"
import { createRouter } from "./context"
export const postRouter = createRouter()
.query('all', {
async resolve() {
return prisma.post.findMany()
}
})
.query('byId', {
input: z.object({ id: z.string() }),
async resolve({ input }) {
const { id } = input
},
})
```
`findUnique` query lets you retrieve a single database record based on the `id` provided by passing it to Prisma's `where` option.
```ts wrap=false
// src/server/router/post.ts
import { prisma } from "../db/client"
import { TRPCError } from "@trpc/server"
import { z } from "zod"
import { createRouter } from "./context"
export const postRouter = createRouter()
.query('all', {
async resolve() {
return prisma.post.findMany()
}
})
.query('byId', {
input: z.object({ id: z.string() }),
async resolve({ input }) {
const { id } = input
const post = await prisma.post.findUnique({
where: { id }
})
},
})
```
Last but not least, throw an error with `TRPCError` if a post is not returned.
```ts wrap=false
// src/server/router/post.ts
import { prisma } from "../db/client"
import { TRPCError } from "@trpc/server"
import { z } from "zod"
import { createRouter } from "./context"
export const postRouter = createRouter()
.query('all', {
async resolve() {
return prisma.post.findMany()
}
})
.query('byId', {
input: z.object({ id: z.string() }),
async resolve({ input }) {
const { id } = input
const post = await prisma.post.findUnique({
where: { id }
})
if (!post) {
throw new TRPCError({
code: 'NOT_FOUND',
message: `No post with id '${id}'`
})
}
return post
}
})
```
### Create Post Page
Import `DefaultQueryCell` in `src/pages/post/[id].tsx` and create a component called `PostPage`.
```tsx wrap=false
// src/pages/post/[id].tsx
import { useRouter } from "next/router"
import Head from "next/head"
import { DefaultQueryCell } from "../../utils/DefaultQueryCell"
import { trpc } from "../../utils/trpc"
export default function PostPage() {
return (...)
}
```
Return `DefaultQueryCell` and pass `postQuery` to `query` and `data` to `success`.
```tsx wrap=false
// src/pages/post/[id].tsx
import { useRouter } from "next/router"
import Head from "next/head"
import { DefaultQueryCell } from "../../utils/DefaultQueryCell"
import { trpc } from "../../utils/trpc"
export default function PostPage() {
const id = useRouter().query.id as string
const postQuery = trpc.useQuery([
'post.byId',
{ id }
])
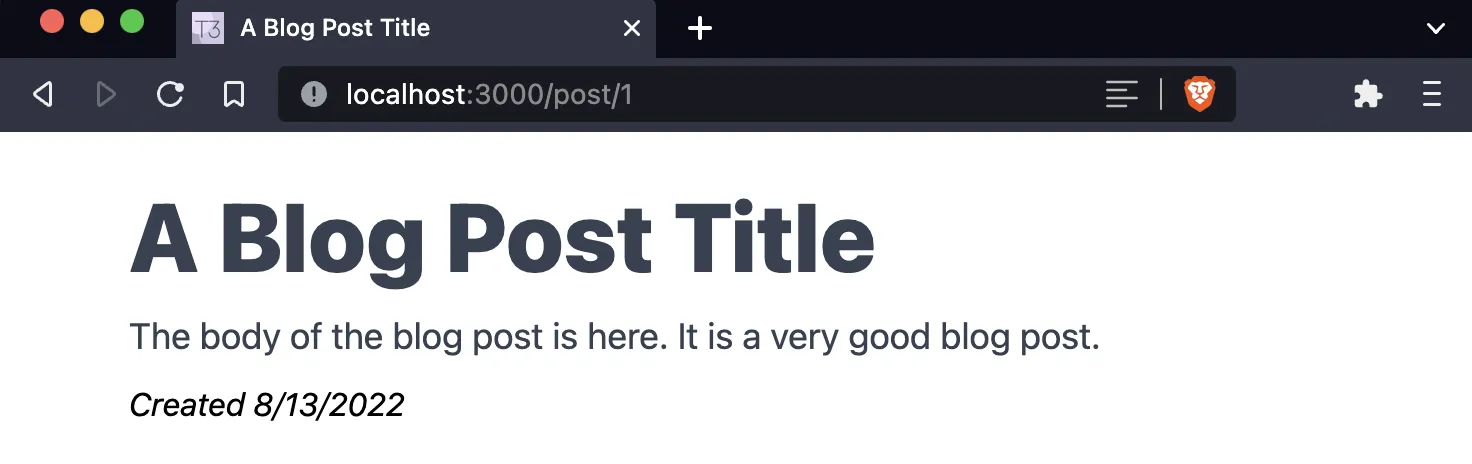
return (
(
<>
{data.title}
{data.title}
{data.body}
Created {data.createdAt.toLocaleDateString()}
)}
/>
)
}
```
Lastly, add `blogContainer`, `blogTitle`, and `blogBody` for styling the posts.
```tsx wrap=false
// src/pages/post/[id].tsx
import { useRouter } from "next/router"
import Head from "next/head"
import { DefaultQueryCell } from "../../utils/DefaultQueryCell"
import { trpc } from "../../utils/trpc"
import { blogContainer, blogTitle, blogBody } from "../../styles/blog-styles"
export default function PostPage() {
const id = useRouter().query.id as string
const postQuery = trpc.useQuery([
'post.byId',
{ id }
])
return (
(
<>
{data.title}
{data.title}
{data.body}
Created {data.createdAt.toLocaleDateString()}
)}
/>
)
}
```
Open [localhost:3000/post/1](http://localhost:3000/post/1) to see your first blog post.
### Create Posts Cell
```bash wrap=false
echo > src/components/PostsCell.tsx
echo > src/styles/blog-styles.ts
```
```tsx wrap=false
// src/styles/blog-styles.ts
export const blogContainer = "container mx-auto min-h-screen p-4"
export const blogTitle = "text-5xl leading-normal font-extrabold text-gray-700"
export const blogBody = "mb-2 text-lg text-gray-700"
export const blogHeader = "text-5xl leading-normal font-extrabold text-gray-700"
```
Create a `PostsCell` function and import the following above it:
- `Link` for linking to each blog post's page
- `blogHeader` and `link` for styling the list output from the Cell
- `DefaultQueryCell` for creating the cell
- `trpc` for executing the query
```tsx wrap=false
// src/components/PostsCell.tsx
import Link from "next/link"
import { blogHeader, link } from "../styles/blog-styles"
import { DefaultQueryCell } from "../utils/DefaultQueryCell"
import { trpc } from "../utils/trpc"
export default function PostsCell() {
return (...)
}
```
Create a type called `BlogPostProps` with an `id` and `title` of type `string`. Delete the `Posts` component in `src/pages/index.tsx` and move the `useQuery` hook into the `PostsCell` component.
```tsx wrap=false
// src/components/PostsCell.tsx
import Link from "next/link"
import { blogHeader, link } from "../styles/blog-styles"
import { DefaultQueryCell } from "../utils/DefaultQueryCell"
import { trpc } from "../utils/trpc"
type BlogPostProps = {
id: string
title: string
}
export default function PostsCell() {
const postsQuery = trpc.useQuery([
'post.all'
])
return (...)
}
```
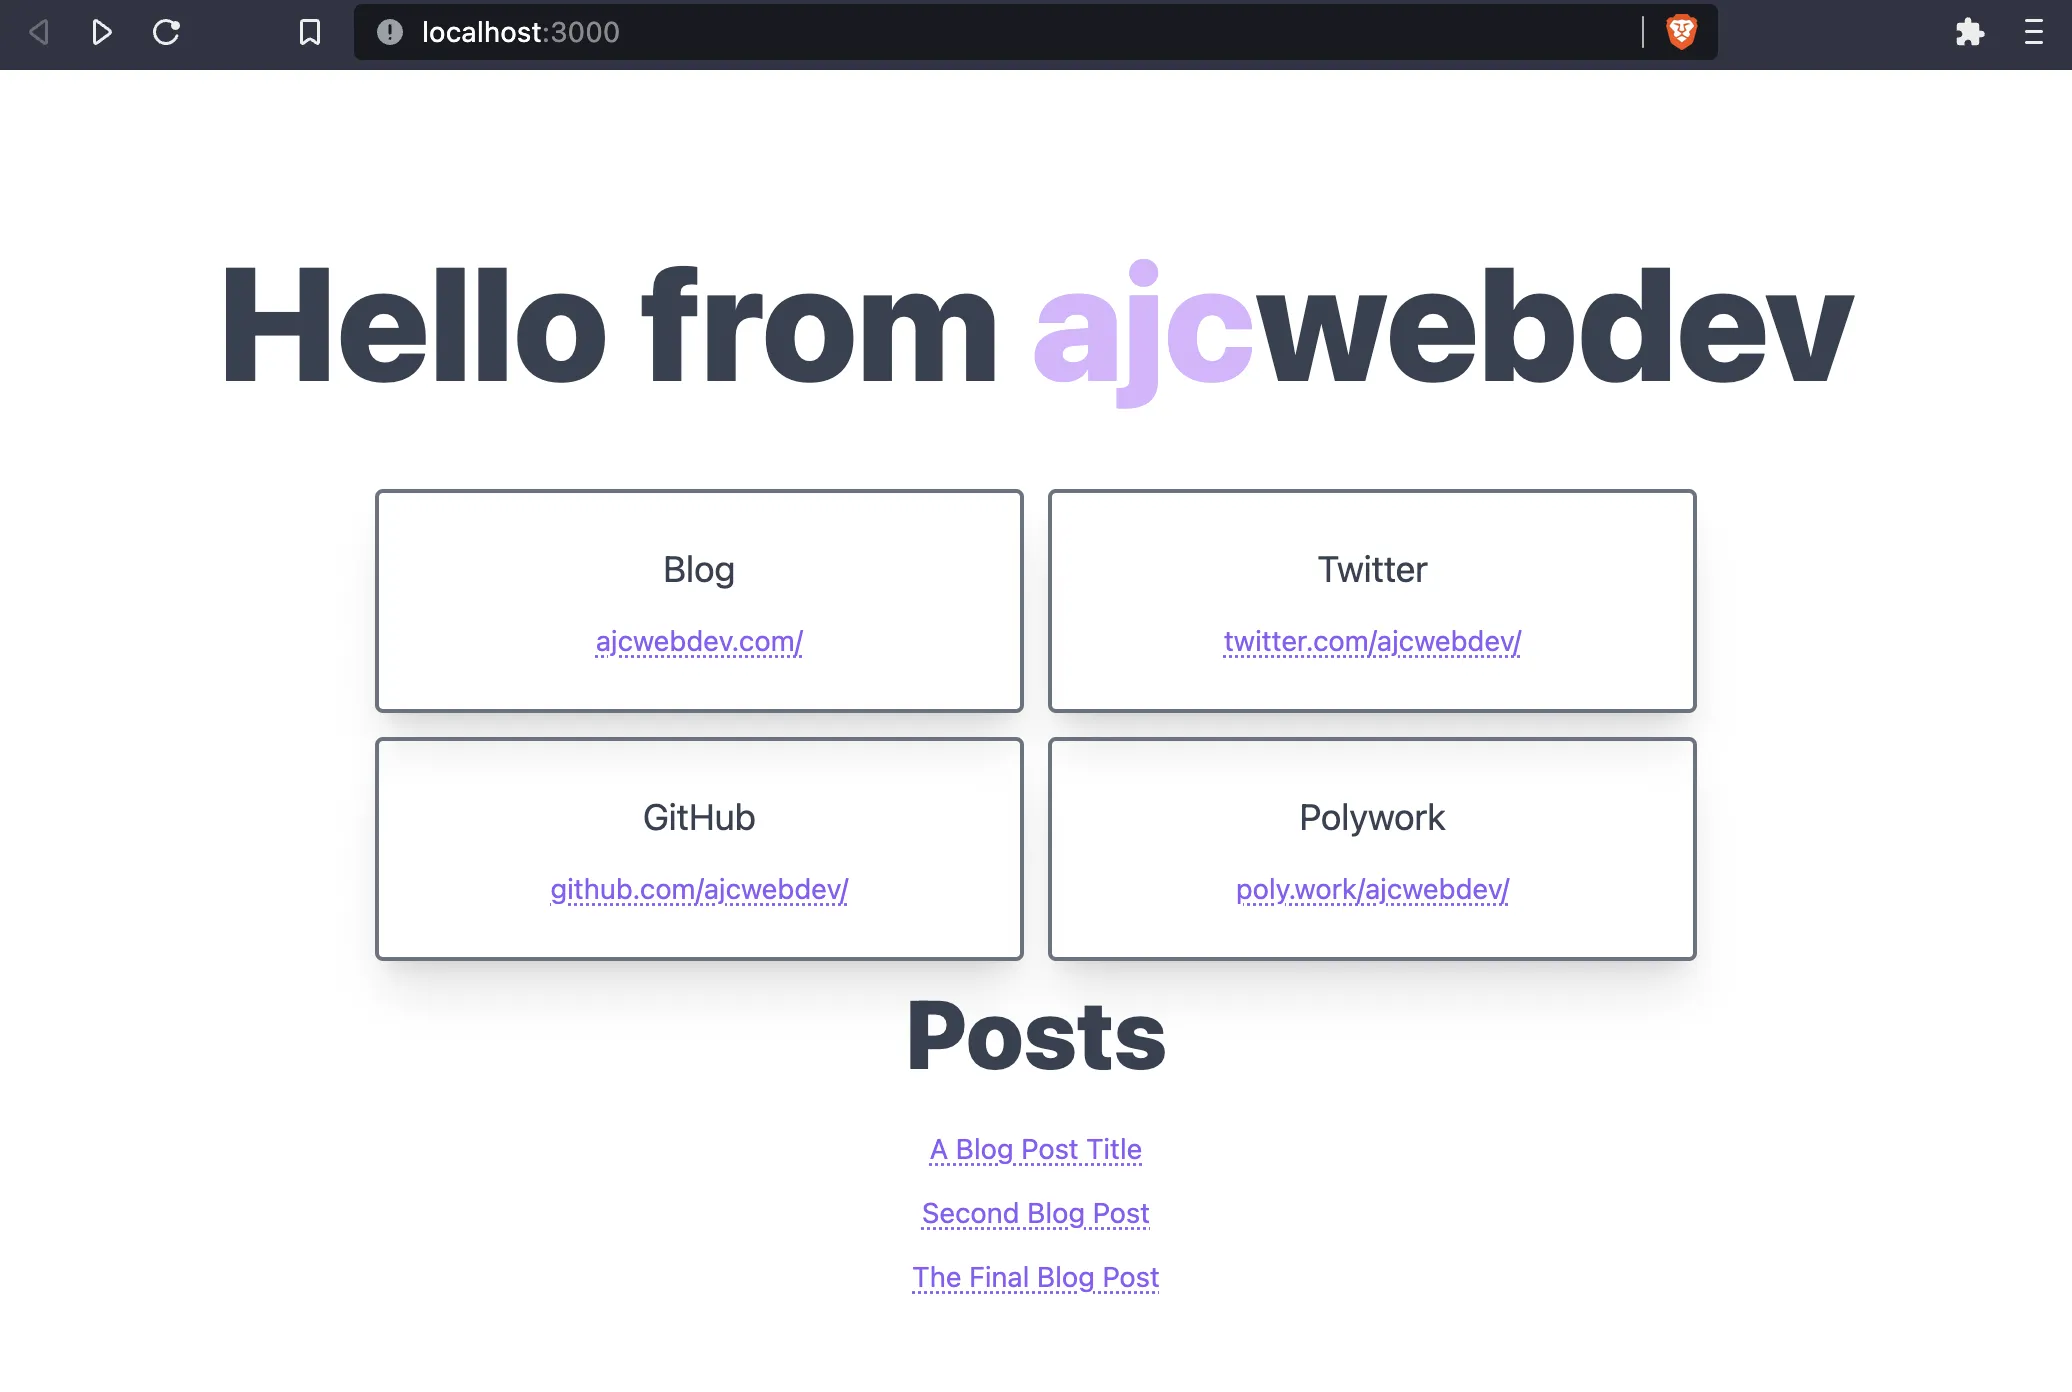
Return `DefaultQueryCell` with the `query` set to `postsQuery`. `success` will map over the `data` object and display a link for each blog post.
```tsx wrap=false
// src/components/PostsCell.tsx
import Link from "next/link"
import { blogHeader, link } from "../styles/blog-styles"
import { DefaultQueryCell } from "../utils/DefaultQueryCell"
import { trpc } from "../utils/trpc"
type BlogPostProps = {
id: string
title: string
}
export default function PostsCell() {
const postsQuery = trpc.useQuery([
'post.all'
])
return (
<>
}
/>
)
}
```
Import `PostsCell` in `src/pages/index.tsx` and return the component in the `Home` function.
```tsx wrap=false
// src/pages/index.tsx
import Head from "next/head"
import { appContainer, title, purple, grid } from "../styles/home-styles"
import Card from "../components/Card"
import PostsCell from "../components/PostsCell"
export default function Home() {
return (
<>
A First Look at create-t3-app
Hello from ajcwebdev
)
}
```
## Deployment
Commit your current changes and create a new repository on GitHub with the [GitHub CLI](https://cli.github.com/).
```bash wrap=false
git add .
git commit -m "ct3a"
gh repo create ajcwebdev-t3 --public --push \
--source=. \
--description="An example T3 application with Next.js, Prisma, tRPC, and Tailwind deployed on Vercel and Fly." \
--remote=upstream
```
### Deploy to Vercel
Install the `vercel` CLI on your machine or add it to your project with `pnpm`.
```bash wrap=false
pnpm add -D vercel
```
Use the following command to pass your database environment variable and deploy to Vercel. Use `--confirm` to give the default answer for each question.
```bash wrap=false
pnpm vercel --env DATABASE_URL=YOUR_URL_HERE
```
> _After the first deployment this command will deploy to a preview branch. You will need to include `--prod` to push changes directly to the live site for future deployments._
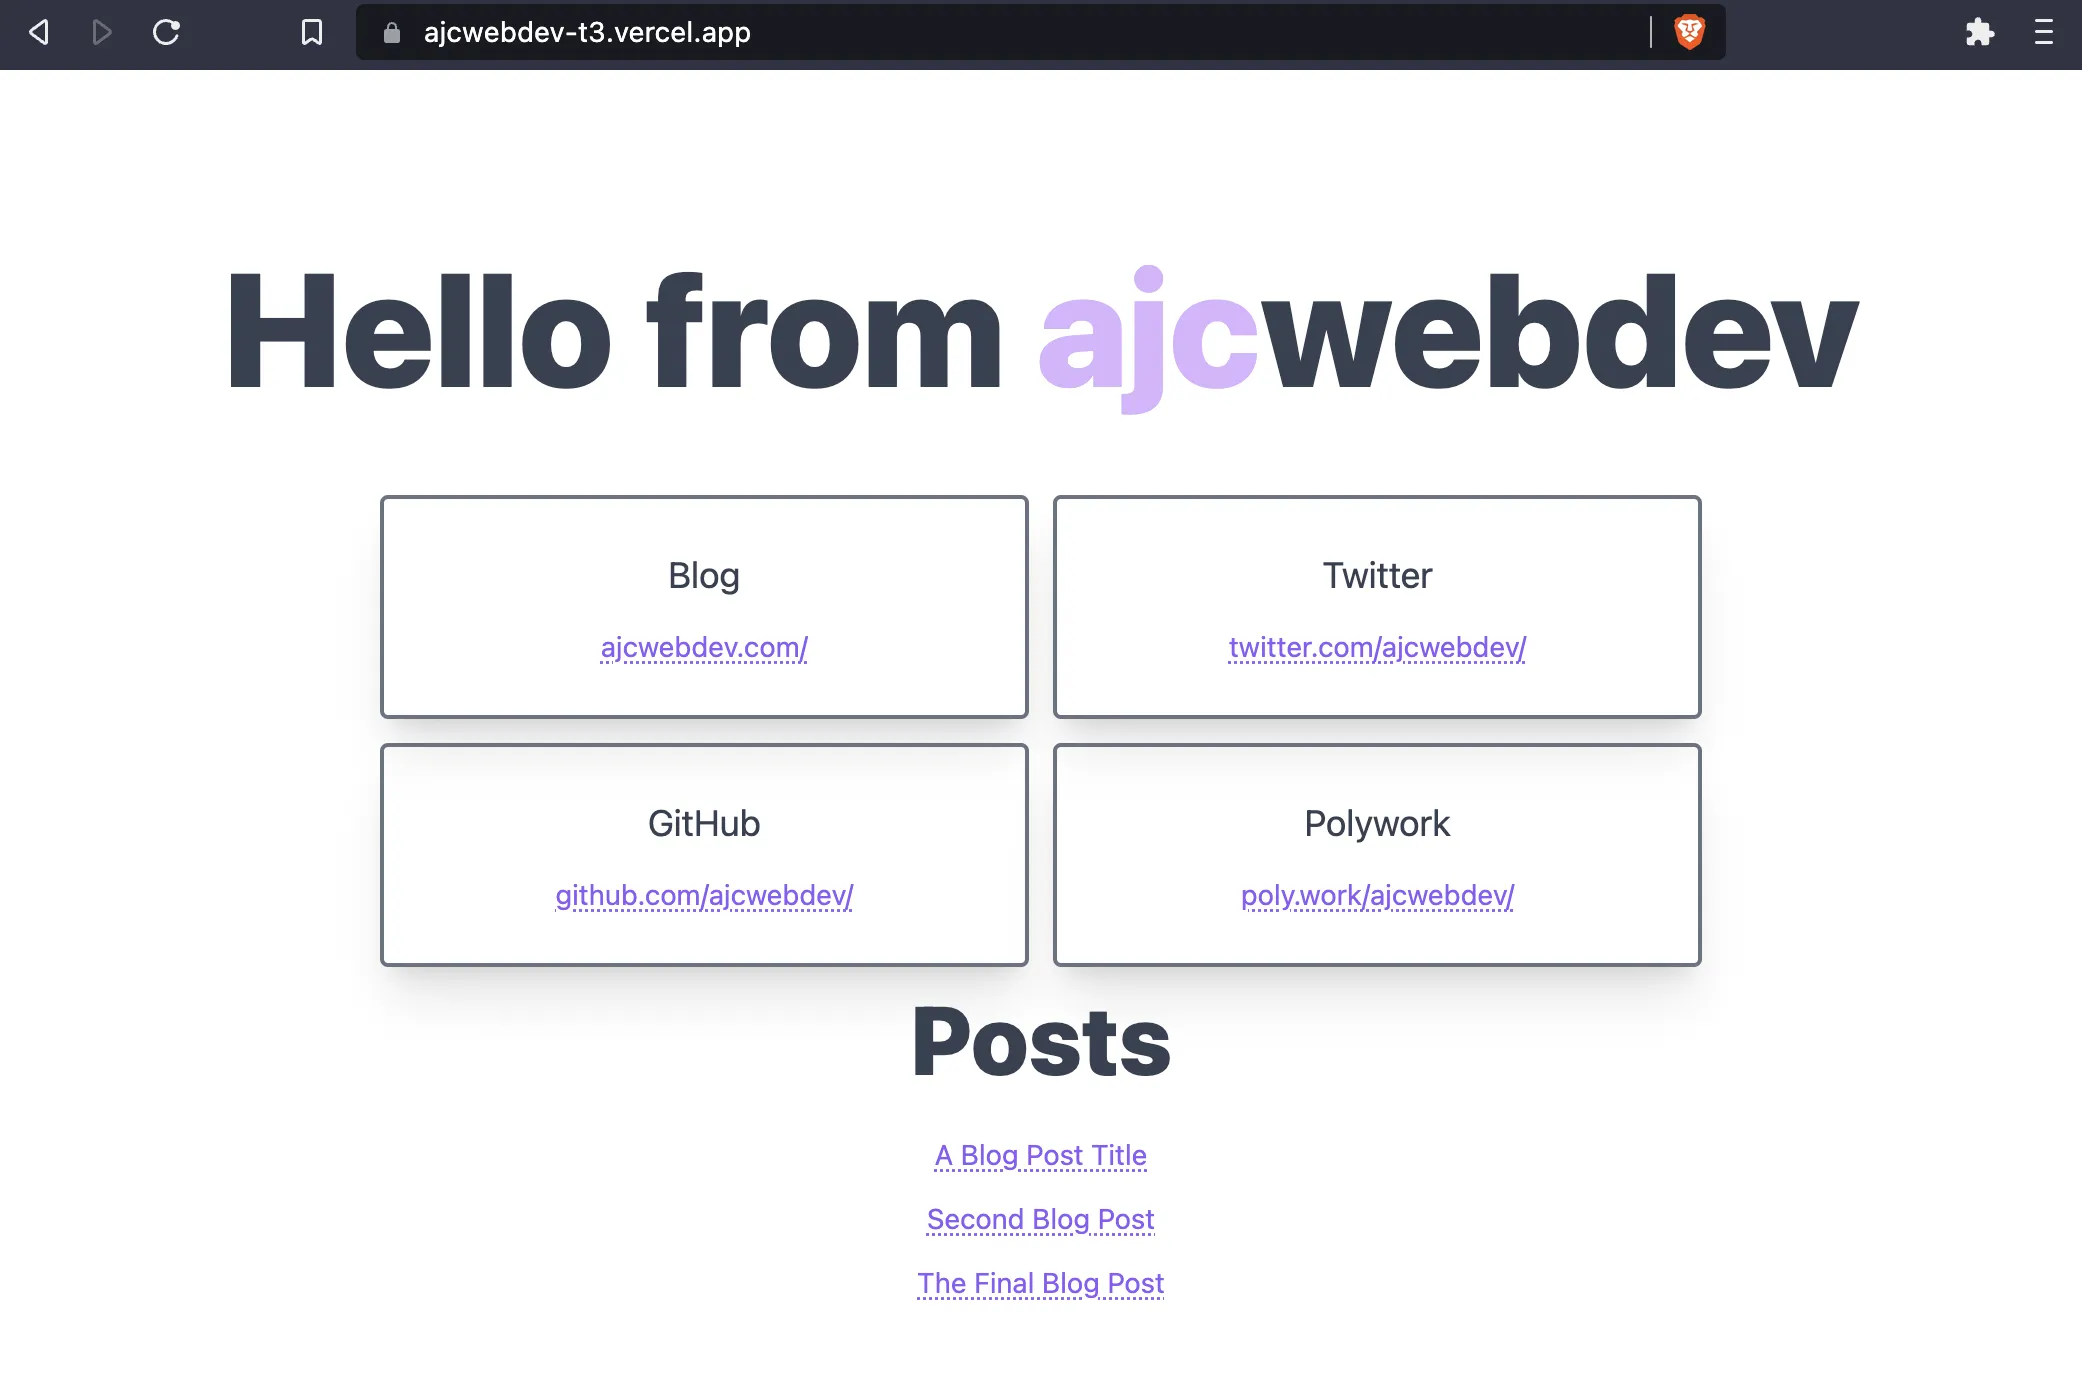
Open `ajcwebdev-t3.vercel.app` to see your blog.
API endpoints are exposed on `api/trpc/`, so `ajcwebdev-t3.vercel.app/api/trpc/post.all` will display all blog posts.
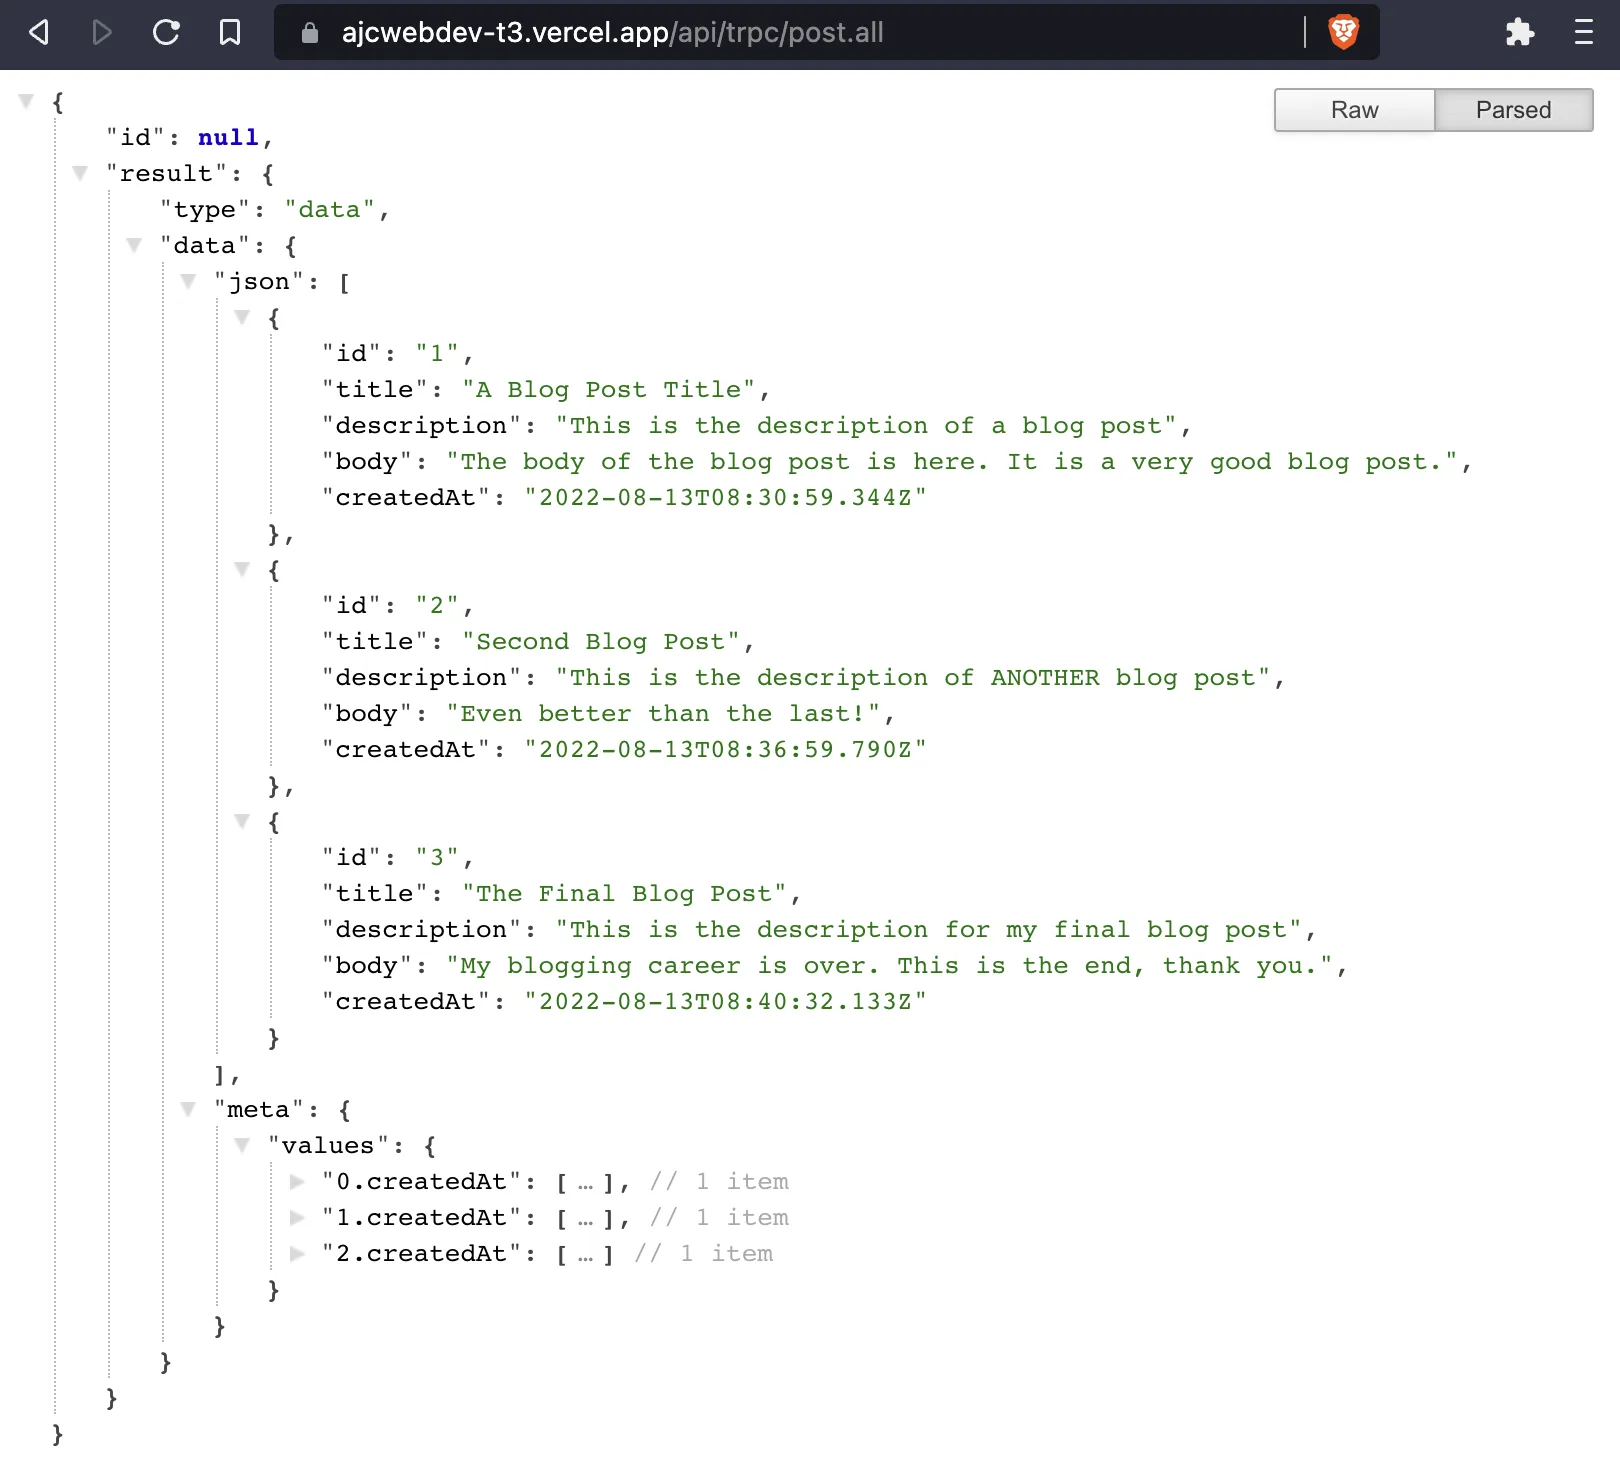
Or you can hit the endpoint with curl:
```bash wrap=false
curl "https://ajcwebdev-t3.vercel.app/api/trpc/post.all" | npx json
```
```json wrap=false
{
"id": null,
"result": {
"type": "data",
"data": {
"json": [
{
"id": "1",
"title": "A Blog Post Title",
"description": "This is the description of a blog post",
"body": "The body of the blog post is here. It is a very good blog post.",
"createdAt": "2022-08-13T08:30:59.344Z"
},
{
"id": "2",
"title": "Second Blog Post",
"description": "This is the description of ANOTHER blog post",
"body": "Even better than the last!",
"createdAt": "2022-08-13T08:36:59.790Z"
},
{
"id": "3",
"title": "The Final Blog Post",
"description": "This is the description for my final blog post",
"body": "My blogging career is over. This is the end, thank you.",
"createdAt": "2022-08-13T08:40:32.133Z"
}
],
"meta": {
"values": {...}
}
}
}
}
```
For single blog posts try any of the following:
- `%7B%220%22%3A%7B%22json%22%3A%7B%22id%22%3A%221%22%7D%7D%7D`
- `%7B%220%22%3A%7B%22json%22%3A%7B%22id%22%3A%222%22%7D%7D%7D`
- `%7B%220%22%3A%7B%22json%22%3A%7B%22id%22%3A%223%22%7D%7D%7D`
And copy them to the end of:
> `https://ajcwebdev-t3.vercel.app/api/trpc/post.byId?batch=1&input=`
Check [PageSpeed Insights for Desktop](https://pagespeed.web.dev/).
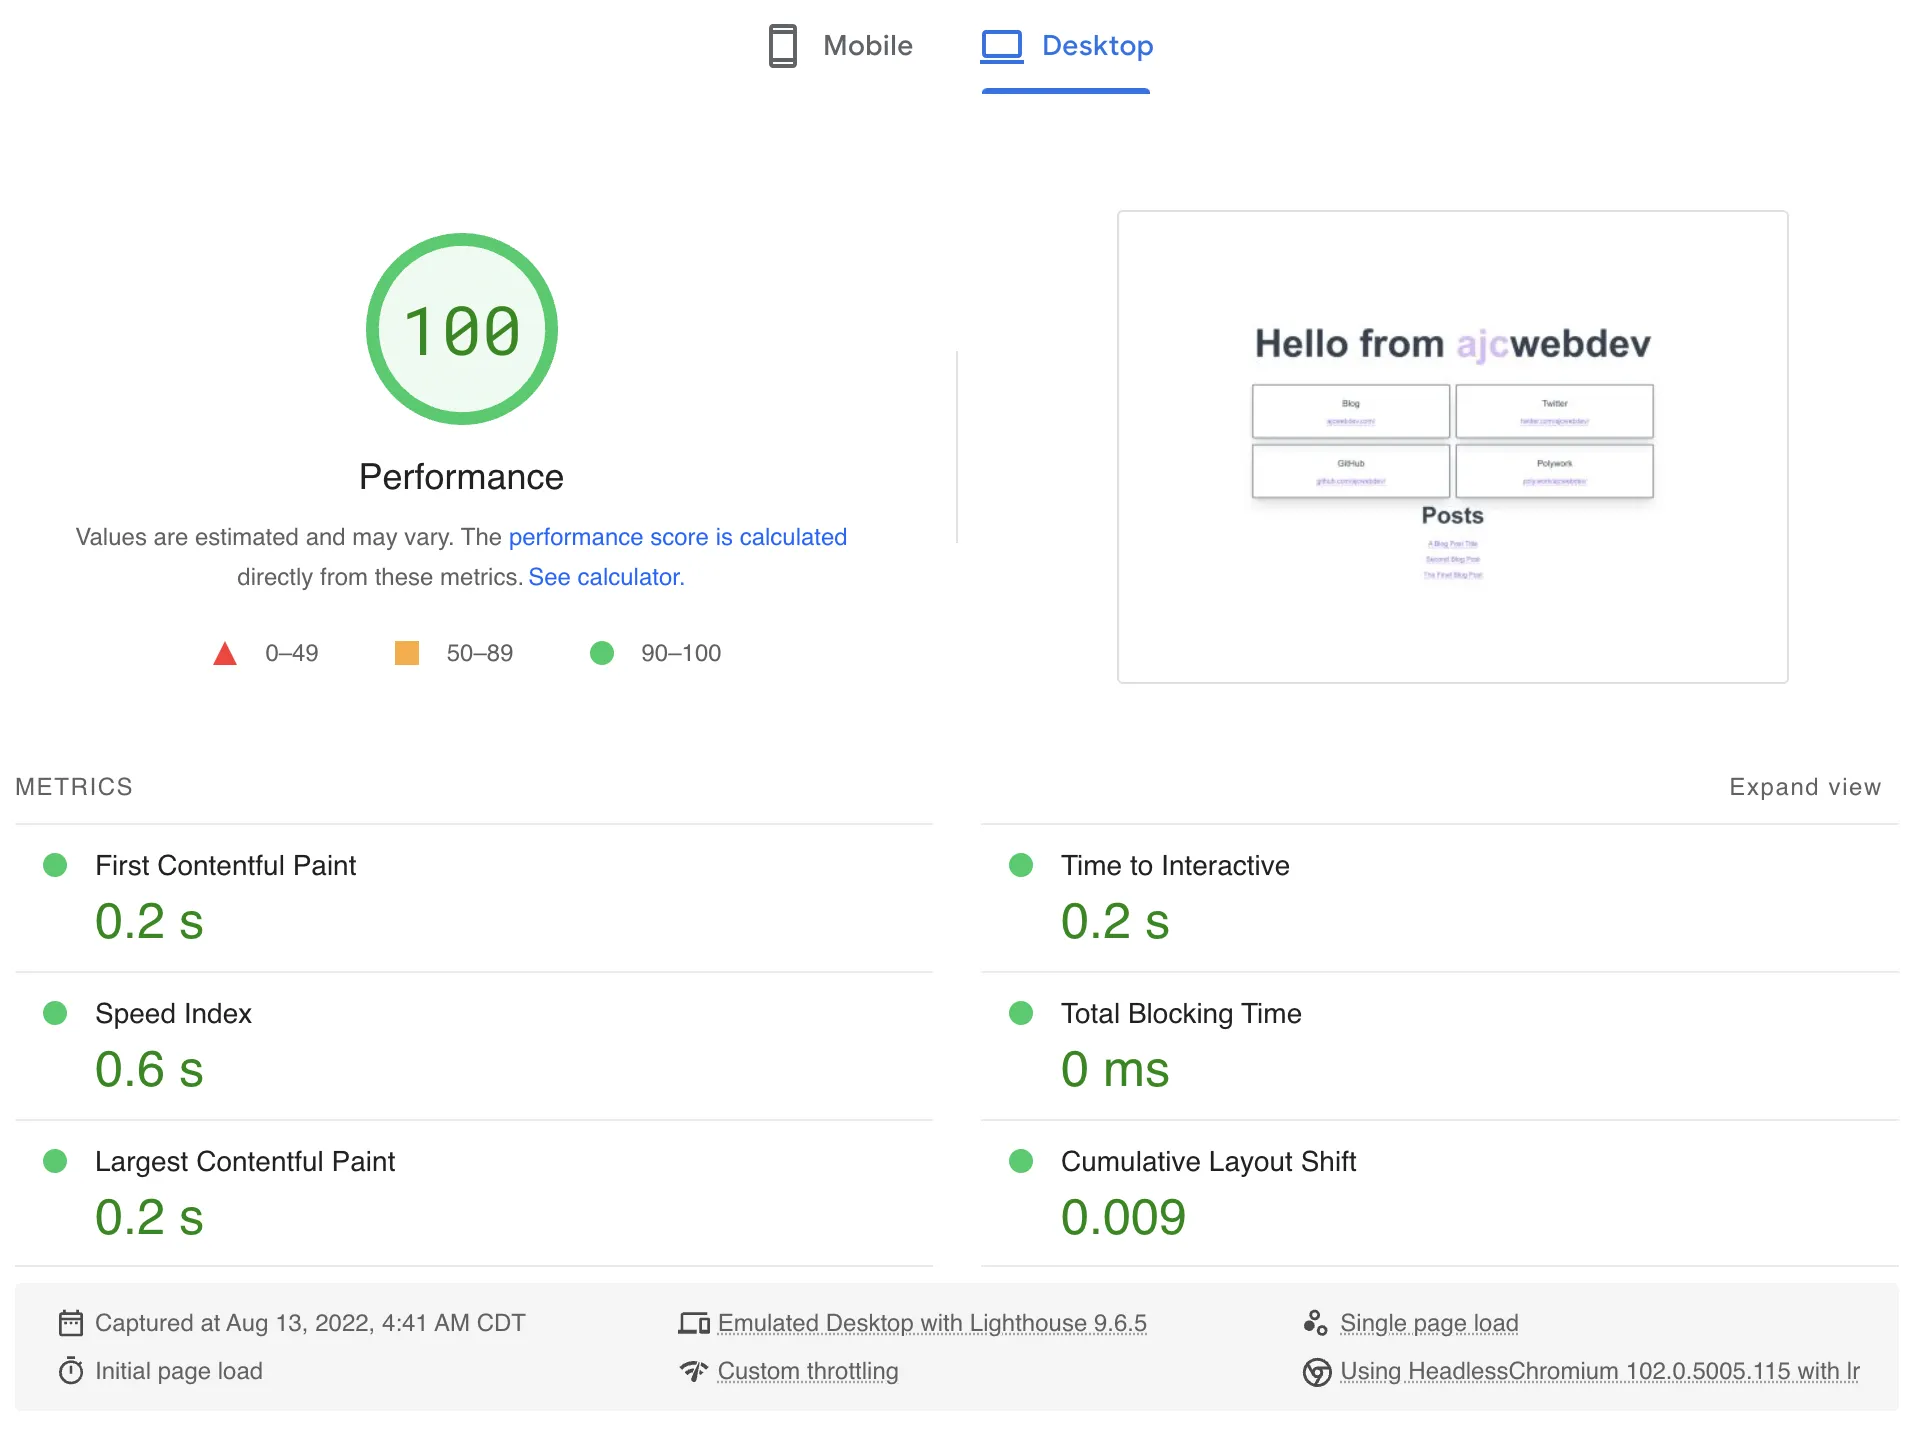
If what I know about these metrics is correct, then I believe 100 is considered a preferable score when compared to other scores which are not 100. PageSpeed Insights also gives a score for Mobile.
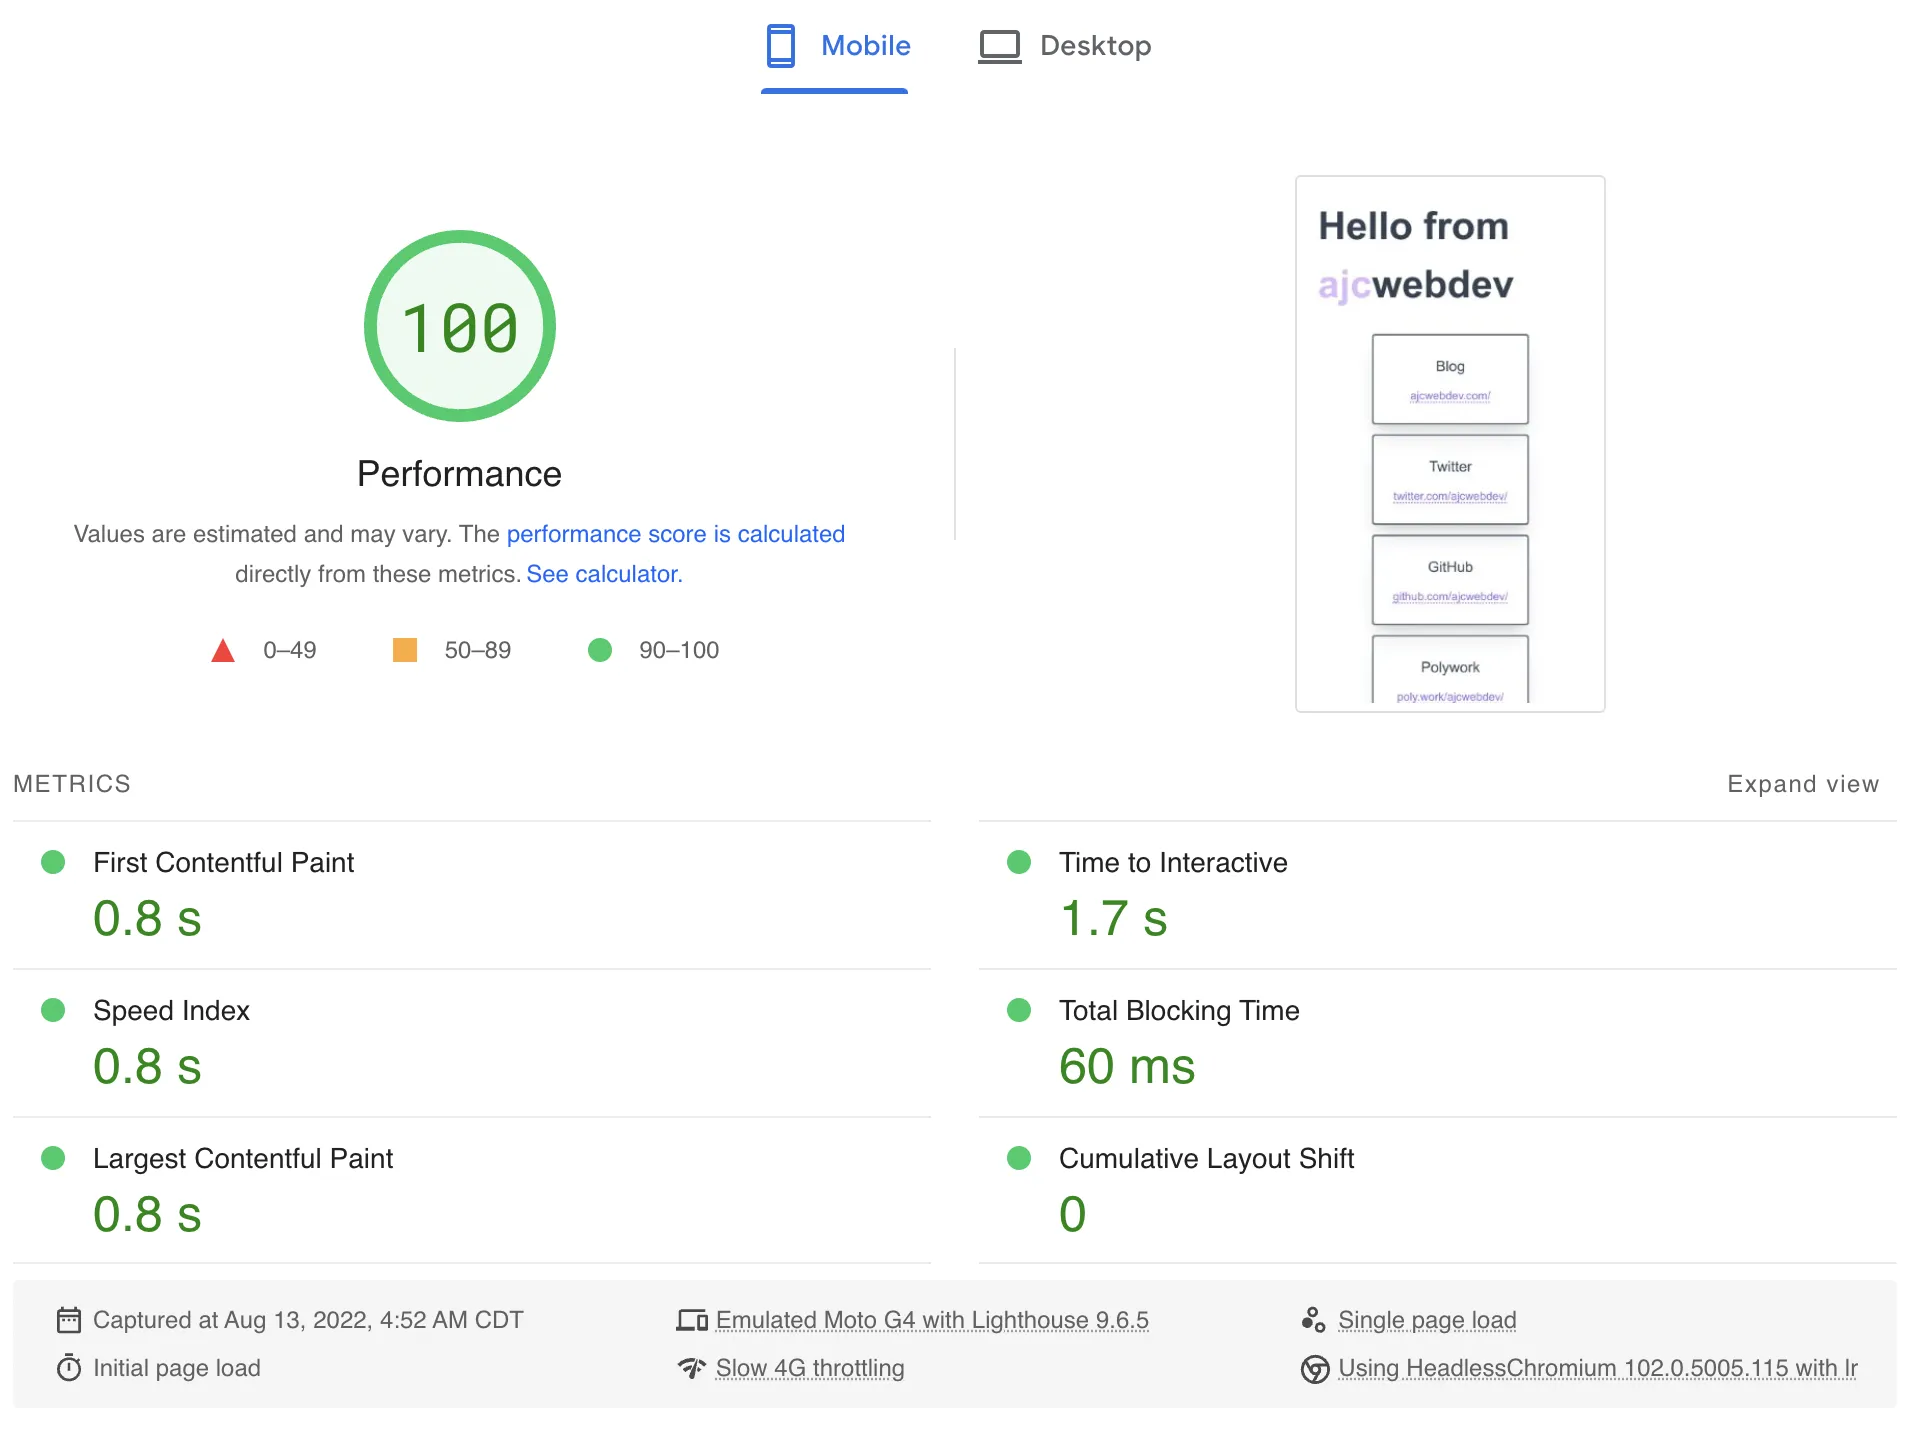
100 again! Equally as preferable!!
### Deploy to Fly
Since `create-t3-app` is mostly Next.js and Prisma at the end of the day, it can be deployed very easily on platforms like Vercel. But, in return for that ease of use, you will be taking a performance hit whenever your database is queried.
When Prisma is running in a Lambda function it has a noticeable cold start. Future guides in the ct3a documentation will demonstrate how to use platforms like Fly, Railway, and Render to deploy your project to a long running server. Install the [`flyctl`](https://fly.io/docs/flyctl/install/) CLI and run the following command to initialize your project.
```bash wrap=false
fly launch --remote-only \
--name ajcwebdev-t3 \
--region ord \
--env DATABASE_URL=YOUR_URL_HERE
```
`flyctl platform regions` to see available regions.
## Resources Articles and Videos
- [create.t3.gg](https://create.t3.gg/)
- [Repo](https://github.com/t3-oss/create-t3-app/)
- [Documentation](https://create-t3-app-docs.vercel.app/en/introduction)
- [init.tips](https://init.tips/)
- [Repo](https://github.com/t3-oss/init.tips/)
- [Documentation](https://init.tips/others)
| Date | Title |
| ---------- | ------------------------------------------------------------------------------------------------------------------ |
| 2022-08-10 | [Build a full stack app with create-t3-app](https://dev.to/nexxeln/build-a-full-stack-app-with-create-t3-app-5e1e) |
| 2022-07-10 | [ct3a End to End Tutorial Proposal](https://github.com/t3-oss/create-t3-app/issues/166) |
| 2022-06-26 | [T3 stack and my most popular open source project ever](https://www.nexxel.dev/blog/ct3a) |
| 2022-05-21 | [Build end to end typesafe APIs with tRPC](https://dev.to/nexxeln/build-end-to-end-typesafe-apis-with-trpc-3o3f) |
| Date | Title |
| ---------- | ---------------------------------------------------------------------------------------------- |
| 2022-07-17 | [Build a Live Chat Application with the T3 Stack](https://www.youtube.com/watch?v=dXRRY37MPuk) |
| 2022-07-12 | [The T3 Stack - How We Built It](https://www.youtube.com/watch?v=H-FXwnEjSsI) |
| 2022-07-10 | [An Overview of the create T3 App](https://www.youtube.com/watch?v=VJH8dsPtbeU) |
| 2022-07-03 | [The BEST Stack For Your Next Project](https://www.youtube.com/watch?v=PbjHxIuHduU) |
| 2022-06-28 | [Build a Blog With the T3 Stack](https://www.youtube.com/watch?v=syEWlxVFUrY) |